Lindy 500m Fibre Optic DVI-D Dual Link Extender Manuale utente
- Tipo
- Manuale utente

© LINDY Group - SECOND EDITION (February 2020)
500m Fibre Optic DVI-D Dual Link
Extender
User Manual English
Benutzerhandbuch Deutsch
Manuel Utilisateur Français
Manuale Italiano
No. 38106
lindy.com
Tested to comply with
FCC Standards
For Home and Office Use!


User Manual English
Introduction
Thank you for purchasing the LINDY Fibre Optic DVI-D Dual Link Extender!
This Fibre Optic Extender allows you to transmit DVI-D Dual Link signals up to maximum resolution of
2560x1600 at distances of up to 500m/1600 feet using an 8 core MPO multimode fibre cable. This cable
is available upon request from LINDY in custom made lengths.
Features
▪ Extends DVI-D signals up to 500m/ 1600 feet
▪ Suitable for use with Computer, Video Wall and Home Theatre equipment
▪ Uses a standard MPO fibre cable (not included)
▪ Auto power save mode
▪ Auto EDID programming and Self-EDID learning feature
▪ Auto Laser disable if DVI cable is removed
Specification
▪ DVI 2.0 Compatible
▪ Supports DVI-D Dual Link, resolutions up to 2560x1600@60Hz
▪ No HDTV / HDCP support
Package Contents
▪ LINDY Fibre Optic DVI-D Dual Link Extender: 1x Transmitter, 1x Receiver
▪ Multi-Country Power Adapter (5VDC) x 2
▪ This User Manual
Pre-Installation Remarks
Self-EDID learning procedure
The Fibre Optic DVI-D Extender has a default EDID pre-set table stored in the TX. If the display resolution
does meet this default EDID stored in transmitter module, you must perform the following EDID self-
learning procedure.
The EDID of a display can be stored in the TX by plugging it into the display.
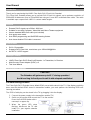
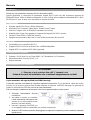
1. Connect the power supply to the transmitter module (TX)
2. Switch on the monitor and connect the TX to the monitor
Press the Self-EDID button with a
narrow pin or paper clip
3. When the green LED stops
flashing, disconnect the TX and
install it in your regular extender
installation
CAUTION!
The Extender will get warm up to 45 °C during operation!
Avoid touching it directly and install it with adequate ventilation!

User Manual English
Recovery of original EDID setting
Plug the power adapter into the transmitter and disconnect all other connectors. Push the self-EDID button
with a narrow pin. When the green EDID LED is totally turned off, the recovery procedure is
completed.
Installation
Important! Before starting the installation, please ensure that all devices are powered off.
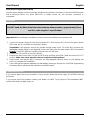
1. Connect the power supply to both the transmitter (TX) and receiver (RX). Ensure the green power
LEDs near the DC connector are turned on (green)
Transmitter: If the graphics source can provide enough power to the TX via the DVI connector the
transmitter’s power supply is not required. In this case make sure the green power LED is illuminated
brightly. A dim LED indicates insufficient power from the DVI port.
2. Connect the TX and RX to your DVI devices.
3. Remove the dust covers from TX and RX MPO ports and from your MPO Cable and connect it to TX
and RX. Make sure not to introduce dust or scratches to the surfaces!
4. Please make sure that the MPO connectors are fully engaged and then power on your display and
source to complete the installation.
5. If you can’t get the proper resolution on the display, please go through the Self-EDID programming
procedure above and repeat the installation procedure again.
Troubleshooting Tips
If you cannot adjust the correct resolution of your monitor please follow the steps of Self-EDID learning
procedure.
If you cannot solve the problems contact your dealer or LINDY Tech Support. Find worldwide LINDY
contact information at www.lindy.com
Do NOT introduce strain or stress to the fibre optic MPO cable and connectors!
Do NOT bend the fibre cable below the minimum allowed radius, approximately 10cm -
see fiber cable supplier’s specification!

Benutzerhandbuch Deutsch
3
Einführung
Mit dem DVI-D Dual Link Fibre Optic Extender haben Sie ein qualitativ absolut hochstehendes Produkt
erworben. Er unterstützt DVI-D Dual Link bis 2560 x 1600 und überträgt Signale unkomprimiert in voller
Auflösung und Qualität über ein optisches 12adriges Multimode MPO Kabel bis zu 500m weit. Ein MPO
Kabel ist auf Anfrage in der gewünschten Länge bei LINDY verfügbar.
Eigenschaften
▪ Überträgt DVI-D oder DVI Signale über Glasfaser MPO Kabel bis 500m Kabellänge
▪ Einsetzbar für Computer, Medizintechnik, Video Walls und Präsentationstechnik
▪ Verwendet 12adriges Standard MPO Fibre Optic LWL Kabel
▪ Auto Power Save Mode wenn die DVI Signalquelle kein Bildsignal einspeist (5V DVI aus)
▪ EDID Standarddatensatz sowie Monitor-EDID Selbstlern- & Kopierfunktion
▪ Automatische Laserabschaltung wenn kein DVI Kabel am TX angeschlossen ist
Spezifikationen
▪ Kompatibel mit der DVI-D 2.0 Spezifikation
▪ Unterstützt Auflösungen bis DVI-D Dual Link 2560x1600@60Hz
Lieferumfang
▪ LINDY Fibre Optic DVI-D Dual Link Extender (1x Transmitter, 1x Receiver)
▪ 2x Steckernetzteil mit auswechselbaren Steckern / Multi-Country Power Adapter (5V DC)
▪ Dieses Handbuch
Installation – Vorbereitungen
Schalten Sie die beteiligten Geräte vor Beginn der Arbeiten bitte aus.
Der Transmitter hat eine EDID-Liste von Standard Auflösungen eingespeichert. Besonders wenn die
Auflösungen Ihres Monitors vom Standard abweichen müssen Sie das EDID Selbstlern-Feature des
Transmitters verwenden um alle unterstützten Monitoreigenschaften in den Transmitter zu kopieren:
EDID Selbstlern- und Kopier-Funktion (Self-EDID)
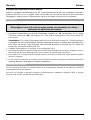
1. Schalten Sie Ihren Monitor ein.
2. Schließen Sie das Netzteil an den
Transmitter an.
3. Schließen Sie den Transmitter an den
Monitor (statt an die Signalquelle) an.
4. Drücken Sie den Self-EDID Schalter
mit einem dünnen Gegenstand (Büroklammer).
5. Die grüne LED erlischt nach Abschluss des Kopiervorganges.
Vermeiden Sie unbedingt Zug- oder andere Krafteinwirkungen auf das MPO Kabel!
Biegen Sie das LC Kabel niemals kleiner als mit seinem zulässigen
Mindestbiegeradius, etwa 10cm – Details siehe Herstellerangabe!

Benutzerhandbuch Deutsch
4
Wiederherstellung der originalen EDID Voreinstellung
Schließen Sie das Netzteil an den Transmitter an und ziehen Sie alle anderen Anschlüsse ab. Drücken
Sie den Self-EDID Schalter mit einem dünnen Gegenstand (Büroklammer) durch die kleine Öffnung im
Transmitteretikett. Die R/W LED wird 6x blinken während des Löschprozesses. Sie erlischt nach
Abschluss des Vorganges.
Installation
1. Schließen Sie die Netzteile an Transmitter (TX) und Receiver (RX) an. Die grünen LEDs neben dem
DC Anschluss und auf dem Etikett oben rechts müssen nun leuchten:
Transmitter: Wenn Ihre DVI-Signalquelle genug Strom liefert (ca. 150mA) kann der Transmitter auch
ohne Netzteil verwendet werden. Dann muss die Power LED hell leuchten! Ein nur schwaches
Leuchten zeigt an, dass der DVI-Port nicht ausreichend Strom zur Verfügung stellen kann!
2. Schließen Sie Transmitter und Receiver an Ihre DVI Geräte an.
3. Entfernen Sie die Schutzkappen auf den MPO Anschlüssen von Transmitter, Receiver und vom MPO
Kabel. Schließen Sie das MPO Kabel an TX und RX an.
4. Stellen Sie bitte sicher dass die Stecker richtig eingerastet sind und schalten Sie zum Abschluss der
Installation das Display und danach die Signalquelle ein.
Fehlersuche und -behebung
Falls das Display kein Bild anzeigt oder Sie die korrekte Auflösung nicht einstellen können müssen Sie
den zuvor beschriebenen EDID Selbstlern- und Kopierprozess durchführen und die Installation
wiederholen.
Wenn die PWR LED an TX und RX nicht hell leuchten schließen Sie bitte das Netzteil am TX an und
vertauschen Sie zur Prüfung die beiden Netzteile gegeneinander.
ACHTUNG!
Der Extender wird im Betrieb sehr warm! Vermeiden Sie direkten Kontakt und
verwenden Sie ihn ausschließlich an einm gut durchlüfteten Ort!

Manuel Utilisateur Français
5
Introduction
Merci d’avoir choisi l’extender DVI-D sur fibre optique LINDY!
Cet extender sur fibre optique vous permet de transmettre des signaux DVI-D Dual Link jusqu’à une
résolution maximale de 2560x1600, jusqu’à 500m en utilisant une fibre optique single multimode 12 core
(brins) MPO .Cette fibre optique est disponible sur demande chez LINDY dans des longueurs désirées,
sur commande.
Caractéristiques
▪ Etend des signaux DVI-D jusqu’à 500m
▪ Adapté à un usage avec ordinateur, murs d’écrans et équipements vidéo home cinéma
▪ Utilise une fibre optique single MPO (non inclus)
▪ Mode économie d’énergie
▪ Données EDID préenregistrées et fonction auto-learning EDID
▪ Désactivation automatique du laser si le câble DVI est déconnecté
Spécifications
▪ Compatible avec les spécifications DVI 2.0
▪ Prise en charge DVI-D Dual Link, résolutions jusqu’à 2560x1600@60Hz
▪ HDTV et HDCP non pris en charge
Contenu
▪ Extender DVI-D Dual Link LINDY sur fibre optique : 1x émetteur (Transmitter), 1x récepteur (Receiver)
▪ Alimentation multi-pays (5V DC) x 2
▪ Ce manuel
Installation – prérequis
Procédure d’apprentissage Self-EDID
L’extender DVI-D sur fibre optique intègre une table EDID stockée dans l’émetteur (Tx). Si la résolution
de votre écran ne figure pas dans cette liste, vous devrez appliquer la procédure d’apprentissage Self-
EDID suivante pour copier les données EDID de votre écran:
Les données EDID d’un écran peuvent
être copiées simplement en connectant
l’émetteur à l’écran.
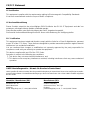
1. Connectez l’alimentation au
module émetteur (TX).
2. Allumez votre écran et connectez-
y le module émetteur.
3. Appuyez sur le bouton Self-EDID avec un objet fin (trombone).
4. Lorsque la LED verte cesse de clignoter, déconnectez le module TX et installer le dans votre
installation d’extension (carte graphique, etc..).
ATTENTION !
La température de l’extender peut atteindre 45°C pendant son fonctionnement !
Evitez de le toucher directement et installez le dans un endroit suffisament ventilé !

Manuel Utilisateur Français
6
Effacement/remise à zéro vers les paramètres EDID d’origine
Connectez l’alimentation au boîtier émetteur (TX) et débranchez toutes les autres connexions. Appuyez
sur le bouton Self-EDID avec un objet fin (trombone). La procédure de remise à zéro sera effective lorsque
la LED verte EDID sera éteinte.
Installation
IMPORTANT! Eteignez tous vos appareils avant de débuter l’installation !
1. Connectez l’alimentation à l’émetteur (avec TX sur l’étiquette) et le récepteur (avec RX sur l’étiquette).
Assurez-vous que les LED vertes près de la prise ronde DC soient bien allumées.
Emetteur: si votre source vidéo fournit suffisamment de courant à l’émetteur via le connecteur DVI, il
ne sera pas nécessaire d’utiliser l’alimentation de l’émetteur. Dans ce cas assurez-vous que la LED
verte s’éclaire brillamment. Une LED faiblement éclairée indique une insuffisance d’alimentation via
le port DVI.
2. Connectez l’émetteur (TX) et le récepteur (RX) à vos appareils DVI.
3. Retirez les capuchons de protection des prises optiques MPO de l’émetteur, du récepteur et du câble
MPO et connectez-le aux TX et RX. Assurez-vous de ne pas introduire de poussières ou de ne
pas rayer les surfaces !
4. Assurez-vous que les connecteurs MPO sont bien enfichés et mettez votre écran et la source sous
tension pour compléter l’installation.
Si vous ne parvenez pas à obtenir la résolution adéquate sur l’écran, merci de consulter la procédure de
programmation Self-EDID ci-dessus et de la répéter.
N’appliquez AUCUNE torsion ou traction à la fibre optique MPO et ses connecteurs!
Ne pliez PAS le câble en-dessous de son rayon de pliure autorisé, environ 10cm
– voir les spécifications du fabricant de la fibre! –

Manuale Italiano
Introduzione
Grazie per aver acquistato l’extender DVI su fibra ottica LINDY!
Questo dispositivo vi consentirà di trasmettere segnali DVI-D Dual Link alla risoluzione massima di
2560x1600 fino a 500m di distanza utilizzando un cavo in fibra ottica standard multimodale MPO -MPO
50/125µm a 12 core. Questo cavo è prodotto su misura da LINDY.
Caratteristiche
▪ Estende segnali DVI-D fino a 500m di distanza.
▪ Utilizzabile con Computer, Video Wall e Sistemi Home Theater
▪ Utilizza un singolo cavo in fibra MPO standard (non incluso)
▪ Modalità Auto Power Save quando la sorgente del segnale DVI (5V) è spenta
▪ Funzioni Preset EDID e Self-EDID learning
▪ Spegnimento automatica del Laser in caso di disconnessione del cavo DVI
Specifiche
▪ Compatibile con le specifiche DVI 2.0
▪ Supporto DVI-D Dual Link risoluzioni fino a 2560x1600@60Hz
▪ Segnali HDTV e codifica HDCP NON supportati
Contenuto della confezione
▪ Extender DVI-D Dual Link su Fibra LINDY (1x Trasmettitore, 1x Ricevitore)
▪ Alimentatore Multi-Country (5V DC) x 2
▪ Questo manuale
Raccomandazioni Pre-Installazione
Copia automatica del segnale EDID (Self-EDID learning)
L’extender possiede una tabella di risoluzioni standard incorporata. Se la risoluzione nativa del vostro
monitor non è inclusa in questa lista dovrete utilizzare la funzione Self-EDID learning che permette di
copiare le informazioni EDID dal monitor all’unità trasmittente
Prima di iniziare l’installazione assicuratevi che tutte le apparecchiature siano spente.
1. Collegate l’alimentatore all’unità
trasmittente
2. Accendete il monitor e connettete
l’unità trasmittente all’ingresso del
monitor (e non alla sorgente come
durante il normale utilizzo)
3. Premete il pulsante Self-EDID con
un un oggetto sottile e arrotondato (es. punta di una penna).
4. Quando il LED verde smetterà di lampeggiare la copia sarà completa e potrete installare l’extender
regolarmente.
ATTENZIONE!
L’ Extender si può scaldare fino a 45 °C durante l’uso!
Evitate di toccarlo ed installatelo solo in ambienti adeguatamente ventilati!
Durante la copia
dell’EDID questo LED
lampeggerà

Manuale Italiano
Ripristino delle impostazioni EDID di fabbrica
Inserite il connettore dell’alimentatore 5V DC e disconnettete tutti gli altri cavi e dispositivi. Premete il
pulsante Self-EDID con un un oggetto sottile e arrotondato (es. punta di una penna). Il LED comincerà a
lampeggare e quando rimarrà completamente spento la procedura di ripristino sarà completata.
Installazione
1. Connettete l’alimentatore sia all’unità Trasmittente (indicata con TX sull’etichetta) che su quella
Ricevente (Indicata con RX). Assicuratevi che i LED verdi di alimentazione vicino al connettore DC
siano accesi.
Trasmettitore: Se la sorgente del segnale grafico fornisce sufficiente corrente (5V ~150mA) attraverso
il connettore DVI non sarà necessario utilizzare l’alimentatore esterno. In questo caso controllato che il
LED “PWR” sia acceso e ben illuminato. Una luminosità attenuata ed instabile del LED indica una
insufficiente alimentazione dalla porta DVI.
2. Collegato il trasmettitore e il ricevitore ai vostri dispositivi DVI-D.
3. Rimuovete la protezione antipolvere dalle porte MPO del trasmettitore e ricevitore e collegate il cavo in
fibra ottica alle due unità (fate attenzione a non rovinare la superficie dei connettori!)
4. Assicuratevi che i connettori MPO siano ben inseriti e connessi come descritto sopra, quindi accendete
monitor e sorgente
5. Se non riuscite a impostare la corretta risoluzione di funzionamento eseguite la procedura di Self EDID
Learning descritta in precedenza e ripetete l’installazione.
Risoluzione dei Problemi
Se non riuscite a impostare la corretta risoluzione di funzionamento eseguite la procedura di Seld EDID
Learning descritta in precedenza.
Nel cavo non riusciate a risolvere i problemi di visualizzazione contattate il supporto LINDY ai recapiti
presenti nella sezione contatti del sito www.lindy.it
NON applicare carichi o mettere in tensione il cavo MPO e i connettori LC!
NON piegare il cavo al di sotto del raggio minimo raccomandato (circa 10cm) –
verificate sulle specifiche del fornitore!

CE/FCC Statement
CE Certification
This equipment complies with the requirements relating to Electromagnetic Compatibility Standards.
It has been manufactured under the scope of RoHS compliance.
CE Konformitätserklärung
Dieses Produkt entspricht den einschlägigen EMV Richtlinien der EU für IT-Equipment und darf nur
zusammen mit abgeschirmten Kabeln verwendet werden.
Diese Geräte wurden unter Berücksichtigung der RoHS Vorgaben hergestellt.
Die formelle Konformitätserklärung können wir Ihnen auf Anforderung zur Verfügung stellen
FCC Certification
This equipment has been tested and found to comply with the limits for a Class B digital device, pursuant
to part 15 of the FCC Rules. These limits are designed to provide reasonable protection against harmful
interference in a residential installation.
You are cautioned that changes or modification not expressly approved by the party responsible for
compliance could void your authority to operate the equipment.
This device complies with part 15 of the FCC Rules.
Operation is subject to the following two conditions:
1. This device may not cause harmful interference, and
2. This device must accept any interference received, including interference that may cause undesired
operation.
LINDY Herstellergarantie – Hinweis für Kunden in Deutschland
LINDY gewährt für dieses Produkt über die gesetzliche Regelung in Deutschland hinaus eine zweijährige Hersteller-
garantie ab Kaufdatum. Die detaillierten Bedingungen dieser Garantie finden Sie auf der LINDY Website aufgelistet
bei den AGBs.
Hersteller / Manufacturer (EU):. Manufacturer (UK):
LINDY-Elektronik GmbH LINDY Electronics Ltd
Markircher Str. 20 Sadler Forster Way
68229 Mannheim Stockton-on-Tees, TS17 9JY
Germany England
Email: info@lindy.com , T: +49 (0)621 470050 postmaster@lindy.co.uk , T: +44 (0)1642 754000

Recycling Information
WEEE (Waste of Electrical and Electronic Equipment),
Recycling of Electronic Products
Europe, United Kingdom
In 2006 the European Union introduced regulations (WEEE) for the collection and recycling of all waste electrical
and electronic equipment. It is no longer allowable to simply throw away electrical and electronic equipment. Instead,
these products must enter the recycling process.
Each individual EU member state has implemented the WEEE regulations into national law in slightly different ways.
Please follow your national law when you want to dispose of any electrical or electronic products. More details can
be obtained from your national WEEE recycling agency.
Germany / Deutschland Rücknahme Elektroschrott und Batterie-Entsorgung
Die Europäische Union hat mit der WEEE Direktive Regelungen für die Verschrottung und das Recycling von Elektro-
und Elektronikprodukten geschaffen. Diese wurden im Elektro- und Elektronikgerätegesetz – ElektroG in deutsches
Recht umgesetzt. Das Entsorgen von Elektro- und Elektronikgeräten über die Hausmülltonne ist verboten! Diese
Geräte müssen den Sammel- und Rückgabesystemen zugeführt werden! Dort werden sie kostenlos entgegen
genommen. Die Kosten für den weiteren Recyclingprozess übernehmen die Gerätehersteller.
LINDY bietet deutschen Endverbrauchern ein kostenloses Rücknahmesystem an, beachten Sie bitte, dass Batterien
und Akkus den Produkten vor der Rückgabe an das Rücknahmesystem entnommen werden müssen und über die
Sammel- und Rückgabesysteme für Batterien separat entsorgt werden müssen. Ausführliche Informationen zu
diesen Themen finden Sie stets aktuell auf der LINDY Webseite im Fußbereich.
France
En 2006, l'union Européenne a introduit la nouvelle réglementation (DEEE) pour le recyclage de tout équipement
électrique et électronique.
Chaque Etat membre de l’ Union Européenne a mis en application la nouvelle réglementation DEEE de manières
légèrement différentes. Veuillez suivre le décret d’application correspondant à l’élimination des déchets électriques
ou électroniques de votre pays.
Italy
Nel 2006 l’unione europea ha introdotto regolamentazioni (WEEE) per la raccolta e il riciclo di apparecchi elettrici ed
elettronici. Non è più consentito semplicemente gettare queste apparecchiature, devono essere riciclate. Ogni stato
membro dell’ EU ha tramutato le direttive WEEE in leggi statali in varie misure. Fare riferimento alle leggi del proprio
Stato quando si dispone di un apparecchio elettrico o elettronico.
Per ulteriori dettagli fare riferimento alla direttiva WEEE sul riciclaggio del proprio Stato.
No. 38106
2
nd
Edition, February 2020
lindy.com
Tested to comply with
FCC Standards
For Home and Office Use!
-
 1
1
-
 2
2
-
 3
3
-
 4
4
-
 5
5
-
 6
6
-
 7
7
-
 8
8
-
 9
9
-
 10
10
-
 11
11
-
 12
12


Lindy 500m Fibre Optic DVI-D Dual Link Extender Manuale utente
- Tipo
- Manuale utente
in altre lingue
Documenti correlati
-
Lindy 38113 Kit extendeur DVI-D optique 1500 m Manuale utente
-
-
Lindy 38113 Manuale utente
-
-
-
-
Lindy 50m Cat.6 4 Port HDMI & IR Splitter Extender Manuale utente
-
-
-
Lindy 200m Fibre Optic DisplayPort 1.2 Extender Manuale utente