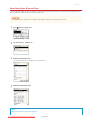
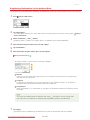
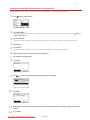
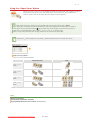
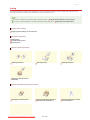
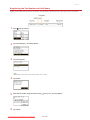
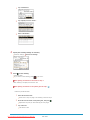
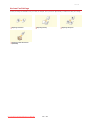
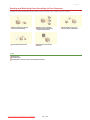
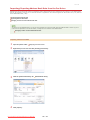
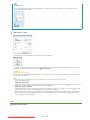
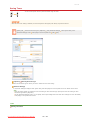
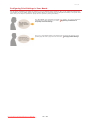
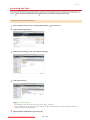
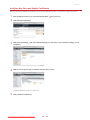
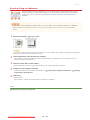
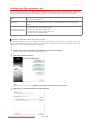
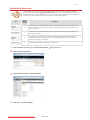
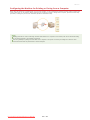
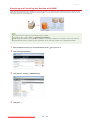
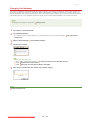
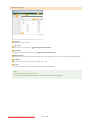
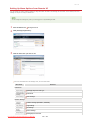
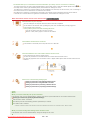
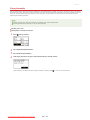
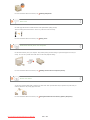
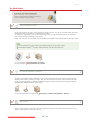
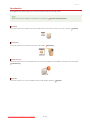
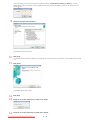
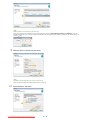
Canon i-SENSYS MF217w Manuale utente
- Categoria
- Multifunzionali
- Tipo
- Manuale utente
Questo manuale è adatto anche per

㻝㻌㻛㻌㻠㻣㻡
Downloaded from ManualsPrinter.com Manuals

Important Safety Instructions 8
Installation
9
Power Supply
11
Handling
12
Maintenance and Inspections
14
Consumables
15
Basic Operations
17
Parts and Their Functions
19
Front Side
20
Back Side
21
Interior
22
Manual Feed Slot
23
Paper Drawer
24
Operation Panel
25
Display
27
Customizing the <Home> Screen
30
Using the Display
32
Entering Text
34
Placing Documents
36
Loading Paper
39
Loading Paper in the Paper Drawer
41
Loading Paper in the Manual Feed Slot
44
Loading Envelopes
46
Loading Preprinted Paper
48
Specifying Paper Size and Type
50
Registering a Custom Paper Size
52
Registering in the Address Book
54
Registering Destinations in the Address Book
55
Registering Destinations for One-Touch Dial
57
Registering Multiple Destinations for Group Dial
60
Adjusting the Volume
62
Entering Quiet Mode
64
Entering Sleep Mode
66
Copying
68
Basic Copy Operations
69
Canceling Copies
71
Various Copy Settings
73
Enlarging or Reducing
74
Selecting Document Type
75
Adjusting Density
76
Adjusting Sharpness
77
2-Sided Copying (MF229dw / MF226dn)
78
Copying Multiple Documents onto One Sheet (2 on 1/4 on 1)
80
Using the <Paper Save> Button
81
Copying Both Sides of an ID Card onto One Page
82
Collating Copies by Page
83
Changing Default Settings
84
Faxing
85
Configuring Initial Settings for Fax Functions
87
㻞㻌㻛㻌㻠㻣㻡
Downloaded from ManualsPrinter.com Manuals

Deciding Which Fax Receive Mode to Use 88
Registering the Fax Number and Unit Name
89
Selecting the Receive Mode
91
Connecting the Telephone Line
93
Sending Faxes
95
Sending from Registered Destinations
100
Specifying from Address Book
101
Selecting Destinations Directly by Entering Coded Dial Numbers
103
Specifying Destinations with the One-Touch Buttons
105
Specifying Previously Used Destinations
107
Various Fax Settings
109
Adjusting Resolution
110
Adjusting Density
111
Adjusting Sharpness
112
Scanning 2-Sided Documents (MF229dw)
113
Changing Default Settings
114
Canceling Sending Faxes
115
Receiving Faxes
117
Sending and Receiving Faxes According to Your Purposes
120
Making a Call before Sending Faxes (Manual Sending)
121
Sending Faxes to Multiple Destinations Simultaneously (Sequential Broadcast)
122
Storing Received Faxes into Memory (Memory Reception)
124
Forwarding Received Faxes
127
Receiving Fax Information Services
129
Checking Status and Log for Sent and Received Documents
131
Importing/Exporting Address Book Data with the Supplied Software
133
Sending Faxes from Your Computer (PC Fax)
135
Sending PC Faxes
136
Attaching Cover Sheets to PC Faxes
138
Using Address Book for PC Faxes
141
Registering Destinations
142
Using Registered Destinations
146
Importing/Exporting Address Book Data from the Fax Driver
148
Using the Machine as a Printer
153
Printing from a Computer
154
Printing a Document
155
Canceling Prints
157
Checking the Printing Status
159
Various Print Settings
160
Enlarging or Reducing
161
Switching 1-Sided and 2-Sided Printing (MF229dw / MF226dn)
163
Collating Printouts by Page
165
Printing Multiple Pages onto One Sheet
166
Printing Posters
167
Printing Booklet (MF229dw / MF226dn)
168
Printing Borders
170
Printing Dates and Page Numbers
171
Printing Watermarks
172
Selecting Document Type
174
㻟㻌㻛㻌㻠㻣㻡
Downloaded from ManualsPrinter.com Manuals

Saving Toner 175
Combining and Printing Multiple Documents
176
Configuring Print Settings to Your Needs
179
Registering Combinations of Frequently Used Print Settings
180
Changing Default Settings
182
Using AirPrint
183
Encrypting Communication of Print Data for Apple Devices with TLS
188
Configuring Settings for Key Pairs and Digital Certificates
191
Generating Key Pairs
192
Using CA-issued Key Pairs and Digital Certificates
197
Verifying Key Pairs and Digital Certificates
200
Using the Machine as a Scanner
202
Preparing to Use the Machine as a Scanner
203
Scanning from the Machine
204
Scanning Using the <Scan -> PC> Button
207
Scanning from a Computer
211
Scanning Using MF Toolbox
212
Configuring Scan Settings in MF Toolbox
217
Scanning Using an Application
222
Configuring Scan Settings in ScanGear MF
223
Configuring Scan Settings in Simple Mode
224
Configuring Scan Settings in Advanced Mode
226
Network
237
Connecting to a Network
238
Selecting Wired LAN or Wireless LAN (MF229dw / MF217w)
240
Connecting to a Wired LAN
241
Connecting to a Wireless LAN (MF229dw / MF217w)
242
Setting Up Connection Using WPS Push Button Mode
244
Setting Up Connection Using WPS PIN Code Mode
246
Setting Up Connection by Selecting a Wireless Router
248
Setting Up Connection by Specifying Detailed Settings
250
Checking the SSID and Network Key
253
Setting IP Addresses
255
Setting IPv4 Address
256
Setting IPv6 Addresses
258
Viewing Network Settings
261
Configuring the Machine for Printing or Faxing from a Computer
263
Configuring Printing Protocols and WSD Functions
264
Configuring Printer Ports
267
Setting Up Print Server
270
Configuring the Machine for Your Network Environment
273
Configuring Ethernet Settings
274
Changing the Maximum Transmission Unit
275
Setting a Wait Time for Connecting to a Network
276
Configuring DNS
277
Monitoring and Controlling the Machine with SNMP
281
Security
284
Protecting the Machine from Unauthorized Access
285
Setting the System Manager PIN
286
㻠㻌㻛㻌㻠㻣㻡
Downloaded from ManualsPrinter.com Manuals

Restricting Communication by Using Firewalls 288
Specifying IP Addresses for Firewall Rules
289
Specifying MAC Addresses for Firewall Rules
292
Changing Port Numbers
294
Setting a Proxy
295
Restricting the Machine's Functions
297
Restricting Access to Address Book and Sending Functions
298
Setting a PIN for Address Book
299
Limiting Available Destinations
300
Prohibiting PC Faxing
301
Disabling Use of Previously Used Destinations
302
Checking Destinations before Sending Documents
303
Prohibiting Sequential Broadcasting
305
Disabling HTTP Communication
306
Disabling Remote UI
307
Using Remote UI
308
Starting Remote UI
309
Remote UI Screens
311
Managing Documents and Checking the Machine Status
314
Setting Up Menu Options from Remote UI
318
Saving/Loading Address Book from Remote UI
320
Registering Address Book from Remote UI
323
Setting Menu List
325
Network Settings
326
Preferences
333
Timer Settings
338
Common Settings (MF229dw / MF226dn)
342
Copy Settings
343
Fax Settings
345
Scan Settings
354
Printer Settings
355
Adjustment/Maintenance
356
System Management Settings
361
Initialize Menu
368
Troubleshooting
369
Clearing Jams
370
When an Error Message Appears
376
When an Error Code Appears
382
Common Problems
384
Installation/Settings Problems
385
Copying Problems
388
Printing Problems
389
Faxing/Telephone Problems
390
When You Cannot Print Properly
391
Printing Results Are Not Satisfactory
392
Paper Creases or Curls
396
Paper Is Fed Incorrectly
397
When a Problem Cannot Be Solved
398
Maintenance
399
㻡㻌㻛㻌㻠㻣㻡
Downloaded from ManualsPrinter.com Manuals

Cleaning the Machine 400
Exterior
401
Platen Glass
402
Feeder
403
Fixing Assembly
404
Machine Interior
405
Replacing Toner Cartridges
407
Before Replacing the Toner Cartridge
409
How to Replace Toner Cartridges
411
Relocating the Machine
413
Printing Reports and Lists
414
TX Result Report
415
Communication Management Report
417
RX Result Report
418
Address Book List
419
User Data List
420
Viewing the Counter Value
421
Initializing Settings
422
Initializing Menu
423
Initializing Address Book
424
Initializing System Management Settings
425
Initializing All Data/Settings
426
Appendix
427
Feature Highlights
428
Going Green and Saving Money
429
Improving Efficiency
431
Going Digital
433
So Much More
435
Specifications
437
Machine Specifications
438
Wireless LAN Specifications (MF229dw / MF217w)
440
Document Type
441
Scan Area
442
Paper
443
Copy Specifications
445
Fax Specifications
446
Scanner Specifications
447
Printer Specifications
448
Consumables
449
Manuals Included with the Machine
450
Using e-Manual
451
Installing e-Manual
452
Uninstalling e-Manual
456
Screen Layout of e-Manual
458
Viewing e-Manual
463
Others
464
Basic Windows Operations
465
For Mac OS Users
470
Notice
471
㻢㻌㻛㻌㻠㻣㻡
Downloaded from ManualsPrinter.com Manuals

Contact Us 475
㻣㻌㻛㻌㻠㻣㻡
Downloaded from ManualsPrinter.com Manuals

0KCY-000
Important Safety Instructions
The content described in this chapter is for the prevention of damage to property and injury to users of the machine and others. Before
using this machine, read this chapter and follow the instructions to properly use this machine. Do not perform any operations not
described in this manual. Canon will not be responsible for any damages resulting from use not described in this manual, improper use,
or repair/changes not performed by Canon or a third party authorized by Canon.
㻤㻌㻛㻌㻠㻣㻡
Downloaded from ManualsPrinter.com Manuals

0KCY-001
Installation
To use this machine safely and comfortably, carefully read the following precautions and install the machine in an appropriate location.
Do not install in a location that may result in a fire or electrical shock
A location where the ventilation slots are blocked
(too close to walls, beds, rugs, or similar objects)
A damp or dusty location
A location exposed to direct sunlight or outdoors
A location subject to high temperatures
A location exposed to open flames
Near alcohol, paint thinners or other flammable substances
Other warnings
Do not connect unapproved cables to this machine. Doing so may result in a fire or electrical shock.
Do not place necklaces and other metal objects or containers filled with liquid on the machine. If foreign substances come in
contact with electrical parts inside the machine, it may result in a fire or electrical shock.
When installing and removing the optional accessories, be sure to turn OFF the power, unplug the power plug, and then
disconnect all the interface cables and power cord from the machine. Otherwise, the power cord or interface cables may be
damaged, resulting in a fire or electrical shock.
Do not use near any medical equipment. Radiowaves emitted from this machine may interfere with medical equipment, which
may cause a malfunction and result in serious accidents.
If any foreign substance falls into this machine, unplug the power plug from the AC power outlet and contact your local
authorized Canon dealer.
Do not install in the following locations
The machine may drop or fall, resulting in injury.
Unstable location
Location exposed to vibrations
Other cautions
When carrying this machine, follow the instructions in this manual. If carried improperly, it may fall, resulting in injury.
When installing this machine, be careful not to get your hands caught between the machine and the floor or walls, or between
the paper drawers. Doing so may result in injury.
Do not install in the following locations that may result in damage
A location subject to dramatic changes in temperature or humidity
A location near equipment that generates magnetic or electromagnetic waves
A laboratory or location where chemical reactions occur
A location exposed to corrosive or toxic gases
A location that may warp from the weight of the machine or where the machine is
liable to sink (a carpet, etc.)
Avoid poorly ventilated locations
㻥㻌㻛㻌㻠㻣㻡
Downloaded from ManualsPrinter.com Manuals

This machine generates a slight amount of ozone, etc. during normal use. Although sensitivity to ozone, etc. may vary, this
amount is not harmful. Ozone, etc. may be more noticeable during extended use or long production runs, especially in poorly
ventilated rooms. It is recommended that the room where the machine operates be appropriately ventilated to maintain a
comfortable working environment. Also avoid locations where people would be exposed to emissions from the machine.
Do not install in a location where condensation occurs
Water droplets (condensation) may form inside the machine when the room where the machine is installed is heated rapidly, and
when the machine is moved from a cool or dry location to a hot or humid location. Using the machine under these conditions may
result in paper jams, poor print quality, or damage to the machine. Let the machine adjust to the ambient temperature and
humidity for at least 2 hours before use.
When using wireless LAN (MF229dw / MF217w)
Set the machine at a distance of 50 m or less from the wireless LAN router.
Do not set machine in a location where any object blocks communication. The signal may be degraded when passing through
walls or floors.
Keep the machine as far as possible from digital cordless phones, microwave ovens, or other equipment that emit radio waves.
In altitudes of 3,000 m or above sea level
Machines with a hard disk may not operate properly when used at high altitudes of about 3,000 meters above sea level, or
higher.
㻝㻜㻌㻛㻌㻠㻣㻡
Downloaded from ManualsPrinter.com Manuals

0KCY-002
Power Supply
This machine is compatible with voltages of 220 to 240 V, and electrical frequency of 50/60 Hz.
Use only a power supply that meets the specified voltage requirements. Failure to do so may result in a fire or electrical shock.
Do not use power cords other than the one provided, as this may result in a fire or electrical shock.
Do not modify, pull, forcibly bend, or perform any other act that may damage the power cord. Do not place heavy objects on
the power cord. Damaging the power cord may result in a fire or electrical shock.
Do not plug in or unplug the power plug with wet hands, as this may result in an electrical shock.
Do not use extension cords or multi-plug power strips with the machine. Doing so may result in a fire or electrical shock.
Do not wrap the power cord or tie it in a knot, as this may result in a fire or electrical shock.
Insert the power plug completely into the AC power outlet. Failure to do so may result in a fire or electrical shock.
Remove the power plug completely from the AC power outlet during a thunder storm. Failure to do so may result in a fire,
electrical shock, or damage to the machine.
Do not obstruct the power outlet where this machine is connected, so that you can unplug the power cord easily in an emergency.
When connecting power
Do not connect the machine to an uninterruptible power source.
If plugging this machine into an AC power outlet with multiple sockets, do not use the remaining sockets to connect other
devices.
Do not connect the power cord into the auxiliary outlet on a computer.
Other precautions
Electrical noise may cause this machine to malfunction or lose data.
㻝㻝㻌㻛㻌㻠㻣㻡
Downloaded from ManualsPrinter.com Manuals

0KCY-003
Handling
Immediately unplug the power plug from the AC power outlet and contact an authorized
Canon dealer if the machine makes an unusual noise, emits an unusual smell, or emits
smoke or excessive heat. Continued use may result in a fire or electrical shock.
Do not disassemble or modify this machine. There are high-voltage and high-
temperature components inside the machine which may result in a fire or electrical
shock.
Place the machine where children will not come in contact with the power cord and other cables or internal and electrical
parts. Failure to do so may result in unexpected accidents.
Do not use flammable sprays near this machine. If flammable substances come into contact with electrical parts inside this
machine, it may result in a fire or electrical shock.
When moving this machine, be sure to turn OFF the power of this machine and your computer, and then unplug the power
plug and interface cables. Failure to do so may damage the power cord or interface cables, resulting in a fire or electrical
shock.
When plugging or unplugging a USB cable when the power plug is plugged into an AC power outlet, do not touch the metal
part of the connector, as this may result in an electrical shock.
If you are using a cardiac pacemaker
This machine generates a low level magnetic flux. If you use a cardiac pacemaker and feel abnormalities, please move away from
this machine and consult your physician immediately.
Do not place heavy objects on this machine as they may fall, resulting in injury.
For your safety, please unplug the power cord if the machine will not be used for a long period of time.
Use caution when opening and closing covers to avoid injury to your hands.
Keep hands and clothing away from the rollers in the output area. If the rollers catch your hands or clothing, this may result
in personal injury.
The inside of the machine and the output slot are very hot during and immediately after use. Avoid contact with these areas to
prevent burns. Also, printed paper may be hot immediately after being output, so use caution when handling it. Failure to do
so may result in burns.
When copying with a thick book placed on the platen glass, do not press the feeder forcefully. Doing so may damage the
platen glass and result in injury.
Be careful not to drop a heavy object, such as a dictionary, on the platen glass. Doing so may damage the platen glass and
result in injury.
Laser beam
This machine is classified as a Class 1 Laser Product under IEC 60825-1: 2007, EN60825-1: 2007. The laser beam can be harmful
to the human body. The laser beam is confined in the laser scanner unit by a cover, so there is no danger of the laser beam
escaping during normal machine operation. Read the following remarks and instructions for safety.
Never open covers other than those indicated in this manual.
Do not remove the caution label attached to the cover of the laser scanner unit.
If you operate the machine in manners other than the control, adjustment, and operating
procedures prescribed in this manual, this may result in hazardous radiation exposure.
If the laser beam should escape and enter your eyes, exposure may cause damage to
your eyes.
㻝㻞㻌㻛㻌㻠㻣㻡
Downloaded from ManualsPrinter.com Manuals

Laser diode information
wavelength: 785-800 nm
maximum power: 6 mW
When transporting the machine
To prevent damage to the machine during transport, perform the following.
Remove the toner cartridges.
Securely pack the machine in the original box with packing materials.
Other precautions
Follow the instructions in the caution label attached to this machine.
Avoid shaking or applying shock to this machine.
Do not forcibly open and close doors, covers, and other parts. Doing so may result in damage to the machine.
Do not touch the contacts (
). Doing so may result in damage to the machine.
Do not turn OFF the machine during printing. Also, do not open and close the cover and do not remove or insert paper during
printing. Doing so can cause paper jams.
Use a telephone cable with a length of 3 m or less.
The display is a touch panel. Press gently to operate. Avoid pressing with a mechanical pencil, ballpoint pen, or other pointed
object. Doing so may scratch or damage the touch panel's surface.
㻝㻟㻌㻛㻌㻠㻣㻡
Downloaded from ManualsPrinter.com Manuals

0KCY-004
Maintenance and Inspections
Clean this machine periodically. If dust accumulates, the machine may not operate properly. When cleaning, be sure to observe the
following. If a problem occurs during operation, see
Troubleshooting. If the problem cannot be resolved or you feel the machine
requires an inspection, see
When a Problem Cannot Be Solved.
Before cleaning, turn OFF the power and unplug the power plug from the AC power outlet. Failure to do so may result in a fire
or electrical shock.
Unplug the power plug periodically and clean with a dry cloth to remove dust and grime. Accumulated dust may absorb
humidity in the air and may result in a fire if it comes into contact with electricity.
Use a damp, well wrung-out cloth to clean the machine. Dampen cleaning cloths with water only. Do not use alcohol,
benzenes, paint thinners, or other flammable substances. Do not use tissue paper or paper towels. If these substances come
into contact with electrical parts inside the machine, they may generate static electricity or result in a fire or electrical shock.
Check the power cord and plug periodically for damage. Check the machine for rust, dents, scratches, cracks, or excessive
heat generation. Use of poorly-maintained equipment may result in a fire or electrical shock.
The inside of the machine has high-temperature and high-voltage components. Touching these components may result in
burns. Do not touch any part of the machine that is not indicated in the manual.
When loading paper or removing jammed documents or paper, be careful not to cut your hands with the edges of the paper.
When removing jammed paper or replacing toner cartridges, be careful not to get any toner on your hands or clothing. If toner
gets on your hands or clothing, wash them immediately with cold water.
㻝㻠㻌㻛㻌㻠㻣㻡
Downloaded from ManualsPrinter.com Manuals

0KCY-005
Consumables
Do not dispose of used toner cartridges in open flames. Also, do not store toner cartridges or paper in a location exposed to
open flames. This may cause the toner to ignite, and result in burns or fire.
If you accidentally spill or scatter toner, carefully wipe up the loose toner with a damp, soft cloth and avoid inhaling any toner
dust. Do not use a vacuum cleaner that is not equipped with safety measures to prevent dust explosions to clean up loose
toner. Doing so may cause damage to the vacuum cleaner or result in a dust explosion due to static discharge.
If you are using a cardiac pacemaker
Toner cartridges generate a low level magnetic flux. If you use a cardiac pacemaker and feel abnormalities, please move away
from toner cartridges and consult your physician immediately.
Use caution not to inhale any toner. If you should inhale toner, consult a physician immediately.
Use caution so that toner does not get into your eyes or mouth. If toner should get into your eyes or mouth, immediately
wash with cold water and consult a physician.
Use caution so that toner does not come into contact with your skin. If it should, wash with soap and cold water. If there is
any irritation on your skin, consult a physician immediately.
Keep the toner cartridges and other consumables out of the reach of small children. If toner is ingested, consult a physician or
poison control center immediately.
Do not disassemble or modify the toner cartridge. Doing so may cause the toner to scatter.
Remove the sealing tape of the toner cartridge completely without using excessive force. Doing otherwise may cause the toner
to scatter.
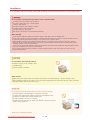
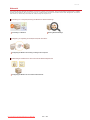
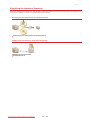
Handling the toner cartridge
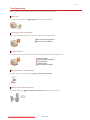
Hold the toner cartridge correctly as shown. Do not stand it up or turn it upside-down.
Do not touch the toner cartridge memory ( ) or the electrical contacts ( ).
Do not scratch the drum surface ( ) or expose it to light.
Do not remove the toner cartridge from this machine or from the protective bag unnecessarily.
㻝㻡㻌㻛㻌㻠㻣㻡
Downloaded from ManualsPrinter.com Manuals

The toner cartridge is a magnetic product. Keep it away from floppy disks, disk drives, and other devices that can be affected
by magnetism. Failure to do so may result in data loss.
Storing the toner cartridge
Store in the following environment to ensure safe and satisfactory use.
Storage temperature range: 0 to 35°C
Storage humidity range: 35 to 85% RH (relative humidity/no condensation)
Store without opening until the toner cartridge is to be used.
When removing the toner cartridge from this machine for storage, place the removed toner cartridge into the original
protective bag or wrap it with a thick cloth.
When storing the toner cartridge, do not store it upright or upside down. The toner will solidify and may not return to its
original condition even if it is shaken.
Even within the storable humidity range, water droplets (condensation) may develop inside the toner cartridge if there is a difference of temperature
inside and outside the toner cartridge. Condensation will adversely affect the print quality of toner cartridges.
Do not store the toner cartridge in the following locations
Locations exposed to open flames
Locations exposed to direct sunlight or bright light for five minutes or more
Locations exposed to excessive salty air
Locations where there are corrosive gases (i.e. aerosol sprays and ammonia)
Locations subject to high temperature and high humidity
Locations subject to dramatic changes in temperature and humidity where condensation may easily occur
Locations with a large amount of dust
Locations within the reach of children
Be careful of counterfeit toner cartridges
Please be aware that there are counterfeit Canon toner cartridges in the marketplace. Use of counterfeit toner cartridge may
result in poor print quality or machine performance. Canon is not responsible for any malfunction, accident or damage caused by
the use of counterfeit toner cartridge.
For more information, see canon.com/counterfeit.
Availability period of repairing parts and toner cartridges
The repairing parts and toner cartridges for the machine will be available for at least seven (7) years after production of this
machine model has been discontinued.
Toner cartridge packing materials
Save the protective bag for the toner cartridge. They are required when transporting this machine.
The packing materials may be changed in form or placement, or may be added or removed without notice.
Dispose of the removed sealing tape according to local regulations.
When disposing of a used toner cartridge
Place the toner container into its protective bag to prevent the toner from scattering, and then dispose of the toner cartridge
according to local regulations.
*
*
㻝㻢㻌㻛㻌㻠㻣㻡
Downloaded from ManualsPrinter.com Manuals

0KCY-00Y
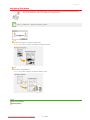
Basic Operations
This chapter describes basic operations, such as how to use the operation panel or how to load the paper and documents, that are
frequently performed to use the functions of the machine.
Parts and Their Functions
This section describes the exterior and interior parts of the machine and their functions, as well as how to use the keys on the operation
panel and how to view the display.
Parts and Their Functions
Using the Display
This section describes how to toggle the display and select items. Using the Display
Entering Text
This section describes how to enter characters and numbers for registering destinations to the Address Book, sending faxes, etc.
Entering Text
Placing Documents
This section describes how to place documents on the platen glass and in the feeder. Placing Documents
Loading Paper
This section describes how to load the paper into the paper drawer and manual feed slot. Loading Paper
㻝㻣㻌㻛㻌㻠㻣㻡
Downloaded from ManualsPrinter.com Manuals

Registering in the Address Book
This section describes how to register destinations for sending faxes. Registering in the Address Book
Adjusting the Volume
This section describes how to adjust the volume of various machine sounds, such as those produced when fax sending is complete or
when an error occurs.
Adjusting the Volume
Entering Quiet Mode
This section describes how to place the machine in quiet mode to reduce operation sound. Entering Quiet Mode
Entering Sleep Mode
This section describes how to set the sleep mode. Entering Sleep Mode
㻝㻤㻌㻛㻌㻠㻣㻡
Downloaded from ManualsPrinter.com Manuals

0KCY-010
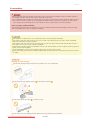
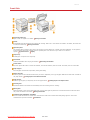
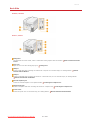
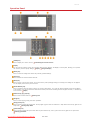
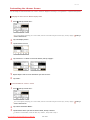
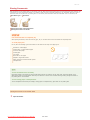
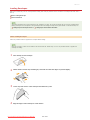
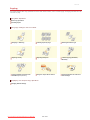
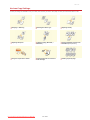
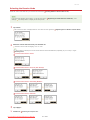
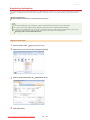
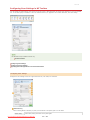
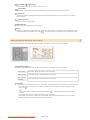
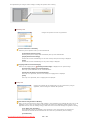
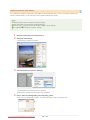
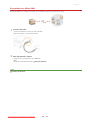
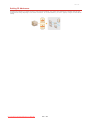
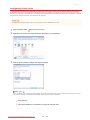
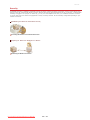
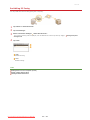
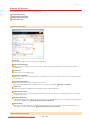
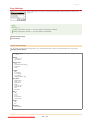
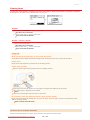
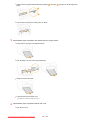
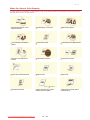
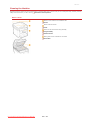
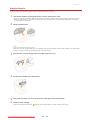
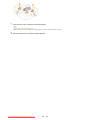
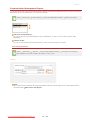
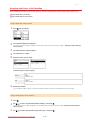
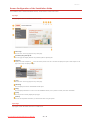
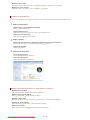
Parts and Their Functions
This section describes the parts of the machine (exterior, front and back side, and interior) and how they function. In addition to
describing the parts of the machine used for such basic operations as placing documents, loading paper, and replacing the toner
cartridges, this section also describes the keys on the operation panel and display. Read this section for tips on how to use the machine
properly.
Front Side
Back Side
Interior
Manual Feed Slot
Paper Drawer
Operation Panel
㻝㻥㻌㻛㻌㻠㻣㻡
Downloaded from ManualsPrinter.com Manuals

0KCY-011
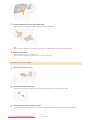
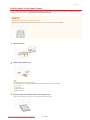
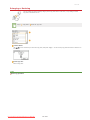
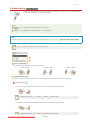
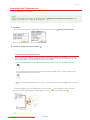
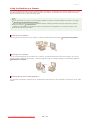
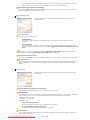
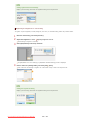
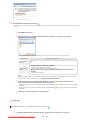
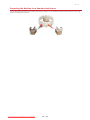
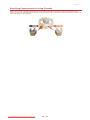
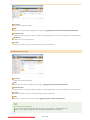
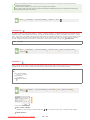
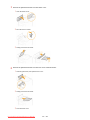
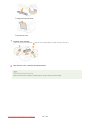
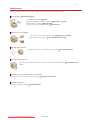
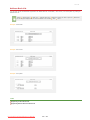
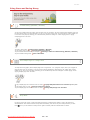
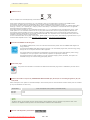
Front Side
Document feeder tray
Open to load an original in the feeder.
Placing Documents
Feeder
Automatically feeds documents into the machine for scanning. When two or more sheets are loaded in the feeder, documents can
be scanned continuously.
Placing Documents
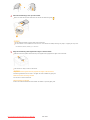
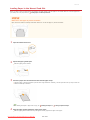
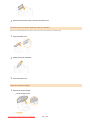
Operation panel
The operation panel consists of keys such as the numeric keys and [Start] key, a display, and status indicators. You can perform
all the operations and specify settings from the operation panel. You can move it up or down so it is easier to
operate.
Operation Panel Display
Output tray
Printed paper is output to the output tray.
Lift handles
Hold the lift handles when carrying the machine.
Relocating the Machine
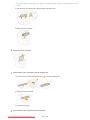
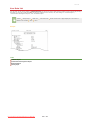
Power switch
Turns the power ON or OFF. To restart the machine, turn OFF the machine, wait for at least 10 seconds, and turn it back ON.
Paper stopper
Prevents paper that has been output after printing from falling.
Manual feed slot
Load the paper into the manual feed slot when you want to temporarily use a type of paper different from that which is loaded in
the paper drawer.
Loading Paper in the Manual Feed Slot
Paper drawer
Load the type of paper you frequently use into the paper drawer.
Loading Paper in the Paper Drawer
Scanning area
Documents loaded in the feeder are automatically fed to the scanning area for scanning.
Platen glass
Place documents to scan on the platen glass. Also, use the platen glass to place thick or bound documents such as books when
they cannot be loaded in the feeder.
Placing Documents
Ventilation slots (MF229dw / MF226dn)
Air from inside the machine is vented out to cool down the inside of the machine. Note that placing objects in front of the
ventilation slots prevents ventilation.
Installation
㻞㻜㻌㻛㻌㻠㻣㻡
Downloaded from ManualsPrinter.com Manuals
La pagina si sta caricando...
La pagina si sta caricando...
La pagina si sta caricando...
La pagina si sta caricando...
La pagina si sta caricando...
La pagina si sta caricando...
La pagina si sta caricando...
La pagina si sta caricando...
La pagina si sta caricando...
La pagina si sta caricando...
La pagina si sta caricando...
La pagina si sta caricando...
La pagina si sta caricando...
La pagina si sta caricando...
La pagina si sta caricando...
La pagina si sta caricando...
La pagina si sta caricando...
La pagina si sta caricando...
La pagina si sta caricando...
La pagina si sta caricando...
La pagina si sta caricando...
La pagina si sta caricando...
La pagina si sta caricando...
La pagina si sta caricando...
La pagina si sta caricando...
La pagina si sta caricando...
La pagina si sta caricando...
La pagina si sta caricando...
La pagina si sta caricando...
La pagina si sta caricando...
La pagina si sta caricando...
La pagina si sta caricando...
La pagina si sta caricando...
La pagina si sta caricando...
La pagina si sta caricando...
La pagina si sta caricando...
La pagina si sta caricando...
La pagina si sta caricando...
La pagina si sta caricando...
La pagina si sta caricando...
La pagina si sta caricando...
La pagina si sta caricando...
La pagina si sta caricando...
La pagina si sta caricando...
La pagina si sta caricando...
La pagina si sta caricando...
La pagina si sta caricando...
La pagina si sta caricando...
La pagina si sta caricando...
La pagina si sta caricando...
La pagina si sta caricando...
La pagina si sta caricando...
La pagina si sta caricando...
La pagina si sta caricando...
La pagina si sta caricando...
La pagina si sta caricando...
La pagina si sta caricando...
La pagina si sta caricando...
La pagina si sta caricando...
La pagina si sta caricando...
La pagina si sta caricando...
La pagina si sta caricando...
La pagina si sta caricando...
La pagina si sta caricando...
La pagina si sta caricando...
La pagina si sta caricando...
La pagina si sta caricando...
La pagina si sta caricando...
La pagina si sta caricando...
La pagina si sta caricando...
La pagina si sta caricando...
La pagina si sta caricando...
La pagina si sta caricando...
La pagina si sta caricando...
La pagina si sta caricando...
La pagina si sta caricando...
La pagina si sta caricando...
La pagina si sta caricando...
La pagina si sta caricando...
La pagina si sta caricando...
La pagina si sta caricando...
La pagina si sta caricando...
La pagina si sta caricando...
La pagina si sta caricando...
La pagina si sta caricando...
La pagina si sta caricando...
La pagina si sta caricando...
La pagina si sta caricando...
La pagina si sta caricando...
La pagina si sta caricando...
La pagina si sta caricando...
La pagina si sta caricando...
La pagina si sta caricando...
La pagina si sta caricando...
La pagina si sta caricando...
La pagina si sta caricando...
La pagina si sta caricando...
La pagina si sta caricando...
La pagina si sta caricando...
La pagina si sta caricando...
La pagina si sta caricando...
La pagina si sta caricando...
La pagina si sta caricando...
La pagina si sta caricando...
La pagina si sta caricando...
La pagina si sta caricando...
La pagina si sta caricando...
La pagina si sta caricando...
La pagina si sta caricando...
La pagina si sta caricando...
La pagina si sta caricando...
La pagina si sta caricando...
La pagina si sta caricando...
La pagina si sta caricando...
La pagina si sta caricando...
La pagina si sta caricando...
La pagina si sta caricando...
La pagina si sta caricando...
La pagina si sta caricando...
La pagina si sta caricando...
La pagina si sta caricando...
La pagina si sta caricando...
La pagina si sta caricando...
La pagina si sta caricando...
La pagina si sta caricando...
La pagina si sta caricando...
La pagina si sta caricando...
La pagina si sta caricando...
La pagina si sta caricando...
La pagina si sta caricando...
La pagina si sta caricando...
La pagina si sta caricando...
La pagina si sta caricando...
La pagina si sta caricando...
La pagina si sta caricando...
La pagina si sta caricando...
La pagina si sta caricando...
La pagina si sta caricando...
La pagina si sta caricando...
La pagina si sta caricando...
La pagina si sta caricando...
La pagina si sta caricando...
La pagina si sta caricando...
La pagina si sta caricando...
La pagina si sta caricando...
La pagina si sta caricando...
La pagina si sta caricando...
La pagina si sta caricando...
La pagina si sta caricando...
La pagina si sta caricando...
La pagina si sta caricando...
La pagina si sta caricando...
La pagina si sta caricando...
La pagina si sta caricando...
La pagina si sta caricando...
La pagina si sta caricando...
La pagina si sta caricando...
La pagina si sta caricando...
La pagina si sta caricando...
La pagina si sta caricando...
La pagina si sta caricando...
La pagina si sta caricando...
La pagina si sta caricando...
La pagina si sta caricando...
La pagina si sta caricando...
La pagina si sta caricando...
La pagina si sta caricando...
La pagina si sta caricando...
La pagina si sta caricando...
La pagina si sta caricando...
La pagina si sta caricando...
La pagina si sta caricando...
La pagina si sta caricando...
La pagina si sta caricando...
La pagina si sta caricando...
La pagina si sta caricando...
La pagina si sta caricando...
La pagina si sta caricando...
La pagina si sta caricando...
La pagina si sta caricando...
La pagina si sta caricando...
La pagina si sta caricando...
La pagina si sta caricando...
La pagina si sta caricando...
La pagina si sta caricando...
La pagina si sta caricando...
La pagina si sta caricando...
La pagina si sta caricando...
La pagina si sta caricando...
La pagina si sta caricando...
La pagina si sta caricando...
La pagina si sta caricando...
La pagina si sta caricando...
La pagina si sta caricando...
La pagina si sta caricando...
La pagina si sta caricando...
La pagina si sta caricando...
La pagina si sta caricando...
La pagina si sta caricando...
La pagina si sta caricando...
La pagina si sta caricando...
La pagina si sta caricando...
La pagina si sta caricando...
La pagina si sta caricando...
La pagina si sta caricando...
La pagina si sta caricando...
La pagina si sta caricando...
La pagina si sta caricando...
La pagina si sta caricando...
La pagina si sta caricando...
La pagina si sta caricando...
La pagina si sta caricando...
La pagina si sta caricando...
La pagina si sta caricando...
La pagina si sta caricando...
La pagina si sta caricando...
La pagina si sta caricando...
La pagina si sta caricando...
La pagina si sta caricando...
La pagina si sta caricando...
La pagina si sta caricando...
La pagina si sta caricando...
La pagina si sta caricando...
La pagina si sta caricando...
La pagina si sta caricando...
La pagina si sta caricando...
La pagina si sta caricando...
La pagina si sta caricando...
La pagina si sta caricando...
La pagina si sta caricando...
La pagina si sta caricando...
La pagina si sta caricando...
La pagina si sta caricando...
La pagina si sta caricando...
La pagina si sta caricando...
La pagina si sta caricando...
La pagina si sta caricando...
La pagina si sta caricando...
La pagina si sta caricando...
La pagina si sta caricando...
La pagina si sta caricando...
La pagina si sta caricando...
La pagina si sta caricando...
La pagina si sta caricando...
La pagina si sta caricando...
La pagina si sta caricando...
La pagina si sta caricando...
La pagina si sta caricando...
La pagina si sta caricando...
La pagina si sta caricando...
La pagina si sta caricando...
La pagina si sta caricando...
La pagina si sta caricando...
La pagina si sta caricando...
La pagina si sta caricando...
La pagina si sta caricando...
La pagina si sta caricando...
La pagina si sta caricando...
La pagina si sta caricando...
La pagina si sta caricando...
La pagina si sta caricando...
La pagina si sta caricando...
La pagina si sta caricando...
La pagina si sta caricando...
La pagina si sta caricando...
La pagina si sta caricando...
La pagina si sta caricando...
La pagina si sta caricando...
La pagina si sta caricando...
La pagina si sta caricando...
La pagina si sta caricando...
La pagina si sta caricando...
La pagina si sta caricando...
La pagina si sta caricando...
La pagina si sta caricando...
La pagina si sta caricando...
La pagina si sta caricando...
La pagina si sta caricando...
La pagina si sta caricando...
La pagina si sta caricando...
La pagina si sta caricando...
La pagina si sta caricando...
La pagina si sta caricando...
La pagina si sta caricando...
La pagina si sta caricando...
La pagina si sta caricando...
La pagina si sta caricando...
La pagina si sta caricando...
La pagina si sta caricando...
La pagina si sta caricando...
La pagina si sta caricando...
La pagina si sta caricando...
La pagina si sta caricando...
La pagina si sta caricando...
La pagina si sta caricando...
La pagina si sta caricando...
La pagina si sta caricando...
La pagina si sta caricando...
La pagina si sta caricando...
La pagina si sta caricando...
La pagina si sta caricando...
La pagina si sta caricando...
La pagina si sta caricando...
La pagina si sta caricando...
La pagina si sta caricando...
La pagina si sta caricando...
La pagina si sta caricando...
La pagina si sta caricando...
La pagina si sta caricando...
La pagina si sta caricando...
La pagina si sta caricando...
La pagina si sta caricando...
La pagina si sta caricando...
La pagina si sta caricando...
La pagina si sta caricando...
La pagina si sta caricando...
La pagina si sta caricando...
La pagina si sta caricando...
La pagina si sta caricando...
La pagina si sta caricando...
La pagina si sta caricando...
La pagina si sta caricando...
La pagina si sta caricando...
La pagina si sta caricando...
La pagina si sta caricando...
La pagina si sta caricando...
La pagina si sta caricando...
La pagina si sta caricando...
La pagina si sta caricando...
La pagina si sta caricando...
La pagina si sta caricando...
La pagina si sta caricando...
La pagina si sta caricando...
La pagina si sta caricando...
La pagina si sta caricando...
La pagina si sta caricando...
La pagina si sta caricando...
La pagina si sta caricando...
La pagina si sta caricando...
La pagina si sta caricando...
La pagina si sta caricando...
La pagina si sta caricando...
La pagina si sta caricando...
La pagina si sta caricando...
La pagina si sta caricando...
La pagina si sta caricando...
La pagina si sta caricando...
La pagina si sta caricando...
La pagina si sta caricando...
La pagina si sta caricando...
La pagina si sta caricando...
La pagina si sta caricando...
La pagina si sta caricando...
La pagina si sta caricando...
La pagina si sta caricando...
La pagina si sta caricando...
La pagina si sta caricando...
La pagina si sta caricando...
La pagina si sta caricando...
La pagina si sta caricando...
La pagina si sta caricando...
La pagina si sta caricando...
La pagina si sta caricando...
La pagina si sta caricando...
La pagina si sta caricando...
La pagina si sta caricando...
La pagina si sta caricando...
La pagina si sta caricando...
La pagina si sta caricando...
La pagina si sta caricando...
La pagina si sta caricando...
La pagina si sta caricando...
La pagina si sta caricando...
La pagina si sta caricando...
La pagina si sta caricando...
La pagina si sta caricando...
La pagina si sta caricando...
La pagina si sta caricando...
La pagina si sta caricando...
La pagina si sta caricando...
La pagina si sta caricando...
La pagina si sta caricando...
La pagina si sta caricando...
La pagina si sta caricando...
La pagina si sta caricando...
La pagina si sta caricando...
La pagina si sta caricando...
La pagina si sta caricando...
La pagina si sta caricando...
La pagina si sta caricando...
La pagina si sta caricando...
La pagina si sta caricando...
La pagina si sta caricando...
La pagina si sta caricando...
La pagina si sta caricando...
La pagina si sta caricando...
La pagina si sta caricando...
La pagina si sta caricando...
La pagina si sta caricando...
La pagina si sta caricando...
La pagina si sta caricando...
La pagina si sta caricando...
La pagina si sta caricando...
La pagina si sta caricando...
La pagina si sta caricando...
La pagina si sta caricando...
La pagina si sta caricando...
La pagina si sta caricando...
La pagina si sta caricando...
La pagina si sta caricando...
La pagina si sta caricando...
La pagina si sta caricando...
La pagina si sta caricando...
La pagina si sta caricando...
La pagina si sta caricando...
La pagina si sta caricando...
La pagina si sta caricando...
La pagina si sta caricando...
La pagina si sta caricando...
La pagina si sta caricando...
La pagina si sta caricando...
La pagina si sta caricando...
La pagina si sta caricando...
La pagina si sta caricando...
La pagina si sta caricando...
La pagina si sta caricando...
La pagina si sta caricando...
La pagina si sta caricando...
La pagina si sta caricando...
La pagina si sta caricando...
La pagina si sta caricando...
La pagina si sta caricando...
La pagina si sta caricando...
La pagina si sta caricando...
La pagina si sta caricando...
La pagina si sta caricando...
La pagina si sta caricando...
La pagina si sta caricando...
La pagina si sta caricando...
La pagina si sta caricando...
La pagina si sta caricando...
La pagina si sta caricando...
La pagina si sta caricando...
La pagina si sta caricando...
La pagina si sta caricando...
La pagina si sta caricando...
La pagina si sta caricando...
La pagina si sta caricando...
La pagina si sta caricando...
La pagina si sta caricando...
La pagina si sta caricando...
La pagina si sta caricando...
La pagina si sta caricando...
La pagina si sta caricando...
La pagina si sta caricando...
La pagina si sta caricando...
La pagina si sta caricando...
La pagina si sta caricando...
La pagina si sta caricando...
La pagina si sta caricando...
La pagina si sta caricando...
La pagina si sta caricando...
La pagina si sta caricando...
La pagina si sta caricando...
La pagina si sta caricando...
La pagina si sta caricando...
La pagina si sta caricando...
La pagina si sta caricando...
La pagina si sta caricando...
La pagina si sta caricando...
La pagina si sta caricando...
La pagina si sta caricando...
La pagina si sta caricando...
La pagina si sta caricando...
La pagina si sta caricando...
La pagina si sta caricando...
La pagina si sta caricando...
La pagina si sta caricando...
La pagina si sta caricando...
La pagina si sta caricando...
La pagina si sta caricando...
La pagina si sta caricando...
La pagina si sta caricando...
La pagina si sta caricando...
La pagina si sta caricando...
La pagina si sta caricando...
La pagina si sta caricando...
La pagina si sta caricando...
La pagina si sta caricando...
La pagina si sta caricando...
La pagina si sta caricando...
La pagina si sta caricando...
La pagina si sta caricando...
La pagina si sta caricando...
La pagina si sta caricando...
La pagina si sta caricando...
La pagina si sta caricando...
La pagina si sta caricando...
La pagina si sta caricando...
La pagina si sta caricando...
La pagina si sta caricando...
La pagina si sta caricando...
-
 1
1
-
 2
2
-
 3
3
-
 4
4
-
 5
5
-
 6
6
-
 7
7
-
 8
8
-
 9
9
-
 10
10
-
 11
11
-
 12
12
-
 13
13
-
 14
14
-
 15
15
-
 16
16
-
 17
17
-
 18
18
-
 19
19
-
 20
20
-
 21
21
-
 22
22
-
 23
23
-
 24
24
-
 25
25
-
 26
26
-
 27
27
-
 28
28
-
 29
29
-
 30
30
-
 31
31
-
 32
32
-
 33
33
-
 34
34
-
 35
35
-
 36
36
-
 37
37
-
 38
38
-
 39
39
-
 40
40
-
 41
41
-
 42
42
-
 43
43
-
 44
44
-
 45
45
-
 46
46
-
 47
47
-
 48
48
-
 49
49
-
 50
50
-
 51
51
-
 52
52
-
 53
53
-
 54
54
-
 55
55
-
 56
56
-
 57
57
-
 58
58
-
 59
59
-
 60
60
-
 61
61
-
 62
62
-
 63
63
-
 64
64
-
 65
65
-
 66
66
-
 67
67
-
 68
68
-
 69
69
-
 70
70
-
 71
71
-
 72
72
-
 73
73
-
 74
74
-
 75
75
-
 76
76
-
 77
77
-
 78
78
-
 79
79
-
 80
80
-
 81
81
-
 82
82
-
 83
83
-
 84
84
-
 85
85
-
 86
86
-
 87
87
-
 88
88
-
 89
89
-
 90
90
-
 91
91
-
 92
92
-
 93
93
-
 94
94
-
 95
95
-
 96
96
-
 97
97
-
 98
98
-
 99
99
-
 100
100
-
 101
101
-
 102
102
-
 103
103
-
 104
104
-
 105
105
-
 106
106
-
 107
107
-
 108
108
-
 109
109
-
 110
110
-
 111
111
-
 112
112
-
 113
113
-
 114
114
-
 115
115
-
 116
116
-
 117
117
-
 118
118
-
 119
119
-
 120
120
-
 121
121
-
 122
122
-
 123
123
-
 124
124
-
 125
125
-
 126
126
-
 127
127
-
 128
128
-
 129
129
-
 130
130
-
 131
131
-
 132
132
-
 133
133
-
 134
134
-
 135
135
-
 136
136
-
 137
137
-
 138
138
-
 139
139
-
 140
140
-
 141
141
-
 142
142
-
 143
143
-
 144
144
-
 145
145
-
 146
146
-
 147
147
-
 148
148
-
 149
149
-
 150
150
-
 151
151
-
 152
152
-
 153
153
-
 154
154
-
 155
155
-
 156
156
-
 157
157
-
 158
158
-
 159
159
-
 160
160
-
 161
161
-
 162
162
-
 163
163
-
 164
164
-
 165
165
-
 166
166
-
 167
167
-
 168
168
-
 169
169
-
 170
170
-
 171
171
-
 172
172
-
 173
173
-
 174
174
-
 175
175
-
 176
176
-
 177
177
-
 178
178
-
 179
179
-
 180
180
-
 181
181
-
 182
182
-
 183
183
-
 184
184
-
 185
185
-
 186
186
-
 187
187
-
 188
188
-
 189
189
-
 190
190
-
 191
191
-
 192
192
-
 193
193
-
 194
194
-
 195
195
-
 196
196
-
 197
197
-
 198
198
-
 199
199
-
 200
200
-
 201
201
-
 202
202
-
 203
203
-
 204
204
-
 205
205
-
 206
206
-
 207
207
-
 208
208
-
 209
209
-
 210
210
-
 211
211
-
 212
212
-
 213
213
-
 214
214
-
 215
215
-
 216
216
-
 217
217
-
 218
218
-
 219
219
-
 220
220
-
 221
221
-
 222
222
-
 223
223
-
 224
224
-
 225
225
-
 226
226
-
 227
227
-
 228
228
-
 229
229
-
 230
230
-
 231
231
-
 232
232
-
 233
233
-
 234
234
-
 235
235
-
 236
236
-
 237
237
-
 238
238
-
 239
239
-
 240
240
-
 241
241
-
 242
242
-
 243
243
-
 244
244
-
 245
245
-
 246
246
-
 247
247
-
 248
248
-
 249
249
-
 250
250
-
 251
251
-
 252
252
-
 253
253
-
 254
254
-
 255
255
-
 256
256
-
 257
257
-
 258
258
-
 259
259
-
 260
260
-
 261
261
-
 262
262
-
 263
263
-
 264
264
-
 265
265
-
 266
266
-
 267
267
-
 268
268
-
 269
269
-
 270
270
-
 271
271
-
 272
272
-
 273
273
-
 274
274
-
 275
275
-
 276
276
-
 277
277
-
 278
278
-
 279
279
-
 280
280
-
 281
281
-
 282
282
-
 283
283
-
 284
284
-
 285
285
-
 286
286
-
 287
287
-
 288
288
-
 289
289
-
 290
290
-
 291
291
-
 292
292
-
 293
293
-
 294
294
-
 295
295
-
 296
296
-
 297
297
-
 298
298
-
 299
299
-
 300
300
-
 301
301
-
 302
302
-
 303
303
-
 304
304
-
 305
305
-
 306
306
-
 307
307
-
 308
308
-
 309
309
-
 310
310
-
 311
311
-
 312
312
-
 313
313
-
 314
314
-
 315
315
-
 316
316
-
 317
317
-
 318
318
-
 319
319
-
 320
320
-
 321
321
-
 322
322
-
 323
323
-
 324
324
-
 325
325
-
 326
326
-
 327
327
-
 328
328
-
 329
329
-
 330
330
-
 331
331
-
 332
332
-
 333
333
-
 334
334
-
 335
335
-
 336
336
-
 337
337
-
 338
338
-
 339
339
-
 340
340
-
 341
341
-
 342
342
-
 343
343
-
 344
344
-
 345
345
-
 346
346
-
 347
347
-
 348
348
-
 349
349
-
 350
350
-
 351
351
-
 352
352
-
 353
353
-
 354
354
-
 355
355
-
 356
356
-
 357
357
-
 358
358
-
 359
359
-
 360
360
-
 361
361
-
 362
362
-
 363
363
-
 364
364
-
 365
365
-
 366
366
-
 367
367
-
 368
368
-
 369
369
-
 370
370
-
 371
371
-
 372
372
-
 373
373
-
 374
374
-
 375
375
-
 376
376
-
 377
377
-
 378
378
-
 379
379
-
 380
380
-
 381
381
-
 382
382
-
 383
383
-
 384
384
-
 385
385
-
 386
386
-
 387
387
-
 388
388
-
 389
389
-
 390
390
-
 391
391
-
 392
392
-
 393
393
-
 394
394
-
 395
395
-
 396
396
-
 397
397
-
 398
398
-
 399
399
-
 400
400
-
 401
401
-
 402
402
-
 403
403
-
 404
404
-
 405
405
-
 406
406
-
 407
407
-
 408
408
-
 409
409
-
 410
410
-
 411
411
-
 412
412
-
 413
413
-
 414
414
-
 415
415
-
 416
416
-
 417
417
-
 418
418
-
 419
419
-
 420
420
-
 421
421
-
 422
422
-
 423
423
-
 424
424
-
 425
425
-
 426
426
-
 427
427
-
 428
428
-
 429
429
-
 430
430
-
 431
431
-
 432
432
-
 433
433
-
 434
434
-
 435
435
-
 436
436
-
 437
437
-
 438
438
-
 439
439
-
 440
440
-
 441
441
-
 442
442
-
 443
443
-
 444
444
-
 445
445
-
 446
446
-
 447
447
-
 448
448
-
 449
449
-
 450
450
-
 451
451
-
 452
452
-
 453
453
-
 454
454
-
 455
455
-
 456
456
-
 457
457
-
 458
458
-
 459
459
-
 460
460
-
 461
461
-
 462
462
-
 463
463
-
 464
464
-
 465
465
-
 466
466
-
 467
467
-
 468
468
-
 469
469
-
 470
470
-
 471
471
-
 472
472
-
 473
473
-
 474
474
-
 475
475
-
 476
476
-
 477
477
-
 478
478
-
 479
479
-
 480
480
-
 481
481
-
 482
482
-
 483
483
-
 484
484
-
 485
485
-
 486
486
-
 487
487
-
 488
488
-
 489
489
-
 490
490
-
 491
491
-
 492
492
-
 493
493
-
 494
494
-
 495
495
-
 496
496
-
 497
497
-
 498
498
-
 499
499
-
 500
500
-
 501
501
-
 502
502
-
 503
503
-
 504
504
-
 505
505
-
 506
506
-
 507
507
-
 508
508
-
 509
509
-
 510
510
-
 511
511
-
 512
512
-
 513
513
-
 514
514
-
 515
515
-
 516
516
-
 517
517
-
 518
518
-
 519
519
-
 520
520
-
 521
521
-
 522
522


Canon i-SENSYS MF217w Manuale utente
- Categoria
- Multifunzionali
- Tipo
- Manuale utente
- Questo manuale è adatto anche per
in altre lingue
- English: Canon i-SENSYS MF217w User manual
Documenti correlati
-
Canon i-SENSYS LBP710Cx Guida utente
-
Canon 6870i Image Runner Advance Dx Guida utente
-
Canon imageFORMULA DR-M1060 Guida utente
-
Canon LBP312 Manuale utente
-
Canon TBA Manuale utente
-
-
-
Canon imageFORMULA CR-120 Guida utente
-
Canon imageFORMULA DR-C230 Manuale utente
-
Canon i-SENSYS LBP351x Manuale del proprietario
Altri documenti
-
KYOCERA FS-C1020MFP Manuale del proprietario
-
Sharp MX-C250E Manuale del proprietario
-
Ricoh Aficio SP C242SF Guida utente
-
-
HP ENVY 7643 e-All-in-One Printer Manuale del proprietario
-
Panasonic KXP6150 Istruzioni per l'uso
-
-
Sharp AR-6020N Istruzioni per l'uso
-
Ricoh P C600 Manuale utente
-
Lexmark P315 Manuale utente