
Martello perforatore
ISTRUZIONI PER L’USO E ISTRUZIONI DI SICUREZZA
Istruzioni originali
Hammer drill
INSTRUCTION MANUAL AND SAFETY INSTRUCTIONS
Translation of the original instructions
ATTENZIONE! Prima di usare la macchina, leggete attentamente le istruzioni per l’uso
CAUTION! Before starting the machine, read the operating instructions carefully
MMarPer
20-09-2016

- 2 -
i
AVVERTENZE DI SICUREZZA GENERALE
ATTENZIONE! Leggere tutte le avvertenze e tutte le
istruzioni.
La mancata ottemperanza alle avvertenze e alle istruzioni
può dare luogo a scosse elettriche, incendio e/o lesioni serie.
La scrupolosa osservanza di queste avvertenze con l’utilizzo
dei mezzi di protezione individuale, minimizzano i rischi di
incidente ma non li eliminano completamente.
Conservare tutte le avvertenze e le istruzioni per riferi-
menti futuri.
Il termine “utensile elettrico” delle avvertenze si riferisce agli
utensili elettrici azionati mediante collegamento alla rete (con
cavo) o azionati a batteria (senza cavo).
Queste istruzioni si riferiscono ad un utensile elettrico fabbri-
cato in più modelli e versioni; leggete attentamente le istruzioni
ed applicatele all’utensile elettrico in vostro possesso.
1) Sicurezza dell’area di lavoro
a) Tenere pulita e ben illuminata l’area di lavoro. Le aree
ingombre e/o poco illuminate possono provocare incidenti.
b) Non far funzionare utensili elettrici in atmosfere
esplosive, ad esempio in presenza di liquidi, gas, o pol-
veri infiammabili. Gli utensili elettrici creano scintille che
possono provocare l’accensione di polveri o fumi.
c) Tenere i bambini e i passanti a distanza durante il fun-
zionamento di un utensile elettrico. Le distrazioni possono
far perdere il controllo dell’utensile.
d) Mantenete in un luogo sicuro i sacchi di nylon presenti
nell’imballaggio. I sacchi possono provocare il soffocamen-
to e i bambini non devono entrarne in possesso.
e) Usate l’utensile in un luogo con un sufficiente ricam-
bio d’aria. L’areazione è necessaria per il raffreddamento
dell’utensile e per eliminare impurità nell’aria provocate
dalla lavorazione.
f) Non far funzionare utensili elettrici all’aperto in presen-
za di pioggia, nebbia, temporale, alte e basse temperature,
o in ambienti bagnati o umidi. L’utilizzo in queste condizioni
può provocare la folgorazione.
2) Sicurezza elettrica
a) La spina dell’utensile elettrico deve corrispondere
alla presa. Mai modificare la spina in alcun modo. Non
utilizzare adattatori con utensili elettrici dotati di messa
a terra (a massa). Spine non modificate e prese corrispon-
denti riducono il rischio di scossa elettrica.
b) Evitare il contatto del corpo con superfici messe a
terra o a massa quali tubi, radiatori, cucine e frigoriferi.
Se il vostro corpo è a terra o a massa, il rischio di scossa
elettrica aumenta.
c) Non esporre gli utensili elettrici alla pioggia e non
utilizzarli in luoghi umidi. L’ingresso di acqua in un utensile
elettrico aumenta il rischio di scossa elettrica.
d) Non usurare il cavo. Non utilizzare mai il cavo per traspor-
tare, tirare o scollegare dalla presa di rete l’utensile elettrico.
Tenere il cavo distante da calore, olio, bordi affilati o parti in
movimento. Cavi danneggiati o attorcigliati aumentano il rischio
di scossa elettrica.
e) Quando si aziona un utensile elettrico all’esterno, usare
un cavo di prolunga adeguato per l’uso in esterni. L’uso
di un cavo adeguato riduce il rischio di scossa elettrica.
f) Utilizzare un’alimentazione elettrica protetta da un
interruttore differenziale (RCD). L’utilizzo di un interruttore
differenziale (RCD) riduce il rischio di scossa elettrica.
g) L’alimentazione elettrica deve corrispondere a quella
indicata sull’utensile elettrico. Una alimentazione elettrica
non idonea genera malfunzionamenti ed incidenti.
h) Verificate periodicamente il cavo di alimentazione
elettrica. Non schiacciate o calpestate il cavo di alimen-
tazione elettrica. Un cavo danneggiato è fonte di scosse
elettriche. Se danneggiato estraete la spina e non usate
l’utensile elettrico.
i) In caso di dubbio in campo elettrico affidatevi ad
tecnico specializzato di comprovata esperienza. L’utilizzo
dell’elettricità in modo non sicuro è molto pericoloso per la
vostra ed altrui incolumità.
3) Sicurezza personale
a) Non distrarsi mai, controllare quello che si sta facendo
e usare il buon senso quando si azionano utensili elet-
trici. Non azionare l’utensile quando si è stanchi o sotto
l’influsso di droghe, alcol o medicinali. Un momento di
disattenzione durante l’azionamento di utensili elettrici può
dare luogo a serie lesioni personali.
b) Usare un’apparecchiatura di protezione personale.
Indossare sempre protezioni per gli occhi. Le apparecchia-
ture di protezione quali maschere antipolvere, abbigliamento
robusto, calzature di sicurezza antiscivolo, casco di sicu-
rezza, guanti di sicurezza e protezioni per l’udito riducono
la possibilità di subire lesioni personali.
c) Prevenire le accensioni accidentali. Assicurarsi che
l’interruttore sia in posizione di spento prima di collegare
l’utensile alla rete elettrica e/o ai gruppi di batterie, prima
di prenderlo o di trasportarlo. Trasportare utensili elettrici
con il dito sull’interruttore o collegarli in rete con l’interruttore
in posizione di accensione può provocare incidenti.
d) Rimuovere qualsiasi chiave di regolazione prima di
accendere l’utensile elettrico. Una chiave lasciata attaccata
ad una parte rotante dell’utensile elettrico può provocare
lesioni personali.
e) Non sbilanciarsi. Mantenere sempre la posizione e
l’equilibrio appropriati. Questo permette di controllare
meglio l’utensile elettrico in situazioni impreviste.
f) Vestirsi in modo appropriato. Non indossare vestiti
larghi o gioielli. Tenere capelli, indumenti e guanti distanti
dalle parti in movimento. Vestiti larghi, gioielli o capelli
lunghi possono impigliarsi nelle parti in movimento.
g) Se sono previsti dispositivi da collegare ad impianti
per l’estrazione e la raccolta di polvere, accertarsi che
siano collegati e usati in maniera appropriata. L’uso di
questi dispositivi può ridurre i rischi correlati alla polvere.
h) L’utilizzatore è responsabile verso terzi di eventuali
incidenti o danni a persone o cose. Un uso improprio
provoca incidenti e danni.
i) E’ vietato l’utilizzo a piedi nudi o con piedi e/o mani
bagnati/e. L’utilizzo in queste condizioni può provocare la
folgorazione.
l) La lavorazione di materiali nocivi alla salute deve avve-
nire nel rispetto delle leggi vigenti. Alcuni tipi di polveri e
materiali come metalli, legni, vernici ecc. sono molto dannosi
alla salute. Salvaguardare la propria ed altrui salute adottando
protezioni ed accorgimenti idonei.
m) Non avvicinarsi alle feritoie di espulsione dell’aria
di raffreddamento. L’aria generata può contenere residui
di lavorazione, piccole parti dannose per le vie respiratorie
e per gli occhi.
n) Non coprire e non infilare cose sulle feritoie di raf-
freddamento. La mancata ventilazione dell’utensile elettrico
può generare un incendio. Accedere a parti interne può
danneggiare l’utensile e provocare la folgorazione.

- 3 -
o) Non utilizzare l’utensile elettrico se le protezioni
(schermi, pannelli, sportelli ecc.) sono aperti, danneggiati
o mancanti. Le protezioni correttamente installate salvaguar-
dano la vostra salute e consentono un utilizzo in sicurezza.
4) Uso e manutenzione degli utensili elettrici
a) Non forzare l’utensile elettrico. Usare l’utensile adatto
per l’operazione da eseguire. L’utensile elettrico appropriato
permette di eseguire il lavoro con maggiore efficienza e
sicurezza senza essere costretti a superare i parametri
d’uso previsti.
b) Non usare l’utensile elettrico se l’interruttore di ac-
censione e spegnimento non si aziona correttamente.
Qualsiasi utensile elettrico che non può essere controllato
con l’interruttore è pericoloso e deve essere sottoposto a
riparazioni.
c) Scollegare la spina dalla rete di alimentazione e/o il
gruppo di batterie dall’utensile elettrico prima di effettuare
qualsiasi regolazione, cambiare accessori o riporre gli
utensili elettrici. Tali misure di sicurezza preventiva riducono
il rischio di avvio accidentale dell’utensile elettrico.
d) Riporre utensili elettrici inutilizzati fuori della portata
dei bambini e non permetterne l’uso a persone inesperte
dell’utensile o che non conoscano queste istruzioni. Gli
utensili elettrici sono pericolosi se utilizzati da persone
inesperte.
e) Effettuare la manutenzione necessaria sugli utensili
elettrici. Verificare il possibile errato allineamento o
bloccaggio delle parti in movimento, la rottura delle
parti e qualsiasi altra condizione che possa influenzare
il funzionamento degli utensili elettrici. Se è danneggia-
to, far riparare l’utensile elettrico prima di utilizzarlo.
Numerosi incidenti sono provocati proprio dal cattivo stato
di manutenzione degli utensili elettrici.
f) Mantenere puliti e affilati gli strumenti di taglio (se
presenti). Strumenti di taglio in buone condizioni di manu-
tenzione e con bordi di taglio affilati sono meno suscettibili
di bloccarsi e sono più facili da controllare.
g) Usare l’utensile elettrico, gli accessori ecc., in confor-
mità con queste istruzioni, tenendo conto delle condizioni
di lavorazione e dell’operazione da eseguire. L’uso dell’u-
tensile elettrico per operazioni diverse da quelle previste può
dare luogo a situazioni pericolose.
i) Mantenete una distanza di sicurezza dalle parti in mo-
vimento. Toccare parti in movimento provoca lesioni serie.
l) Non modificate l’utensile elettrico. Togliere, sostituire o
aggiungere componenti non previsti dalle istruzioni, è vietato
ed annulla la garanzia.
m) Non abbandonare l’utensile elettrico in funzione.
Spegnetelo prima di lasciarlo incustodito per evitare pos-
sibili incidenti.
n) L’utensile elettrico non deve mai venire a contatto con
l’acqua o altri liquidi. L’utilizzo in queste condizioni può
provocare la folgorazione.
5) Assistenza
a) Fare effettuare le operazioni di manutenzione sugli
utensili elettrici da parte di personale tecnico qualificato
che utilizza soltanto ricambi originali. Questo permetterà
di mantenere la sicurezza dell’utensile elettrico.
b) Non tentare di riparare l’utensile elettrico o di accedere
ad organi interni. Interventi effettuati da personale non
qualificato e non autorizzato dalla Ditta costruttrice può
generare seri pericoli ed annulla la garanzia.
c) Richiedete solo ricambi originali. L’utilizzo di ricambi
non originali può compromettere la sicurezza dell’utensile
elettrico.
AVVERTENZE DI SICUREZZA DEL MARTELLO
PERFORATORE
a) Indossare delle protezioni per le orecchie quando si
usa l’utensile. L’esposizione ai rumori può provocare
una perdita dell’udito.
b) Utilizzare una o più impugnature supplementari, se for-
nite con l’utensile. La perdita di controllo può provocare
delle lesioni personali.
c) Tenere l’utensile con le superfici di presa isolate, quando
si effettua un’operazione nel corso della quale il disposi-
tivo di taglio può venire in contatto con dei cavi nascosti
oppure con il suo stesso cordone di alimentazione. Il
contatto con un conduttore “in tensione” può mettere “in
tensione” le parti metalliche esposte dell’utensile elettrico
e provocare uno shock elettrico all’operatore.
d) Prima di inserire o togliere le punte di foratura, staccare
la spina di alimentazione elettrica. Ogni manutenzione
deve avvenire in sicurezza per evitare incidenti provocati
da un avvio improvviso.
e) Le lavorazioni a soffitto, con utensile rivolto verso l’alto,
è fonte di maggior pericolo per l’utilizzatore. Utilizzate
un casco a protezione del capo per eventuali cadute di
materiale. Indossate occhiali a protezione della vista.
f) Nel caso di lavorazioni su edifici o strutture portanti, tuba-
zioni o recipienti chiusi è importante verificare, mediante
rilevatori, che all’interno non siano presenti: cavi elettrici
o telefonici, liquidi o gas in pressione (che possono essere
infiammabili e corrosivi), tubature ecc. Il taglio anche parzia-
le di opere murarie può indebolire la struttura dell’intero edificio
fino al crollo. La fuoriuscita di liquidi o gas può provocare uno
scoppio, un incendio, un allagamento.
g) Se l’utensile si blocca durante l’utilizzo, spegnerlo
subito. Non forzate con operazioni gravose per l’utensile.
h) Non avviare l’utensile se la punta é bloccata dentro il
pezzo. Se avvierete in queste condizioni si avrà un note-
vole momento di reazione con una rotazione pericolosa
dell’utensile.
i) Mantenete ben saldo l’utensile con entrambe le mani
e adottare una posizione di lavoro sicura. Gli sforzi
provocati dalla lavorazione provocano sollecitazioni che
è necessario contrastare con la vostra forza.
l) Assicurate il pezzo in lavorazione con una morsa o altro.
Un pezzo trattenuto con la mano può improvvisamente
provocare un incidente.
m) Attendete l’arresto completo dell’utensile elettrico
prima di posarlo. Le parti in movimento possono pro-
vocarne la perdita di controllo.
n) Non utilizzare una punta da foratura o scalpello non
specificatamente realizzata/o dal produttore di utensili
e da lui consigliata/o. Il semplice fatto che la punta/scal-
pello possa essere fissata/o al vostro utensile elettrico non
garantisce un funzionamento in tutta sicurezza.
o) Non usare una punta da foratura o scalpello danneg-
giato. Prima di ogni utilizzo esaminare gli utensili di taglio.
p) Posizionare il cavo lontano dalle parti in rotazione. Se
perdete il controllo, il cavo può essere tagliato oppure
attorcigliarsi e la vostra mano oppure il braccio può essere
tirato nelle parti in rotazione.
q) Non fare funzionare l’utensile elettrico mentre lo si
porta a fianco. Un contatto accidentale con le parti in
rotazione potrebbe far impigliare i vostri vestiti e attirare
l’apparecchio addosso a voi.
r) Pulire con regolarità le aperture di ventilazione dell’u-
tensile elettrico. Il ventilatore del motore attirerà la povere
all’interno dell’alloggiamento e un accumulo eccessivo
di polvere di metallo può provocare dei pericoli elettrici.

- 4 -
s) Non far funzionare l’utensile elettrico in prossimità di
materiali infiammabili. Le scintille potrebbero provocare
un incendio.
t) Non utilizzare delle punte che necessitano di refrigeranti
liquidi. L’utilizzo di acqua o di altri refrigeranti liquidi può
provocare una scossa elettrica.
AVVERTENZE DI SICUREZZA PER LA
RUMOROSITA’ E PER LE VIBRAZIONI
Il livello di rumorosità e di vibrazioni riportate nel foglio
allegato, sono valori medi di utilizzo dell’elettroutensile.
L’impiego di accessori di taglio diversi, materiali diversi,
assenza di manutenzione all’elettroutensile influiscono in
modo significativo nelle emissioni sonore e nelle vibrazioni.
Di conseguenza adottate tutte le misure preventive in modo
da eliminare possibili danni dovuti ad un rumore elevato e
alle sollecitazioni da vibrazioni; indossate cuffie antirumore,
guanti antivibrazioni, effettuate delle pause durante la lavora-
zione, mantenete efficiente l’elettroutensile e gli accessori.
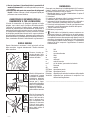
RISCHI RESIDUI
Queste illustrazioni mostrano i rischi principali nell’uso
della macchina. Leggete attentamente il libretto istruzioni
della macchina.
Rumore elevato ge-
nerato durante l’uso.
Indossate cuffie a pro-
tezione dell’udito.
Rischio di folgorazione
o esplosione a causa
di forature di canalette
elettriche o tubazioni
con fluidi in pressione
(acqua, gas...). Impu-
gnare con entrambe le
mani le 2 impugnature
isolate dell’utensile.
Utilizzare un rilevatore di
parti metalliche nascoste.
Rischio di scossa elet-
trica con pericolo di
morte. Non toccate le
parti in tensione elet-
trica e mantenete una
distanza di sicurezza.
Prima di ogni manu-
tenzione scollegate la
spina dalla presa di
alimentazione.
SIMBOLOGIA
Osservate con attenzione la simbologia della fig.B e memo-
rizzate il rispettivo significato. Una corretta interpretazione
dei simboli consente un uso più sicuro.
1 Modello, dati tecnici e nr. lotto di fabbricazione. Le prime 2
cifre del lotto indicano l’anno.
2 Attenzione!
3 Leggete con attenzione tutte le istruzioni prima dell’uso.
4 Indossare guanti a protezione delle mani.
5 Indossare occhiali a protezione degli occhi, cuffie antiru-
more e maschera a protezione delle vie respiratorie.
6 Pericolo di schiacciamento. Prima di ogni manutenzione
staccate il cavo di alimentazione elettrica dalla presa.
7 Doppio isolamento elettrico.
8 Marcature (se presenti).
9 I rifiuti elettrici ed elettronici possono contenere so-
stanze pericolose per l’ambiente e per la salute umana;
non devono pertanto essere smaltiti con quelli domestici
ma mediante una raccolta separata negli appositi centri di
raccolta o riconsegnati al venditore nel caso di acquisto
di una apparecchiatura nuova analoga. Lo smaltimento
abusivo dei rifiuti comporta l’applicazione di sanzioni
amministrative.
V Volt
Hz Her tz
~ corrente alternata
W Watt
m metri
mm millimetri
n0 velocità a vuoto
min-1 giri al minuto / percussioni al minuto
s secondo
dB decibel
SDS plus tipo attacco punta
SDS max tipo attacco punta
Rotostop
dispositivo per escludere la rotazione dello scalpello
Variolock dispositivo per posizionare lo scalpello in un
determinata angolazione
____________________________________________

- 5 -
Vi ringraziamo per averci preferito nella scelta di questo
utensile elettrico, di seguito chiamato martello perforatore.
ATTENZIONE! Il martello perforatore è idoneo, con
l’utilizzo di specifiche punte, a forare vari materiali come
metallo e legno senza percussione oppure calcestruzzo
e laterizio con percussione, inoltre può essere usato per
piccoli lavori di scalpellatura con sola percussione.
E’ vietato l’utilizzo su materiali pericolosi per la salute e
in ambienti con pericolo di incendio/esplosione.
Questo istruzioni riportano le informazioni e quanto ritenuto
necessario per il buon uso, la conoscenza e la normale ma-
nutenzione dell’utensile. Esse non riportano le informazioni
sulle tecniche di lavorazione dei vari materiali; l’utilizzatore
troverà maggiori notizie su libri e pubblicazioni specifiche o
partecipando a corsi di specializzazione.
COMPONENTI
Fare riferimento alla fig. A e seguenti, allegate alle presenti
istruzioni.
1 Protezione antipolvere
2 Mandrino di bloccaggio punta
3 Interruttore di avvio/arresto
4 Impugnatura supplementare
5 Feritoie di ventilazione motore
6 Selettore rotazione inserita/disinserita
7 Selettore percussione inserita/disinserita
8 Asta finecorsa (se presente)
9 Impugnatura principale
10 Tappo per ingrassaggio (se presente)
11 Spina e cavo di alimentazione
12 Limitatore di velocità (se presente)
13 Selettore senso rotazione mandrino (se presente)
14 Cuffia raccoglipolvere (se presente)
15 Spia di tensione elettrica (se presente)
16 Pulsante di ritegno (se presente)
INSTALLAZIONE
ATTENZIONE! La Ditta costruttrice declina ogni
responsabilità per gli eventuali danni diretti e/o indiretti
causati da un errato allacciamento.
ATTENZIONE! Prima di effettuare le seguenti opera-
zioni assicuratevi che la spina sia scollegata dalla rete
elettrica.
TRASPORTO
Per trasportare l’utensile utilizzate sempre il suo imballo o
la sua valigetta (se presente); questo lo preserverà da urti,
polvere e umidità che ne possono compromettere il regolare
funzionamento.
Durante il trasporto togliete la punta dal mandrino dell’u-
tensile.
MOVIMENTAZIONE
Afferrate saldamente l’impugnatura (pos.9) senza azionare
l’interruttore, mantenetelo lontano dal vostro corpo e dopo
l’uso appoggiatelo di fianco senza battere.
MESSA IN SERVIZIO
Nel luogo che utilizzerete l’utensile elettrico è opportuno
considerare:
- che la zona non sia umida e sia al riparo dagli agenti
atmosferici.
- che attorno sia prevista un’ampia zona operativa libera da
impedimenti.
- che vi sia una buona illuminazione.
- che sia utilizzata in vicinanza dell’interruttore generale con
differenziale.
- che l’impianto di alimentazione sia dotato di messa a terra
conforme alle norme (solo se l’utensile elettrico è di classe
I, cioè dotato di spina con cavo di terra).
- che la temperatura ambiente sia compresa tra 10° e 35°C.
- che l’ambiente non sia in atmosfera infiammabile/esplo-
siva.
Estraete l’utensile ed i componenti e verificate visivamente
la loro perfetta integrità; a questo punto procedete ad una
accurata pulizia per togliere dalle superfici metalliche gli
eventuali oli protettivi utilizzati per il trasporto.
MONTAGGIO IMPUGNATURA SUPPLEMENTARE (fig.E pos.4)
Infilate l’anello dell’impugnatura supplementare nella parte
anteriore dell’utensile; prestare attenzione ad eventuali sedi
sagomate che devono innestarsi per un corretto accop-
piamento. Prima di fissarla, ruotatela in modo da trovare
la giusta posizione d’uso. Svitate l’impugnatura in senso
antiorario per allentare, in senso orario per fissare.
MONTAGGIO ASTA FINECORSA (fig.E pos.8, se presente)
Infilate l’asta nel foro presente nell’impugnatura supplemen-
tare e fissatela avvitando l’impugnatura stessa.
MONTAGGIO PUNTA/SCALPELLO (fig.C)
1) Scollegate l’alimentazione elettrica staccando la spina
dalla presa elettrica.
2) Verificate che l’attacco della punta sia compatibile con il
mandrino dell’utensile osservando i dati tecnici di entrambi;
non è possibile installare una punta con attacco diverso o
con attacco cilindrico.
3) Pulite accuratamente l’attacco della punta ed ingrassate
leggermente la superficie con grasso lubrificante; se
presente, utilizzare il grasso fornito nella confezione
dell’utensile.
4) Tirate verso di voi il mandrino di bloccaggio (pos.2);
questa operazione aprirà le griffe interne del mandrino.
5) Inserite la punta, ruotandola leggermente e spingetela
fino al fermo di fondo.
6) Rilasciate il mandrino, la punta rimarrà bloccata auto-
maticamente.
7) Verificate il bloccaggio della punta tirandola verso
l’esterno.
ESTRAZIONE PUNTA/SCALPELLO (fig.D)
1) Scollegate l’alimentazione elettrica staccando la spina
dalla presa elettrica.
2) Tirate verso di voi il mandrino di bloccaggio (pos.2);
questa operazione aprirà le griffe interne del mandrino.
3) Estraete la punta.
4) Rilasciate il mandrino.
SELEZIONE DELLE FUNZIONI ROTAZIONE-PERCUSSIONE
Osservate attentamente la fig.H ed operate di conseguenza.
AVVIAMENTO, ARRESTO E REGOLAZIONE
VELOCITA’
ATTENZIONE! Prima di avviare l’utensile elettrico è
obbligatorio indossare occhiali, guanti, maschera e cuffie
di protezione (non in dotazione).

- 6 -
ATTENZIONE! Durante l’utilizzo fate in modo che
nessuno si avvicini alla vostra zona di lavoro.
Avviamento
1) Afferrate saldamente entrambe le impugnature con le mani
2) Per avviare premete l’interruttore (pos.3)
L’interruttore è del tipo ad “azione mantenuta”; pertanto
l’utensile elettrico rimarrà acceso per il tempo che voi
mantenete premuto l’interruttore.
Arresto
Per arrestare rilasciate l’interruttore, mantenendo ben saldo
l’apparecchio.
Funzionamento continuo (se presente)
Per un funzionamento continuo è necessario, dopo le fasi
di “avviamento”, premere il pulsante (pos.16) in modo da
bloccare l’interruttore.
Successivamente per arrestare la macchina premere l’inter-
ruttore (pos.3) e poi rilasciarlo subito.
ATTENZIONE! Quando lavorate con l’ interruttore in mo-
dalità continua, non abbandonate mai la presa sull’impu-
gnatura principale in modo che, in caso di pericolo, potete
arrestare la macchina immediatamente.
Servizio di funzionamento non continuo
Osservare le seguenti istruzioni solo se il vostro apparecchio
riporta l’informazione nei dati tecnici (esempio: S6 25%).
Far funzionare l’apparecchio con cicli identici di 10 minuti; acceso
per un tempo massimo di 2,5 minuti seguito da un periodo di
arresto di 7,5 minuti. Questa limitazione d’uso è necessaria
per evitare surriscaldamenti ai componenti dell’apparecchio e
successivi guasti; la mancata osservanza di quanto prescritto
annulla la garanzia.
Vi consigliamo di ripetere queste operazioni alcune volte
prima di iniziare il lavoro in modo da familiarizzare il più
possibile con i comandi.
Se osservate delle anomalie di funzionamento spegnete
l’utensile elettrico e consultate il capitolo “Problemi, cause
e rimedi”.
Quando non lavorate spegnete e staccate la spina dalla
presa.
ISTRUZIONI D’USO
Dopo aver letto attentamente i capitoli precedenti, seguite
scrupolosamente queste istruzioni che vi permetteranno di
ottenere il massimo delle prestazioni.
Procedete con calma in modo da prendere familiarità con tutti
i comandi; solo dopo aver acquisito una buona esperienza
riuscirete a sfruttarne a fondo tutte le potenzialità.
REGOLAZIONE ELETTRONICA DELLA VELOCITÀ MANDRINO
(se presente)
Premere gradualmente l’interruttore (pos.3) fino al raggiungi-
mento della velocità desiderata. Con una minor pressione si
otterranno velocità basse, mentre con una maggior pressione
si otterranno velocità alte.
REGOLAZIONE CAMPO DELLA VELOCITA’ MANDRINO
(fig.G, se presente)
Ruotate la rotellina zigrinata (pos.12) posta sull’interruttore,
in modo da limitare la corsa dell’interruttore e la velocità
massima del mandrino.
SELEZIONE SENSO DI ROTAZIONE DEL MANDRINO (fig.G,
se presente)
ATTENZIONE! L’operazione di inversione del senso di
rotazione deve essere eseguita con l’utensile elettrico
spento ed il mandrino fermo.
Per operazioni di foratura e avvitamento viti a filetto destro
(rotazione oraria) spostate il selettore senso di rotazione
(pos.13) su ‘R’, ‘<--’.
Per operazioni di svitamento, rimozione di punte incastrate
e avvitamento viti con filetto sinistro (rotazione antioraria)
spostate il selettore senso di rotazione su ‘L’, ‘-->’.
MONTAGGIO CUFFIA RACCOGLIPOLVERE (fig.F, se presente)
Questo accessorio in gomma (pos.14) è utile per raccogliere
la polvere prodotta da una foratura verticale. Infilare la cuffia
nella punta e durante l’uso non trattenerla con la mano.
INSERIMENTO E DISINSERIMENTO PERCUSSIONE
ATTENZIONE! L’operazione di inserimento percussione e
viceversa, deve essere eseguita con l’utensile spento ed
il mandrino fermo.
Osservate attentamente la fig.H ed operate di conseguenza.
Non inserire la percussione per forare su metallo o legno.
INSERIMENTO E DISINSERIMENTO ROTAZIONE
ATTENZIONE! L’operazione di inserimento rotazione e
viceversa, deve essere eseguita con l’utensile spento ed
il mandrino fermo.
Osservate attentamente la fig.H ed operate di conseguenza.
SOSTITUZIONE PUNTA DA FORARE / SCALPELLO
Vedere capitolo “MESSA IN SERVIZIO”.
PUNTE/SCALPELLI (non inclusi)
Acquistate delle punte/scalpelli di qualità, con attacco idoneo
alle caratteristiche del mandrino del demolitore e adatte al
materiale in lavorazione. Rivolgetevi al vostro rivenditore di
fiducia che potrà consigliarvi al meglio.
La nostra azienda produce un’ampia gamma di punte/
scalpelli adatti ai più svariati impieghi (metallo, legno,
laterizio ecc.).
USO
Indossate sempre i dispositivi di protezione individuale
elencati nel cap. Avvertenze.
Assicuratevi che il pezzo sia correttamente bloccato; se il
pezzo è piccolo fissatelo con una morsa o morsetti.
Foratura su metallo e legno
Non utilizzare la funzione percussione; se l’utensile non ha
la possibilità di disinserire la percussione, non forare su
metallo o legno.
Utilizzate punte idonee e mantenetele ben affilate.
Usate un punteruolo per marcare il punto di inizio foratura.
Per l’esecuzione di fori di diametro elevato, eseguite dei fori
in serie con diametro crescente per evitare il bloccaggio della
punta nel foro e di sovraccaricare in modo anomalo l’utensile.
Quando siete in prossimità dell’uscita della punta dal pezzo,
riducete la pressione di foratura. Fate attenzione ai trucioli pro-
dotti che oltre ad essere molto caldi sono anche molto taglienti.
Foratura su laterizio
Non utilizzare la funzione percussione per piastrelle, into-
naci e mattoni leggeri, mentre innestate la percussione per
calcestruzzo e mattoni resistenti.
Utilizzate punte idonee con inserti al metallo duro e mante-

- 7 -
netele ben affilate.
Per l’esecuzione di fori di diametro elevato, eseguite dei fori
in serie con diametro crescente per evitare il bloccaggio della
punta nel foro e di sovraccaricare in modo anomalo l’utensile;
utilizzate inoltre delle punte a tazza dette “carotatrici” che
tagliano lungo una circonferenza per eseguire fori di grande
diametro (se consentito, vedi dati tecnici). Attenzione!
Rispettare sempre il diametro massimo consentito per il
vostro apparecchio osservando i dati tecnici delle istruzioni.
Scalpellatura
Innestate solo la funzione percussione senza rotazione
“ROTOSTOP”.
Utilizzate scalpelli idonei (piatti, a punta ecc.) e manteneteli
ben affilati.
Non applicare forze laterali o torsionali inclinando/ruotando
l’utensile. Procedete sfruttando la percussione senza for-
zare sull’utensile; non caricate eccessivamente l’utensile,
è sufficiente applicare una forza pari al peso dello stesso.
DEMOLITORI CON PUNTA FISSA (fig.L, se presente)
Per i demolitori con punta fissa (in modalità scalpellatura/
demolitore), è possibile
bloccare lo scalpello nella posizione desiderata .
Per posizionare la punta con l’angolo desiderato:
1) Scollegate l’alimentazione elettrica staccando la spina
dalla presa elettrica.
2) Ruotate il selettore (pos.6) nella posizione ‘’a’’
3) Afferrate lo scalpello con una mano e ruotatelo nel punto
desiderato.
4) Ruotate il selettore (pos.6) nella posizione ‘’b’’.
MANUTENZIONE
ATTENZIONE! Prima di ogni controllo o regolazione
staccate la spina dalla presa di alimentazione elettrica.
ATTENZIONE! Non manomettete o tentate di riparare
l’utensile elettrico.
ATTENZIONE! Una eventuale revisione interna o la
sostituzione delle spazzole in grafite del motore che si
usurano con l’uso, deve essere effettuata solo da un
centro assistenza autorizzato.
La durata e il costo d’esercizio dipendono anche da una
costante e scrupolosa manutenzione. Pulite regolarmente
ed abbiate cura del vostro utensile elettrico, vi garantirete
una perfetta efficienza ed una lunga durata dello stesso.
- Rimuovete la polvere e i residui di lavorazione con un
pennello a setole morbide.
- Non spruzzate o bagnate d’acqua l’utensile elettrico,
pericolo di infiltrazioni interne.
- Non usate infiammabili, detergenti o solventi vari. Le parti
in plastica sono aggredibili da agenti chimici.
- Non utilizzate un getto d’aria compressa per la pulizia:
pericolo lancio materiale!
- Prestate particolare attenzione alla pulizia dell’interruttore,
alle feritoie di ventilazione del motore, al mandrino.
Protezione antipolvere (pos.1):
- se danneggiata farla sostituire da un centro assistenza
autorizzato.
LUBRIFICAZIONE
Mandrino:
L’assenza della lubrificazione del foro del mandrino provoca
la mancata apertura dello stesso e il conseguente bloccaggio
della punta.
- ogni 3 ore di funzionamento pulite il mandrino ed inserite un
leggero strato di grasso lubrificante per parti meccaniche
nel foro del mandrino (pos.2).
- il codolo della punta deve essere pulito e leggermente
lubrificato prima del montaggio nel mandrino.
Organi meccanici:
Con “organi meccanici” si intendono i componenti accessi-
bili dal tappo per ingrassaggio (fig.M pos.10, se presente) e
che sono a vista dal foro; non è necessario smontare altre
parti dell’utensile e non è necessario smontare gli organi
meccanici.
- ogni 6 ore di funzionamento verificare la presenza del grasso;
se necessario aggiungere del grasso lubrificante quantità
min./max 20-25 grammi (tipo per cuscinetti/giunti/snodi,
al litio a bassa viscosità, campo di utilizzo -30°C/+120°C),
da inserire secondo le istruzioni seguenti:
1 Scollegate l’alimentazione elettrica staccando la spina
dalla presa elettrica.
2 Svitate il tappo (pos.10) con l’apposita chiave (se inclusa)
o con un attrezzo equivalente.
3 Verificate visivamente se gli organi meccanici necessitano
di ingrassaggio: la lubrificazione è corretta quando sono
rivestiti di un leggero strato di grasso. Se non è necessaria
alcuna lubrificazione passate al punto 5.
4 Inserite il grasso con un pennellino (non incluso) sugli
organi meccanici a vista (biella, manovella e relativi
cuscinetti/perni), in modo da coprirli con uno leggero
strato; insistete principalmente nelle zone dei cuscinetti/
perni per farlo penetrare. Attenzione! Non è necessario
riempire la camera di grasso in quanto provocherebbe un
malfunzionamento dell’elettroutensile (fuoriuscita del gras-
so, mancato funzionamento della percussione ecc.). Se il
grasso è attaccato alle pareti della camera, raccoglietelo
con il pennellino e depositatelo sugli organi meccanici; solo
se il grasso è sporco asportatelo e rimpiazzatelo con del
nuovo.
5 Pulire la zona del foro ed avvitate bene il tappo.
6 Pulire con uno straccio eventuali tracce di grasso sull’u-
tensile.
ATTENZIONE!
- Non inserire mai le dita dentro il foro.
- Non inserire il pennellino del grasso troppo in profondità.
- Non inserire mai il grasso con una spatola o con le dita.
- Non eccedere con la quantità di grasso; una quantità
eccessiva provoca il malfunzionamento dell’utensile.
- Non avviare mai l’utensile se il tappo non è corretta-
mente avvitato!

- 8 -
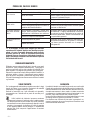
PROBLEMI, CAUSE E RIMEDI
PROBLEMA CAUSE RIMEDI
L’utensile elettrico
non si avvia Linea di alimentazione scollegata Verificate la linea di alimentazione elettrica
Spina non inserita Inserire la spina nella presa di alimentazione elettrica
e premere il pulsante di avvio
Guasto elettrico Rivolgetevi ad un centro di assistenza autorizzato
L’utensile elettrico
vibra molto Punta/scalpello danneggiato o sbilanciato Sostituire la punta/scalpello
Attacco della punta/scalpello non idoneo al
mandrino dell’utensile elettrico Utilizzare solo punte/scalpelli idonei secondo quanto
riportato nei dati tecnici
La punta/scalpello
non esce dal man-
drino
Punta/scalpello incastrata a causa dello
sporco, dalla mancata manutenzione e
lubrificazione o dell’attacco non conforme
Spruzzare qualche goccia di lubrificante all’interno
del mandrino e seguire attentamente le istruzioni
per estrarre la punta. Rivolgetevi ad un centro di
assistenza autorizzato. Questo inconveniente non
è coperto dalla garanzia.Protezione antipolvere danneggiata.
La percussione non
funziona Eccessiva quantità di grasso Rivolgetevi ad un centro assistenza autorizzato per
la rimozione/sostituzione del grasso in eccesso/
non idoneo; questo intervento non è compreso
nella garanzia.
Grasso non idoneo
ATTENZIONE! Se dopo aver eseguito gli interventi
sopra descritti l’utensile elettrico non funziona corretta-
mente o in caso di anomalie diverse da quelle indicate,
portatelo presso un centro di assistenza autorizzato
esibendo la prova di acquisto e richiedendo ricambi ori-
ginali. Fate sempre riferimento alle informazioni riportate
sull’etichetta dati tecnici.
IMMAGAZZINAMENTO
Effettuate una accurata pulizia di tutto l’utensile e sue parti
accessorie (vedi paragrafo Manutenzione). Proteggete le
parti non verniciate con un olio protettivo ed utilizzate l’im-
ballo originale o la valigetta (se presente) per proteggerla.
Riponete la macchina lontano dalla portata dei bambini, in
posizione stabile e sicura. Il luogo dovrà essere asciutto,
privo da polveri, temperato e protetto dai raggi solari diretti.
Al locale di rimessaggio non devono avere accesso i bambini
e gli estranei.
SMALTIMENTO
Per la salvaguardia ambientale procedete secondo le leggi
vigenti del Paese in cui vi trovate. Rivolgetevi alle autorità
competenti per maggiori notizie in merito.
Quando la macchina non è più utilizzabile né riparabile,
consegnatela con l’imballo ad un punto di raccolta per il
riciclaggio.
I rifiuti elettrici ed elettronici possono contenere
sostanze pericolose per l’ambiente e per la salute umana;
non devono pertanto essere smaltiti con quelli domestici
ma mediante una raccolta separata negli appositi centri di
raccolta o riconsegnati al venditore nel caso di acquisto
di una apparecchiatura nuova anologa. Lo smaltimento
abusivo dei rifiuti comporta l’applicazione di sanzioni
amministative.
GARANZIA
Il prodotto è tutelato a norma di legge contro non conformità
rispetto alle caratteristiche dichiarate purché sia stato utiliz-
zato esclusivamente nel modo descritto dalle istruzioni, non
sia stato manomesso in alcun modo, sia stato conservato
correttamente, sia stato riparato da tecnici autorizzati e, ove
previsto, siano stati utilizzati solo ricambi originali.
In caso di utilizzo industriale o professionale oppure in caso
di impiego simile la garanzia ha validità di 12 mesi.
Per emettere una richiesta di intervento in garanzia è ne-
cessario presentare la prova di acquisto al rivenditore o ad
centro assistenza autorizzato.

- 9 -

- 10 -
g
GENERAL SAFETY
WARNING! Read all warnings and all instructions.
Failure to follow warnings and instructions may result in
electric shock, fire and / or serious injury.
The strict observance of these warnings with the use
of personal protective equipment , minimize the risk of
accidents but do not eliminate them completely.
Save all warnings and instructions for future reference.
The term “ power tool “ of the warnings refers to your
power tools operated by connecting to the network (wired)
or battery operated (cordless).
These instructions are for a power tool manufactured in
several models and versions; please read the instructions ca-
refully and apply them to the power tool in your possession.
1) Work Area Safety
a) Keep clean and well lit work area. The areas cluttered
and / or poorly lit can cause accidents.
b) Do not operate power tools in explosive atmospheres,
such as in the presence of liquids, gases or inflammable
dusts. Power tools create sparks which may ignite dust
or fumes.
c) Keep children and bystanders away while operating
a power tool. Distractions can cause you to lose control
of the tool.
d) Keep in a safe place the nylon bags in the package.
The bags can cause suffocation and children should not
gain possession.
e) Use the tool in a location with adequate ventilation.
The ventilation is required for cooling the tool and to remove
impurities in the air caused by the machining .
f) Do not operate power tools outdoors in rain, fog,
storm, high and low temperatures or in wet or damp
environments. The use of these terms may result in electric
shock.
2) Electrical safety
a) Power tool cabinet must match the outlet. Never modify
the plug in any way. Do not use an adapter with power
tools equipped with a grounded (earthed). Unmodified
plugs and matching sockets reduce the risk of electric shock.
b) Avoid body contact with earthed or grounded surfaces
such as pipes, radiators, cookers and refrigerators. If
your body is on the ground or grounded, the risk of electric
shock is increased.
c) Do not expose power tools to rain or use in damp
locations. The entry of water into a power tool will increase
the risk of electric shock.
d) Do not wear out the cable. Never use the cord for
carrying, pulling or unplugging from the wall outlet power
tool. Keep the cord away from heat, oil, sharp edges or
moving parts. Damaged or entangled cords increase the
risk of electric shock.
e) When operating a power tool outdoors, use an extension
cord suitable for outdoor use. The use of an appropriate
cable reduces the risk of electric shock.
f) Use a power supply protected by a residual current
circuit breaker (RCD). The use of a residual current circuit
breaker (RCD) reduces the risk of electric shock.
g) The power supply must match the one specified on
the power tool. An unsuitable power supply generates
malfunctions and accidents.
h) Check periodically the electrical supply cable. Not
crushed or trampled the power supply cable. A damaged
power cord is a source of electric shock. If damaged pull
the plug and do not use the power tool .
i) In case of doubt in the electric field, rely on technician
with proven experience. The use of electricity in an unsafe
manner is very dangerous for your and others’ safety.
3) Personal Safety
a) Stay alert , check what you are doing and use common
sense when operating a power tool. Do not operate the
tool when you are tired or under the influence of drugs,
alcohol or medication. A moment of inattention while
operating power tools may result in serious personal injury.
b) Use of personal protective equipment. Always wear
eye protection. Protective equipment such as dust masks,
clothing sturdy, non-slip safety shoes, safety helmet, safety
gloves and hearing protection reduce the chance of injuring
yourself.
c) Prevent accidental starting. Make sure that the switch
is in the off position before connecting the tool to the
mains and/or battery packs, picking up or carry it. Carrying
power tools with your finger on the switch or connect them
in a network with the switch in the on position may cause
an accident .
d) Remove any adjusting key before turning the power
tool. A key left attached to a rotating part of the power tool
may result in personal injury.
e) Do not overreach. Always keep proper footing and
balance. This allows better control of the power tool in
unexpected situations.
f) Dress appropriately. Do not wear loose clothing or
jewelry. Keep your hair, clothing and gloves away from
moving parts. Loose clothes, jewelery or long hair can be
caught in moving parts.
g) If devices are provided for connection to equipment
for extraction and collection of dust, ensure these are
connected and properly used. The use of these devices
can reduce dust related hazards.
h) The user is responsible to third parties for any accident
or damage to persons or property. Improper use will cause
accidents and damage.
i) It is forbidden to use with bare feet or with wet feet/han-
ds. The use in these conditions may result in electric shock.
l) The processing of materials hazardous to health must
be in compliance with applicable laws. Some types of
powders and materials such as metals, wood , paint , etc.
are very harmful to health. Safeguard their own and others’
health protections and adopting suitable measures.
m) Do not touch any openings of exhaust air cooling. The
air generated can contain residues of processing, small parts
harmful to the respiratory tract and eyes.
n) Do not cover or stick things on the cooling holes. The
lack of ventilation of the power tool may cause fire. Access
to internal parts can cause damage to the tool and cause
electrocution.
o) Do not use the power tool if the protections (screens,
panels, doors, etc.) are opened, damaged or missing. The
guards properly installed safeguard your health and provide
safe operation.
4) Use and maintenance of power tools
a) Do not force the power tool. Use the right tool for the
task to be performed. The appropriate power tool allows
you to perform the work with greater efficiency and safety
without having to exceed the parameters of use envisaged.
b) Do not use the power tool if the switch does not turn
on and off properly. Any power tool that can not be con-

- 11 -
trolled with the switch is dangerous and must be subjected
to repairs.
c) Disconnect the plug from the power supply and/or
the battery pack from the power tool before making any
adjustments, changing accessories, or storing power
tools. Such preventive safety measures reduce the risk of
starting the power tool accidentally.
d) Store unused power tools out of the reach of children
and do not allow their use by unskilled persons who do
not know the tool or these instructions. Power tools are
dangerous in the hands of untrained users.
e) Perform the necessary maintenance on power tools.
Check the possible misalignment or blockage of moving
parts, breakage of parts and any other condition that may
affect the operation of power tools. If damaged, have the
power tool repaired before use. Many accidents are caused
just by the poor state of maintenance of power tools .
f) Keep tools sharp and clean cut (if any). Cutting tools in
a well maintained condition and with sharp cutting edges are
less likely to get stuck and are easier to control.
g) Use the power tool, accessories... in accordance
with these instructions, taking into account the working
conditions and the operation to be performed. The use of
the power tool for operations different from those intended
could result in a hazardous situation.
i) Maintain a safe distance from moving parts. Touch
moving parts causing serious injuries.
l) Do not modify the power tool. Remove, replace or add
components not covered by the instructions is prohibited
and will void the warranty.
m) Do not leave the power tool on. Turn it off before leaving
it unattended to prevent possible accidents.
n) The power tool must never come in contact with water
or other liquids. The use of these terms may result in
electric shock.
5) Support
a) Making perform maintenance on power tools by a
qualified technician using only original spare parts. This
will help to maintain the safety of the power tool.
b) Do not groped to repair the power tool or access to
internal organs. Interventions carried out by unqualified
and unauthorized by the Manufacturer can create serious
hazards and void the warranty.
c) Request only original spare parts. The use of unautho-
rized parts can compromise the safety of the power tool.
SAFETY OF HAMMER DRILL
a ) Wear ear protectors when using the tool. Exposure to
noise can cause hearing loss.
b ) Use one or more auxiliary handle, if provided with the
tool. Loss of control can cause personal injury.
c) Hold tool by insulated gripping surfaces, when perfor-
ming an operation during which the cutting device can
come in contact with hidden wiring or its own power
cord. The contact with a conductor “ supply” can put
“live“ exposed metal parts of the power tool and cause
an electric shock to the operator.
d) Before inserting or removing the drills, unplug the po-
wer supply. Any maintenance must be in place to prevent
accidents caused by a sudden start .
e) The processing in the ceiling, with the tool facing
upward, is the source of greatest danger for the user.
Use a helmet for head protection against falling material .
Wear goggles to protect the eyes .
f) In the case of work on buildings or structures, pipes or
containers is important to verify, by means of sensors,
within which there are no electric cables or telephone,
liquids or gases under pressure ( which may be flam-
mable and corrosive ), pipes etc. The partial cutting of
masonry can weaken the structure of the entire building
to collapse . The leaking of fluid or gas can cause an
explosion, a fire, a flood .
g ) If the tool crashes during use, turn it off immediately.
Do not force with heavy operations for the tool.
h ) Do not operate the tool if the tip is locked into the piece.
If start it in these conditions there will be significant time
to reaction with a rotation dangerous tool.
i) Hold the tool firmly with both hands and take a secure
stance. Efforts cause stress caused by work that is
necessary to fight with your strength.
l) Secure the workpiece with a chuck or other. A piece held
with the hand may suddenly cause an accident.
m ) Wait for the complete shutdown of the power tool
before placing it. Moving parts can cause loss of control.
n) Do not use a drill to drill or chisel is not specifically
created by the tool manufacturer and recommended by
him. The mere fact that the tip/chisel can be fixed in your
power tool does not guarantee a safe operation.
o) Do not use a chisel tip for drilling or damaged. Before
each use, examine the cutting tools .
p) Place the cable away from rotating parts. If you lose
control, the cord can be cut or twisted and your hand or
arm may be pulled into the rotating parts .
q) Do not run the power tool while carrying it to the side.
Accidental contact with rotating parts could not catch your
clothes and attracting the unit next to you.
r) Regularly clean the ventilation slots on the power tool.
The motor fan will draw the dust inside the housing and
excessive accumulation of powdered metal may cause
electrical hazards.
s ) Do not operate the power tool near flammable mate-
rials. Sparks could cause fire.
t ) Do not use the tips that require liquid coolants. The
use of water or other liquid coolants may result in an
electric shock.
SAFETY INSTRUCTIONS FOR THE NOISE
AND VIBRATIONS
The level of noise and vibration levels shown in the attached
sheet are average values of use of the tool. The use of diffe-
rent accessories, different materials, the absence of electric
tool maintenance have a significant influence in the noise
emissions and vibrations. Consequently taken all preventive
measures to eliminate possible damage due to high noise
and stress from vibration, wear ear defenders, anti-vibration
gloves, made of breaks during the work, maintain efficient
power tools and accessories.

- 12 -
RESIDUAL RISKS
These illustrations show the main risks in the use of the ma-
chine. Carefully read the instruction manual of the machine.
High noise generated
during the use. Wear
ear protection of he-
aring.
Risk of electric shock
or explosion due to
puncture of electri-
cal conduits or pipes
containing pressurized
fluids (water, gas ... ) .
Hold with both hands
2 insulated handles of
the tool.
Use a metal detector
hidden .
Risk of electric shock
and danger of death.
Do not touch live elec-
trical parts and keep a
safe distance. Before
any maintenance di-
sconnect the plug from
the power outlet.
SYMBOLS
Look carefully at the symbology of fig.B stored and their
meanings. A correct interpretation of the symbols can be
used more safely.
1 Model, technical data and lot number. The first 2 lot digits
indicate the production year.
2 Warning!
3 Carefully read all instructions before use.
4 Wear gloves to protect hands .
5 Wear eye to eye protection, hearing protection and
respiratory protection mask.
6 Risk of crushing. Before any maintenance, disconnect
the power cord from the outlet.
7 Double electric insulation.
8 Marking (if any).
9 Electric and electronic waste may contain substances
that are dangerous for the environment and for human
health. For this reason they must never be disposed of
together with domestic waste, but collected separately in
specific collection centres or returned to the retailer when
similar new equipment has been purchased. The illegal
disposal of such equipment may result in prosecution to
the full extent of the law.
V Volts
Hz Hertz
~ AC
W Watts
m meters
mm millimeters
n0 load speed
min-1 rpm / percussion per minute
s second
dB decibel
SDS plus type attack tip
SDS max type attack tip
Rotostop device to exclude the rotation of the chisel
Variolock device for positioning the chisel in a given angle
____________________________________________

- 13 -
Thank you for giving us the preferred choice of this power
tool , hereinafter called ‘hammer drill’.
WARNING! The hammer drill is suitable , with the use
of specific bits , drilling various materials such as metal
and wood without percussion or concrete and brick with
percussion, also can be used for small chiselling with
percussion only.
Is forbidden the use of materials hazardous to health and
environment with danger of fire / explosion.
This instruction guide contains information and as deemed
necessary for the proper use, the knowledge and the normal
maintenance of the tool. They do not report information
on the manufacturing techniques of various materials, the
user will find more news about books and publications or
by attending courses.
COMPONENTS
Refer to fig.A and the following , attached to these instruc-
tions.
1 Dust protection
2 Spindle lock tip
3 Switch on / off
4 Auxiliary handle
5 Louvers engine
6 Reversing switch on / off
7 Selector percussion on / off
8 Pole limit switch (if present)
9 Main handle
10 Cap for greasing (if present)
11 Plug and power cord
12 Speed limiter (if present)
13 Spindle rotation direction switch (if present)
14 Dust cap (if present)
15 Lamp voltage (if present)
16 Button retainer (if present)
INSTALLATION
WARNING! The manufacturer disclaims any liability
for any direct and/or indirect damages caused by improper
connection.
WARNING! Before you perform the following steps,
make sure that the plug is disconnected from the mains.
TRANSPORT
To carry the tool always use his or her briefcase packaging (if
any), and this will preserve it from bumps, dust and moisture
that may affect proper operation.
During transport, remove the tip from the tool spindle.
HANDLING
Firmly grasp the handle (pos.9) without activating the switch,
keep it away from your body after use and place it to the
side without blinking .
STARTUP
In the place that you will use the power tool you should
consider:
- That the area is not damp and is sheltered from the
elements.
- Which is provided around a large working area free from
obstructions.
- That there is good lighting.
- Which is used in the vicinity of the main switch with
differential.
- That the fuel system is equipped with a grounding in ac-
cordance with the rules (only if the tool is in class I , that
is equipped with a plug with ground wire).
- That the ambient temperature is between 10° and 35° C.
- That the environment is not in the atmosphere of flam-
mable/explosive.
Pull the tool and the components and visually check their
perfect integrity at this point, proceed to a thorough cleaning
to remove from the metal surfaces of any protective oils
used for the transport.
ADDITIONAL HANDLE ASSEMBLY (fig.E pos.4)
Put the ring on the front of the auxiliary tool, paying attention
to any shaped seats that need to engage in a proper fit.
Before you fix it, rotate it in order to find the right position
for use. Unscrew the handle counterclockwise to loosen,
clockwise to secure.
ASTA SWITCH ASSEMBLY (fig.E pos.8, if present)
Insert the rod into the hole and secure it by screwing into
the auxiliary handle itself.
ASSEMBLY TIP / CHISEL (fig.C)
1) Disconnect the power supply by disconnecting the plug
from the electrical outlet.
2) Verify that the attack of the tip is compatible with the
spindle of the tool by looking at the technical specifications
of both , you can not install a bit with different attack or
with cylindrical shank.
3) Clean out the attack of the tip and the surface lightly
greased with grease, if present, use grease supplied in
the packaging tool.
4) Pull toward you chuck (item 2), this will open the jaws
inside the chuck.
5) Insert the tip, turning it slightly and push it until it stops
background .
6) Release the spindle , the tip will be locked automatically.
7) Check the locking of the tip by pulling it outwards .
EXTRACTION TIP / CHISEL ( Fig. D )
1 ) Disconnect the power supply by disconnecting the plug
from the electrical outlet.
2 ) Pull toward you chuck (item 2), this will open the jaws
inside the chuck.
3 ) Remove the tip .
4) Release the spindle.
SELECTION OF FUNCTIONS - ROTATION HAMMER
Look carefully at the fig.H and operate accordingly.

- 14 -
STARTING, STOPPING AND SPEED ADJUSTMENT
WARNING! Before starting the power tool is required
to wear safety glasses, gloves , mask and ear protection
(not included).
WARNING! When using make sure that no one comes
to your area of work.
Starting
1 ) Grasp both handles firmly with your hands
2 ) To start press the switch (pos.3)
The switch is of the type “Maintained action“ and therefore the
power tool will remain lit for as long as you hold the switch.
Stopping
To stop, release the switch keeping the unit securely .
Continuous operation (if present)
For continuous operation is necessary, after the steps of
“Starting”, press the button (pos.16) to lock the switch.
Then to stop the machine press the switch (pos.3) and then
release it immediately.
WARNING! When you work with the switch in continuous
mode, never leave your grip on the main so that, in case
of danger, you can stop the machine immediately.
Not continuous service operation
Observe the following instructions only if your appliance
contains information in the technical data (eg: S6 25%).
Operate the appliance with identical cycles of 10 minutes;
turned on for a maximum time of 2.5 minutes followed
by a stop period of 7.5 minutes. This limitation of use is
required to avoid overheating the components of the device
and subsequent failure, the failure to comply with these
provisions will void the warranty .
We recommend that you repeat these steps a few times
before starting the work in order to familiarize yourself with
the controls as much as possible.
If you look malfunctions turn off the power tool and refer to
the chapter “Problems, Causes and Remedies”.
When you do not work turn off and unplug it from the outlet.
INSTRUCTIONS FOR USE
After having read the previous chapters , read carefully
the instructions that will enable you to get the maximum
performance.
Take your time to get familiar with all the controls, and only
after you have gained a good experience to be able to exploit
fully its potential.
ELECTRONIC SPEED SPINDLE (if present)
Gradually press the switch (pos.3) until it reaches the desired
speed. With less pressure you will get low speeds , while a
higher pressure you will get high speeds.
SETTING THE FIELD OF SPEED CHUCK (Fig.G, if present)
Rotate the thumb wheel (pos.12) located on the switch, so
as to limit the stroke of the switch and the maximum speed
of the spindle.
SELECTION OF THE SPINDLE DIRECTION OF ROTATION
(Fig.G, if present)
WARNING! The operation of reversing the direction of
rotation must be performed with the power tool off and
the stationary spindle.
For drilling and screwing screws in right hand thread
(clockwise) rotation move the selector (pos.13) to ‘R‘, ‘<--‘.
For operations unscrewing, removing bits stuck screws
and screw thread left (counterclockwise rotation) move the
selector rotation of ‘L‘, ‘-->‘.
DUST CAP ASSEMBLY (fig.F, if present)
This accessory rubber (pos.14) is useful to collect dust
produced by a vertical drilling. Put the headset in the tip
during use and does not hold it with your hand.
SNAP OFF AND PERCUSSION
WARNING! The insertion operation percussion and vice
versa , must be performed with the tool off and the
stationary spindle.
Look carefully at the fig.H and operate accordingly.
Do not insert the percussion drilling of metal or wood.
SNAP OFF AND ROTATION
WARNING! The insertion operation rotation and vice versa,
must be performed with the tool off and the stationary
spindle.
Look carefully at the fig.H and operate accordingly.
REPLACEMENT DRILL DRILL / CHISEL
See the section “ STARTUP “.
TIPS / CHISEL (not included)
Buy the bits / chisels quality, with an attachment suitable to
the characteristics of the spindle of the breaker and suitable
for the material being processed. Please contact your dealer
who will advise you.
Our company produces a wide range of drills / chisels sui-
table for different uses (metal, wood , brick , etc.).
USE
Always wear the personal protective equipment listed in
Chapter ‘SAFETY’.
Make sure that the workpiece is properly locked if the piece
is small secure it with a clamp or clamps.
Drilling in wood and metal
Do not use the hammer, if the tool does not have the ability
to disengage the hammer, do not drill on metal or wood.
Use appropriate tips and keep them sharp.
Use an awl to mark the starting point of drilling. For the
execution of holes of large diameter, made of the holes in
series with increasing diameter to avoid clamping of the tip
in the hole and overloading the tool in an anomalous way.
When you’re near the exit of the tip from the workpiece,
decrease pressure drilling. Beware of chips produced in
addition to being very hot is also very sharp.
Drilling on brick
Do not use the percussion tile, plaster and brick light, while
the grafted percussion resistant concrete and brick.
Use appropriate drills with carbide inserts to mantenetele
and well-sharpened.
For the execution of holes of large diameter, made of the
holes in series with increasing diameter to avoid clamping
of the tip in the hole and overloading abnormally the tool;
used also of the tips in said cup “ coring “ that cut along
a circumference for drilling large diameter (if possible, see
technical data). Attention! Always observe the maximum
diameter allowed for your device by observing the technical
instructions.

- 15 -
Chiselling
Engage only the percussion function without rotation
“Rotostop“.
Use suitable chisels (flat, pointed, etc.) and keep them well
sharpened.
Do not apply lateral forces or torsional tilting / rotating the
tool. Proceed without taking advantage of the percussion
force on the tool, not the tool loaded excessively, it is
sufficient to apply a force equal to the weight of the same.
DEMOLITION HAMMER WITH LOCKED BIT (fig.L, where fitted)
With demolition hammers with locked bit (in chisel/demoli-
tion mode), it is possible to lock the chisel into the desired
position.
To position the bit at the desired angle:
1) Disconnect the power by removing the plug from the
power supply.
2) Rotate the selector switch (pos.6) to position ‘’a’’
3) Grip the chisel with one hand and rotate it to the desired
point.
4) Rotate the selector switch (pos.6) to position ‘’b’’.
MAINTENANCE
WARNING! Before any control or regulation unplug
it from the power outlet.
WARNING! Do not tamper with or attempt to repair
the power tool.
WARNING! A possible internal audit or the replace-
ment of graphite brushes of the motor wear out with use,
should only be performed by an authorized service center.
The duration and the operating cost are also dependent on
a constant and careful maintenance. Regularly clean and
take care of your power tool, you will guarantee a perfect
efficiency and a long duration.
- Remove dust and machining residues with a soft bristle
brush.
- Do not spray water or wet electric tools, danger of infil-
tration inside.
- Do not use flammable cleaning agents or solvents. The
plastic parts are actions brought by chemicals.
- Do not use a compressed air jet cleaning: danger launch
material!
- Pay particular attention to cleaning the switch, louvers
allow the motor to the spindle.
Dust protection cap (pos.1):
- If damaged have it replaced by an authorized service center.
LUBRICATION
Spindle:
The absence of lubrication of the hole of the spindle causes
the non-opening of the same and the consequent locking
of the tip.
- Every 3 hours of operation clean the spindle and insert
a thin layer of grease for mechanical parts in the hole of
the spindle (pos.2) .
- The shank of the tip should be cleaned and lightly oiled
before assembly into the spindle.
Mechanical:
“mechanical“ means components accessible from the
grease cap (pos.10 fig.M, if any) and which are visible from
the hole; it is not necessary to remove other parts of the tool
and it is not necessary to remove the mechanical.
- Every 6 hours of operation, check the presence of fat, if
you need to add the lubricating grease quantity min./max
20-25 grams ( type bearings / joints , lithium, low viscosity
range of -30°C / +120°C), to be inserted in accordance
with the following instructions:
1 Disconnect the electrical supply by disconnecting the
plug from the electrical outlet.
2 Unscrew the cap (pos.10) with the appropriate key (if
included) or an equivalent tool.
3 Check visually if the mechanical parts require lubrication :
lubrication is correct when they are coated with a thin layer
of grease . If you do not need any lubrication skip to step 5.
4 Insert the grease with a brush (not included) on the
mechanical view (connecting rod, crank and its bearings
/ pins), so as to cover them with a thin layer; insist mainly
in the areas of bearings / pivots to make it penetrate.
Attention! It is not necessary to fill the chamber of fat as
it would cause a malfunction of the power (leakage of
grease, failure of percussion etc.). If the fat is attached
to the walls of the room, pick it up and deposit it with the
brush on the mechanical and only if the fat is dirty access
cover and replace it with the new one.
5 Clean the area of the hole and screw the cap on tightly.
6 Wipe any traces of grease on the tool.
WARNING!
- Never put your fingers inside the hole.
- Do not insert the brush fat too deep.
- Never put grease with a spatula or your fingers.
- Do not exceed the amount of fat, an excessive amount
causes the malfunction of the tool.
- Never start the tool if the cap is not screwed on properly!

- 16 -
PROBLEMS, CAUSES AND REMEDIES
PROBLEM CAUSE REMEDY
The power tool does
not start Power Line disconnected Check the electrical supply line
Plug not inserted Insert the plug into the power outlet and press the
start button
Electrical fault Contact an authorized service center
The power tool vibrates
a lot damaged or unbalanced bit/chisel Change the bit/chisel
Use of bit/chisel not suitable Change the bit/chisel using the ones reported in the
technical data
The bit/chisel tip does
not come from the
spindle
Bit/chisel stuck due to dirt, lack of
maintenance and lubrication of the
attack or not in accordance
Sprinkle a few drops of lubricant inside the spindle
and carefully follow the instructions to remove the tip.
Contact an authorized service center. This problem is
not covered by the warranty.
Damaged dust protection cap
The percussion is not
working Excessive amounts of greese Visit an authorized service center for removal/replace-
ment of excessive/unfiting greese, this intervention is
not included in the warranty.
Greese is not suitable
WARNING! If after performing the actions described
above, the power tool is not working properly or in case
of anomalies other than those mentioned , take it to a
service center authorized by showing proof of purchase
and requesting spare parts. Always refer to the informa-
tion on the label technical data.
STORAGE
Do a deep cleaning of all the tool and accessories (see
Maintenance). Protect the unpainted parts with a protective
oil and use the original packaging or in the case (if any) to
protect it.
Store the machine out of the reach of children in a stable
position and secure. The place should be dry and free from
dust, tempered and protected from direct sunlight .
At the local storage should not have access children and
strangers.
DISPOSAL
To safeguard the environment, proceed according to the
laws of the country where you are. Consult the competent
authorities for more news on this.
When the machine is no longer usable or repairable, hand
it in with the packaging to an official collection point for
recycling.
Electric and electronic waste may contain substances
that are dangerous for the environment and for human
health. For this reason they must never be disposed of
together with domestic waste, but collected separately in
specific collection centres or returned to the retailer when
similar new equipment has been purchased. The illegal
disposal of such equipment may result in prosecution to
the full extent of the law.
WARRANTY
The product is protected by law against non-compliance
with the declared characteristics provided it is used only in
the manner described in the instructions, it has not been
tampered with in any way, it has been stored properly, has
been repaired by authorized and, where applicable, have
been used only original spare parts.
In the case of industrial or professional use or when using
such a guarantee is valid for 12 months.
To issue a claim under warranty you must present proof
of purchase to your dealer or authorized service center.
-
 1
1
-
 2
2
-
 3
3
-
 4
4
-
 5
5
-
 6
6
-
 7
7
-
 8
8
-
 9
9
-
 10
10
-
 11
11
-
 12
12
-
 13
13
-
 14
14
-
 15
15
-
 16
16


Valex 1421470 Manuale del proprietario
- Categoria
- Utensili elettrici
- Tipo
- Manuale del proprietario
in altre lingue
- English: Valex 1421470 Owner's manual
Documenti correlati
-
 Valex 1411139 Manuale del proprietario
-
 Valex 1421467 Manuale del proprietario
-
 Valex 1420715 Manuale del proprietario
-
 Valex 1401630 Manuale del proprietario
-
 Valex 1429402 Manuale del proprietario
-
 Valex 1429384 Manuale del proprietario
-
 Valex 1429202 Manuale del proprietario
-
 Valex 1429203 Manuale del proprietario
-
 Valex 1467017 Manuale del proprietario
-
 Valex 1552009 Manuale del proprietario


Altri documenti
-
Powerplus POWDP1570 Manuale del proprietario
-
Parkside PBH 1100 A1 Operation and Safety Notes
-
Hilti TE-SX Istruzioni per l'uso
-
Powerplus POWDP15640 Manuale del proprietario
-
 Status MPB20 Manuale del proprietario
-
Powerplus POWDP15630 Manuale del proprietario
-
Powerplus POWXQ5226 Manuale del proprietario
-
Parkside PBH 1050 A1 Operation and Safety Notes
-
 Lissmac CDM 23 WP Manuale del proprietario

