
1
Spro2
User Manual

2
About This Manual
Thank you for choosing this ZTE device. Read this manual and
keep it for future reference.
Copyright
Copyright © 2015 ZTE CORPORATION
All rights reserved.
No part of this publication may be quoted, reproduced,
translated or used in any form or by any means, electronic or
mechanical, including photocopying and microfilm, without the
prior written permission of ZTE Corporation.
Notice
ZTE Corporation reserves the right to make modifications on print
errors or update specifications in this guide without prior notice.
This manual has been designed with the utmost care to ensure
the accuracy of its content. However, all statements, information
and recommendations contained therein do not constitute a
warranty of any kind, either expressed or implied. Please refer to
For Your Safety to be sure to use the device properly and safely.
We offer self-service for our smart terminal device users. Please
visit the ZTE official website (at www.zteusa.com) for more
information on self-service and supported product models.
Information on the website takes precedence.
Disclaimer
ZTE Corporation expressly disclaims any liability for faults and

3
damages caused by unauthorized modifications of the software.
Images and screenshots used in this manual may differ from the
actual product. Content in this manual may differ from the actual
product or software.
Trademarks
ZTE and the ZTE logos are trademarks of ZTE Corporation.
Google and Android are trademarks of Google, Inc.
The Bluetooth
®
trademark and logos are owned by the Bluetooth
SIG, Inc. and any use of such trademarks by ZTE Corporation is
under license.
Qualcomm
®
Snapdragon™ processors are products of
Qualcomm Technologies, Inc.
Qualcomm and Snapdragon are trademarks of Qualcomm
Incorporated, registered in the United States and other countries.
Used with permission.
DLP is the trademark of Texas Instruments.
microSDHC Logo is a trademark of SD-3C, LLC.
Manufactured under license from Dolby Laboratories. Dolby,
Dolby Audio, and the double-D symbol are trademarks of Dolby

4
Laboratories.
Other trademarks and trade names are the property of their
respective owners.
Version No.: R1.0
Edition Time: September 21, 2015

5
Contents
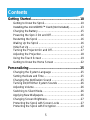
Getting Started ....................................................... 10
Getting to Know the Spro2................................................ 10
Installing the microSDHC™ Card (Not Included) ............... 13
Charging the Battery ........................................................ 15
Powering the Spro 2 On and Off ....................................... 16
Restarting the Spro2 ........................................................ 16
Waking Up the Spro2 ....................................................... 16
Initial Set Up .................................................................... 17
Turning the Projector On and Off ...................................... 17
Adjusting the Projection .................................................... 18
Using the Touch Screen ................................................... 19
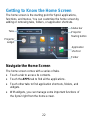
Getting to Know the Home Screen ................................... 22
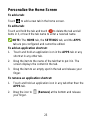
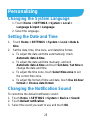
Personalizing ......................................................... 25
Changing the System Language ...................................... 25
Setting the Date and Time ................................................ 25
Changing the Notification Sound ...................................... 25
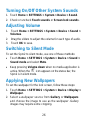
Turning On/Off Other System Sounds .............................. 26
Adjusting Volume ............................................................. 26
Switching to Silent Mode .................................................. 26
Applying New Wallpapers ................................................. 26
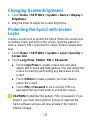
Changing Screen Brightness ............................................ 27
Protecting the Spro2 with Screen Locks ........................... 27
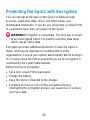
Protecting the Spro2 with Encryption ................................ 28

6
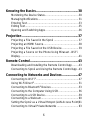
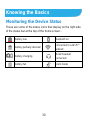
Knowing the Basics ............................................... 30
Monitoring the Device Status............................................ 30
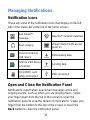
Managing Notifications ..................................................... 31
Entering Text ................................................................... 33
Editing Text ...................................................................... 35
Opening and Switching Apps ........................................... 36
Projection ............................................................... 37
Projecting a File Saved in the Spro2 ................................ 37
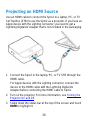
Projecting an HDMI Source .............................................. 38
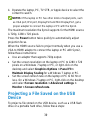
Projecting a File Saved on the USB Device ...................... 39
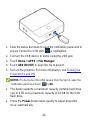
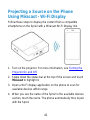
Projecting a Source on the Phone Using Miracast - Wi-Fi
Display ............................................................................ 41
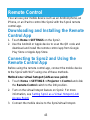
Remote Control ...................................................... 43
Downloading and Installing the Remote Control App ........ 43
Connecting to Spro2 and Using the Remote Control App .. 43
Connecting to Networks and Devices .................. 47
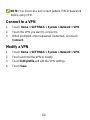
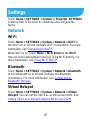
Connecting to Wi-Fi
®
....................................................... 47
Using Wi-Fi Direct
®
.......................................................... 51
Connecting to Bluetooth
®
Devices .................................... 53
Connecting to the Computer Using USB .......................... 56
Connecting to a USB Device ............................................ 59
Connecting to a Webcam ................................................. 60
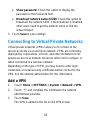
Setting the Spro2 as a Virtual Hotspot (LAN Access Point)61
Connecting to Virtual Private Networks ............................ 63

7
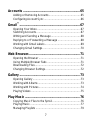
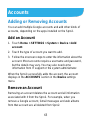
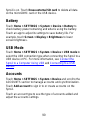
Accounts ................................................................ 65
Adding or Removing Accounts .......................................... 65
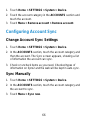
Configuring Account Sync ................................................ 66
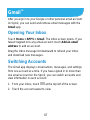
Gmail
™
.................................................................... 67
Opening Your Inbox .......................................................... 67
Switching Accounts .......................................................... 67
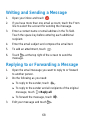
Writing and Sending a Message ....................................... 68
Replying to or Forwarding a Message .............................. 68
Working with Gmail Labels ............................................... 69
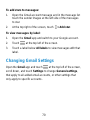
Changing Gmail Settings .................................................. 70
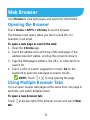
Web Browser .......................................................... 71
Opening the Browser ....................................................... 71
Using Multiple Browser Tabs ............................................ 71
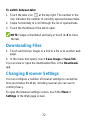
Downloading Files ............................................................ 72
Changing Browser Settings .............................................. 72
Gallery .................................................................... 73
Opening Gallery ............................................................... 73
Working with Albums ........................................................ 73
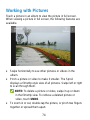
Working with Pictures ....................................................... 74
Playing Videos ................................................................. 75
Play Music .............................................................. 76
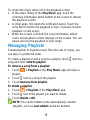
Copying Music Files to the Spro2 ..................................... 76
Playing Music ................................................................... 77
Managing Playlists ........................................................... 79

8
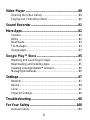
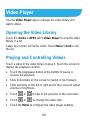
Video Player ........................................................... 80
Opening the Video Library ............................................... 80
Playing and Controlling Videos ........................................ 80
Sound Recorder ..................................................... 81
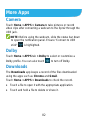
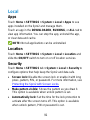
More Apps............................................................... 82
Camera ........................................................................... 82
Dolby ............................................................................... 82
Downloads....................................................................... 82
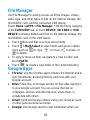
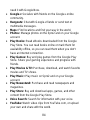
File Manager ................................................................... 83
Google Apps .................................................................... 83
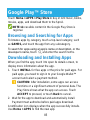
Google Play™ Store .............................................. 85
Browsing and Searching for Apps .................................... 85
Downloading and Installing Apps ...................................... 85
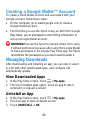
Creating a Google Wallet™ Account ................................ 86
Managing Downloads ...................................................... 86
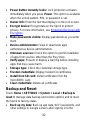
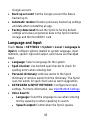
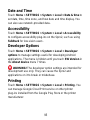
Settings ................................................................... 87
Network ........................................................................... 87
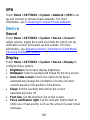
Device ............................................................................. 88
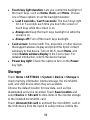
Local ............................................................................... 91
Projector Settings ............................................................ 96
Troubleshooting ..................................................... 98
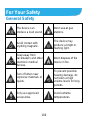
For Your Safety .................................................... 100
General Safety............................................................... 100

9
Radio Frequency (RF) Energy ........................................ 101
FCC Compliance ............................................................ 102
Distraction ...................................................................... 103
Product Handling ........................................................... 104
Electrical Safety ............................................................. 107
Radio Frequency Interference ........................................ 107
Explosive Environments ................................................. 109

10
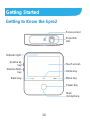
Getting Started
Getting to Know the Spro2
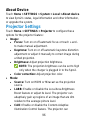
Projection
lens
Indicator light
Back key
Volume down
key
Touch screen
Home key
Menu key
Volume up
key
Main
microphone
Focus sensor
Power key

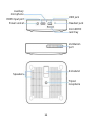
11
USB jack
Headset jack
Auxiliary
microphone
HDMI input port
Power socket
microSDHC
card tray
Ventilation
port
Kickstand
Speakers
Tripod
receptacle

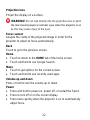
12
Projection lens
Project the display on a surface.
WARNING! Do not look directly into the projection lens or point
the lens toward people or animals‟ eyes when the projector is on
as this may cause injury to the eyes.
Focus sensor
Analyze the clarity of the projected image in order for the
projector to adjust its focus automatically.
Back
Touch to go to the previous screen.
Home
Touch to return to the HOME tab of the home screen.
Touch and hold to use Google Search.
Menu
Touch to get options for the current screen.
Touch and hold to see recently used apps.
Volume up and down
Press or hold to turn the volume up or down.
Power
Press and hold to power on, power off, or restart the Spro2.
Press to turn off or on the screen display.
Press twice quickly when the projector is on to automatically
adjust focus.

13
Main microphone / Auxiliary microphone
Transmit your voice. The auxiliary microphone is useful for
cancelling ambient noise.
Ventilation port
Exhaust hot air when the projector is on.
WARNING! Do not place anything near the ventilation port as
this may cause internal heat accumulation. Do not place your
hand near the ventilation port as this may cause injury.
Tripod receptacle
Connect a tripod (not included in the packaging).
Installing the microSDHC™ Card (Not
Included)
The Spro2 must be on to install or remove a microSDHC card.
unmount the microSDHC card before removing it. For more
information, see Remove the microSDHC Card From the Spro2.
1. Turn the Spro2 upside down.
2. Insert the tip of the tray eject tool into the hole on the
microSDHC card tray and take the tray out of the slot.

14
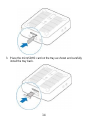
3. Place the microSDHC card on the tray as shown and carefully
install the tray back.

15
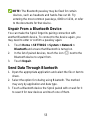
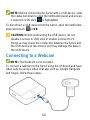
NOTE: Some applications may require a microSDHC
card to work properly if it stores certain data on it.
Therefore, it is recommended that you keep a
microSDHC card installed and not to remove or replace it
unnecessarily.
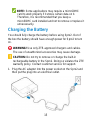
Charging the Battery
You should fully charge the battery before using Spro2. Out of
the box the battery should have enough power for Spro2 to turn
on.
WARNING! Use only ZTE-approved chargers and cables.
The use of unauthorized accessories may cause damage.
CAUTION: Do not try to remove or change the built-in
rechargeable battery in the Spro2. Doing so violates the ZTE
warranty policy. Contact customer service for support.
1. Plug the AC adapter into the power socket on the Spro2 and
then put the plug into an electrical outlet.

16
2. Disconnect the adapter when the battery is fully charged.
NOTE: If the battery is extremely low, you may not be able to
power on Spro2 even when it is charging. Allow Spro2 to
charge longer and try again. Contact customer service if you
still cannot power on Spro2 after prolonged charging.
Powering the Spro 2 On and Off
Ensure that the battery is charged.
Press and hold the Power button to turn on the Spro2.
To power it off, press and hold the Power button to open the
options menu. Touch Power off and touch OK.
Restarting the Spro2
If the screen freezes or takes too long to respond, try pressing
and holding the Power button for about 10 seconds to restart
Spro2.
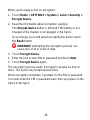
Waking Up the Spro2
The Spro2 automatically goes into sleep mode when it is not in
use for certain time. The touch screen is turned off to save power
and the keys are locked to prevent accidental operations.
You can wake up the Spro2 by following the instruction as below.
1. Press the Power button to turn the touch screen on.
2. Touch and hold any area of the screen to unlock Spro2.
NOTE: If you set an unlock pattern, a PIN or a password for the
Spro2, draw the pattern, or enter the PIN/password to unlock the
Spro2. For more information about setting an unlock pattern, see
Protecting the Spro2 With Screen Locks.

17
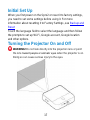
Initial Set Up
When you first power on the Spro2 or reset it to factory settings,
you need to set some settings before using it. For more
information about resetting it to Factory Settings, see Backup and
Reset
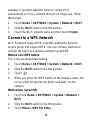
Touch the language field to select the language and then follow
the prompts to set up Wi-Fi, Google account, Google location
and other options.
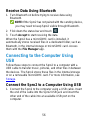
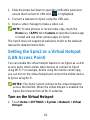
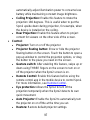
Turning the Projector On and Off
WARNING! Do not look directly into the projection lens or point
the lens toward people or animals‟ eyes when the projector is on.
Doing so can cause serious injury to the eyes.

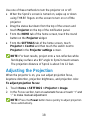
18
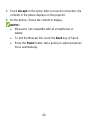
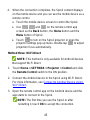
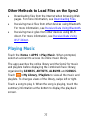
Use one of these methods to turn the projector on or off:
When the Spro2‟s screen is turned on, swipe up or down
using THREE fingers on the screen to turn on or off the
projector.
Drag the status bar down from the top of the screen and
touch Projector on the top of the notification panel.
From the HOME tab of the home screen, touch the round
button on the Projector widget.
From the SETTINGS tab of the home screen, touch
Projector > Control and then touch the switch next to
Projector in the Projector settings screen.
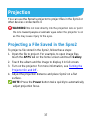
NOTE: For best results, project onto a non-reflective white
flat display surface at a 90° angle to Spro2‟s touch screen.
The projection distance of Spro2 is about 3 to 12 feet.
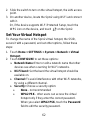
Adjusting the Projection
When the projector is on, you can adjust projection focus,
keystone distortion, projection brightness, and projection color.
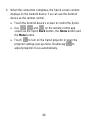
To adjust projection focus:
1. Touch Home > SETTINGS > Projector > Image.
2. In the Focus section, turn on automatic focus or touch “+” and
“-” to make manual adjustment.
NOTE: Press the Power button twice quickly to adjust projection
focus automatically.

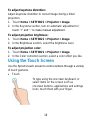
19
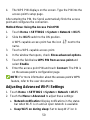
To adjust keystone distortion:
Adjust keystone distortion to correct image during a tilted
projection.
1. Touch Home > SETTINGS > Projector > Image.
2. In the Keystone section, turn on automatic adjustment or
touch “+” and “-” to make manual adjustment.
To adjust projection brightness:
1. Touch Home > SETTINGS > Projector > Image.
2. In the Brightness section, select the brightness level.
To adjust projection color:
1. Touch Home > SETTINGS > Projector > Image.
2. In the Color correction section, select a color effect you like.
Using the Touch Screen
Use the Spro2‟s touch screen to control actions through a variety
of touch gestures.
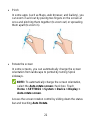
Touch
To type using the onscreen keyboard, or
select items on the screen such as
onscreen buttons, applications and settings
icons, touch them with your finger.

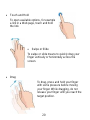
20
Touch and Hold
To open available options, for example
a link in a Web page, touch and hold
the link.
Swipe or Slide
To swipe or slide means to quickly drag your
finger vertically or horizontally across the
screen.
Drag
To drag, press and hold your finger
with some pressure before moving
your finger. While dragging, do not
release your finger until you reach the
target position.
La pagina si sta caricando...
La pagina si sta caricando...
La pagina si sta caricando...
La pagina si sta caricando...
La pagina si sta caricando...
La pagina si sta caricando...
La pagina si sta caricando...
La pagina si sta caricando...
La pagina si sta caricando...
La pagina si sta caricando...
La pagina si sta caricando...
La pagina si sta caricando...
La pagina si sta caricando...
La pagina si sta caricando...
La pagina si sta caricando...
La pagina si sta caricando...
La pagina si sta caricando...
La pagina si sta caricando...
La pagina si sta caricando...
La pagina si sta caricando...
La pagina si sta caricando...
La pagina si sta caricando...
La pagina si sta caricando...
La pagina si sta caricando...
La pagina si sta caricando...
La pagina si sta caricando...
La pagina si sta caricando...
La pagina si sta caricando...
La pagina si sta caricando...
La pagina si sta caricando...
La pagina si sta caricando...
La pagina si sta caricando...
La pagina si sta caricando...
La pagina si sta caricando...
La pagina si sta caricando...
La pagina si sta caricando...
La pagina si sta caricando...
La pagina si sta caricando...
La pagina si sta caricando...
La pagina si sta caricando...
La pagina si sta caricando...
La pagina si sta caricando...
La pagina si sta caricando...
La pagina si sta caricando...
La pagina si sta caricando...
La pagina si sta caricando...
La pagina si sta caricando...
La pagina si sta caricando...
La pagina si sta caricando...
La pagina si sta caricando...
La pagina si sta caricando...
La pagina si sta caricando...
La pagina si sta caricando...
La pagina si sta caricando...
La pagina si sta caricando...
La pagina si sta caricando...
La pagina si sta caricando...
La pagina si sta caricando...
La pagina si sta caricando...
La pagina si sta caricando...
La pagina si sta caricando...
La pagina si sta caricando...
La pagina si sta caricando...
La pagina si sta caricando...
La pagina si sta caricando...
La pagina si sta caricando...
La pagina si sta caricando...
La pagina si sta caricando...
La pagina si sta caricando...
La pagina si sta caricando...
La pagina si sta caricando...
La pagina si sta caricando...
La pagina si sta caricando...
La pagina si sta caricando...
La pagina si sta caricando...
La pagina si sta caricando...
La pagina si sta caricando...
La pagina si sta caricando...
La pagina si sta caricando...
La pagina si sta caricando...
La pagina si sta caricando...
La pagina si sta caricando...
La pagina si sta caricando...
La pagina si sta caricando...
La pagina si sta caricando...
La pagina si sta caricando...
La pagina si sta caricando...
La pagina si sta caricando...
La pagina si sta caricando...
-
 1
1
-
 2
2
-
 3
3
-
 4
4
-
 5
5
-
 6
6
-
 7
7
-
 8
8
-
 9
9
-
 10
10
-
 11
11
-
 12
12
-
 13
13
-
 14
14
-
 15
15
-
 16
16
-
 17
17
-
 18
18
-
 19
19
-
 20
20
-
 21
21
-
 22
22
-
 23
23
-
 24
24
-
 25
25
-
 26
26
-
 27
27
-
 28
28
-
 29
29
-
 30
30
-
 31
31
-
 32
32
-
 33
33
-
 34
34
-
 35
35
-
 36
36
-
 37
37
-
 38
38
-
 39
39
-
 40
40
-
 41
41
-
 42
42
-
 43
43
-
 44
44
-
 45
45
-
 46
46
-
 47
47
-
 48
48
-
 49
49
-
 50
50
-
 51
51
-
 52
52
-
 53
53
-
 54
54
-
 55
55
-
 56
56
-
 57
57
-
 58
58
-
 59
59
-
 60
60
-
 61
61
-
 62
62
-
 63
63
-
 64
64
-
 65
65
-
 66
66
-
 67
67
-
 68
68
-
 69
69
-
 70
70
-
 71
71
-
 72
72
-
 73
73
-
 74
74
-
 75
75
-
 76
76
-
 77
77
-
 78
78
-
 79
79
-
 80
80
-
 81
81
-
 82
82
-
 83
83
-
 84
84
-
 85
85
-
 86
86
-
 87
87
-
 88
88
-
 89
89
-
 90
90
-
 91
91
-
 92
92
-
 93
93
-
 94
94
-
 95
95
-
 96
96
-
 97
97
-
 98
98
-
 99
99
-
 100
100
-
 101
101
-
 102
102
-
 103
103
-
 104
104
-
 105
105
-
 106
106
-
 107
107
-
 108
108
-
 109
109


in altre lingue
- English: ZTE MF97G User manual
Documenti correlati
-
ZTE V830W Manuale utente
-
-
-
ZTE Z557BL Manuale utente
-
-
-
-
-
-
Altri documenti
-
AIPTEK V10 Manuale del proprietario
-
Philips PPX520 Guida utente
-
Bigben GAMETAB-ONE Manuale del proprietario
-
Philips NPX442/INT Manuale utente
-
AIPTEK POCKETCINEMA V50 Manuale del proprietario
-
 NexiGo PJ10 LCD Projector Manuale utente
-
Anker AK-D2322111 Manuale utente
-
Lindy 32702 Manuale utente
-
Philips 58PFL9956T/12 Manuale utente
-
Nebula Capsule Manuale del proprietario
