FICHA TÉCNICA
Pesos y tamaños Tamaño embalaje (cm) 37x27,5x14
Peso bruto (Kg) 2,7
Tamaño consola (cm) 20,7x22x7
Características de trabajo Potencia de trabajo 12 W
Frecuencia de trabajo 250 KHz
Tiempo de trabajo preesta-
blecido
15 min
Características eléctricas Voltaje nominal 220V ~ 240V
Frecuencia 50Hz/60Hz
Potencia nominal 10 W
ADVERTENCIA
• Nunca, en ninguna circunstancia,
intente abrir o inspeccionar los
componentes o accesorios internos
de la máquina. Si fuera necesaria una
inspección, por favor póngase en
contacto con su proveedor o un técnico
debidamente cualificado.
• No utilice nunca la unidad en ambientes
húmedos o insuficientemente ventilados,
como zonas de baño, baños, etc., con el
fin de prevenir daños en los componentes
eléctricos de su equipo.
• Nunca utilice el equipo al aire libre, las
inclemencias meteorológicas pueden
causar daños.
• Si el cable eléctrico estuviera roto,
solicite a un profesional que le suministre
otro y lo cambie para evitar riesgos, o
contacte con el proveedor.
DECLARACIÓN DE
CONFORMIDAD CE
Este producto cumple lo estipulado en las
siguientes directivas:
1. Las medidas de la Directiva sobre Baja
Tensión: 2014/35/EU.
2. Las medidas de la Directiva de
Compatibilidad Electromagnética:
2014/30/EU.
RECICLAJE
¡BIENVENIDO!
© 2019 Weelko
Visite nuestra web para obtener más información: www.weelko.com
Muchas gracias por su compra. Por favor,
lea detenidamente las instrucciones antes
de utilizar el equipo. También puede
pedir orientación a un profesional para
asegurarse de que está utilizando el
equipo correctamente. No aceptaremos
ninguna responsabilidad por los
accidentes que ocurran debido a un
manejo incorrecto.
La empresa se reserva el derecho de
corregir detalles de los equipos, sin
previo aviso. Si encuentra algún error en
estas instrucciones, por favor no dude en
enviarnos un e-mail para informarnos y
que podamos corregirlos.
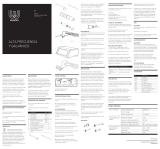
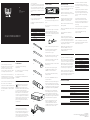
CONTENIDO DEL PAQUETE
• Estos componentes están sujetos a
cambio sin previo aviso.
• El aspecto del producto puede diferir de
la imagen.
Nº PRODUCTO REF. CANT.
1 ELECTRODO 1 10009 1
2 ELECTRODO 2 10010 1
3 ELECTRODO 3 10011 1
4 ELECTRODO 4 10012 1
5 MANÍPULO ALTA
FRECUENCIA
10040 1
6 UNIDAD PRINCIPAL - 1
7 CABLE ALIMENT-
ACIÓN ELÉCTRICA
- 1
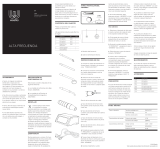
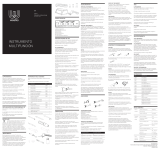
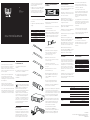
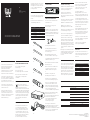
PANEL FRONTAL
INSTRUCCIONES DE USO
1. Conecte el cable de alimentación en
el panel trasero.
2. Conecte los accesorios correctamente
en el panel lateral.
3. Seleccione el tubo de cristal del
electrodo correcto e inserte el extremo de
la tapa de metal en la boquilla de salida
del mango (intente no tocar el electrodo
de cristal con las manos o cualquier objeto
de metal).
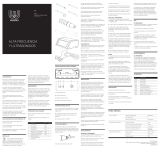
Elección de los electrodos de cristal:
a. Tubo de electrodo en forma de seta:
para grandes zonas de piel (cara, frente,
cuello, etc). fig. 3
b. Tubo de electrodo en forma de
cucharón: para zonas medias de la piel (la
barbilla, etc). fig. 1
c. Tubo de electrodo en forma de bola:
usarse para pequeñas áreas de la piel (la
nariz, etc). fig. 4
d. Tubo de electrodo recto: utilizar para el
tratamiento indirecto. fig. 2
4. Encienda el equipo pulsando el
botón “POWER” y asegúrese de que
“ENERGY” está colocado al mínimo.
5. Seleccione el tiempo de tratamiento
deseado mediante “TIME”.
6. Pulse el botón “START / POWER” para
iniciar el tratamiento.
7. Asegúrese de situar su dedo índice
encima del electrodo de cristal antes de
mantener cualquier contacto con la piel del
cliente. Después toque el área de tratamiento
con el electrodo de cristal.
A continuación, puede ajustar la potencia
poco a poco usando el botón “ENERGY”.
8. Durante el tratamiento, cuando
cambie de electrodo debe volver a
poner la potencia al nivel mínimo antes
de intercambiar los electrodos, y luego,
lentamente, ajustar el nivel de energía y
volver a la intensidad requerida.
9. Al final del tratamiento, bajar lentamente
el botón “ENERGY” al nivel de potencia
mínima y luego apague el botón “POWER”
antes de retirar el electrodo de la cara del
cliente.
USO INDIRECTO
1. Seleccione el electrodo de vidrio recto
e inserte el extremo de la tapa de metal
en la boquilla de salida del mango.
2. Dé el aparato de mano al cliente,
asegurándose de que sostenga el
electrodo de vidrio y no la otra.
3. Encienda la unidad pulsando el
botón “POWER” y asegúrese de que la
“ENERGY” esté al mínimo.
4. Seleccione el tiempo de tratamiento
deseado mediante “TIME”.
5. Pulse el botón “START / STOP” para
iniciar el tratamiento.
6. Seleccione poco a poco la potencia
mediante “ENERGY”.
7. Lleve a cabo el masaje facial
o tratamiento con el producto
correspondiente según sea necesario.
Durante el proceso de tratamiento
completo, asegúrese de no tocar o entrar
en contacto con el electrodo de cristal
que sujeta el cliente.
8. Al final del tratamiento, reduzca
lentamente “ENERGY” a la mínima
potencia y luego apagué el botón
“POWER.
PRECAUCIÓN
• El polo del electrodo de cristal producirá
una chispa cuando esté a menos de 2,5
centímetros de distancia de la piel con
el instrumento encendido. En este caso,
reduzca la energía de la unidad de alta
frecuencia. Si el cliente aún siente la
chispa, puede cubrirse la cara con un
paño seco pequeño, de algodón, pero
nunca con uno de nylon o sintético.
• Antes de retirar el electrodo de cristal
de la piel, disminuya “ENERGY” a su valor
mínimo, y luego apague la corriente antes
de retirarlo de la piel.
• Los clientes no deben llevar ningún
objeto de metal o joyas, todos los
artículos deben ser retirados antes de
comenzar cualquier tratamiento.
• Los tratamientos de alta frecuencia
no deben llevarse a cabo en mujeres
embarazadas o cualquier otra persona
con un marcapasos (o cualquier aparato
eléctrico o rítmico de regulación del
corazón).
• Los productos utilizados en el
tratamiento de alta frecuencia no deben
contener alcohol o líquidos espirituosos
con el fin de prevenir la combustión
accidental derivada de la formación del
arco eléctrico..
• Nunca toque el interior del ojo (globo
ocular) con ningún electrodo de alta
frecuencia.
• Sujete únicamente el mango de aparato
de mano de alta frecuencia.
MANTENIMIENTO
• Los tubos de cristal de los electrodos
deben mantenerse limpios y secos, y
deben ser esterilizados antes o después
de cada uso.
ACCESORIOS
REF. DESCRIPCIÓN
10009 ELECTRODO 1
10010 ELECTRODO 2
10011 ELECTRODO 3
10012 ELECTRODO 4
10024 ELECTRODO ESPECIAL 1
10025 ELECTRODO ESPECIAL 2
10026 ELECTRODO ESPECIAL 3
10040 MANÍPULO ALTA FRECUENCIA
ALTA FRECUENCIA
ES
F314A
Manual de instrucciones
WE-2021-F314A
Cuando aparezca este símbolo
en cualquiera de nuestros
productos eléctricos o su embalaje, esto
significa que dichos productos no deben
tratarse como residuos domésticos
convencionales en Europa. Para asegurar
un tratamiento de residuos adecuado,
hágalo de acuerdo con las leyes locales
o según convenga para el desecho
de equipos eléctricos. Esto ayudará a
preservar el medio ambiente y mejorar los
estándares de protección medioambiental
en relación con el tratamiento de residuos
eléctricos.
Importador : Weelko Barcelona, S.L.
ESB65397556
3.
2.
1.
4.
5.
6.
7.

TECHNICAL SHEET
Weights and sizes Packing size (cm) 37x27,5x14
Gross weight (kg) 2,7
Product size (cm) 20,7x22x7
Working characteristics Working power 12 W
Working frequency 250 KHz
Preset working time 15 min
Electrical characteristics Rated voltage 220V ~ 240V
Frequency 50Hz/60Hz
Rated power 10 W
WARNING
• Never under any circumstances
attempt to open or inspect the internal
components or accessories of the
machine. If an inspection becomes
necessary, please contact your supplier
or a suitably competent technician.
• Never use the unit in humid or poorly
ventilated environments, such as wet
rooms, bathrooms etc. to prevent damage
to the electrical components of your unit.
• Never use the unit outdoors; exposure to
the elements can cause damage.
• If the power cord was destroyed, please
ask a professional to service and replace
it to avoid hazards, or contact the dealer
for service.
EC-DECLARATION OF
COMPLIANCE
This product meets the following
requirements:
1. Conditions set out in the Low Voltage
Directive: 2014/35/EU.
2. Conditions set out in the
Electromagnetic Compatibility Directive:
2014/30/EU.
RECYCLING
WELCOME!
Thank you very much for purchase.
Please read the instructions carefully
before operating the instrument. You can
also ask a professional for guidance to
make sure you are using the instrument
correctly. We will accept no responsibility
for any accidents that occur due to
incorrect operation.
The company reserves the right to amend
the details of the instruments with no prior
notice. If any mistakes are found in these
instructions, please feel free to send us an
e-mail informing us so that we can correct
them.
PACKAGE CONTENTS
• These components are subject to
change without prior notice.
• Appearance of product may differ from
the image.
No. PRODUCT REF. QTY.
1 ELECTRODE 1 10009 1
2 ELECTRODE 2 10010 1
3 ELECTRODE 3 10011 1
4 ELECTRODE 4 10012 1
5 HIGH FREQUENCY
HANDLE
10040 1
6 MAIN UNIT - 1
7 FEEDER CABLE - 1
FRONT PANEL
INSTRUCTIONS OF USE
1. Connect the power supply via the rear
panel.
2. Connect the accessories properly in the
lateral panel.
3. Select the proper glass electrode pipe
and insert the metal cap end into the
output mouthpiece of the handle (try not to
touch the glass electrode with your hands
or any metal objects).
Glass electrode pipe assignment position:
a. Mushroom-shaped electrode pipe:
used for large areas of skin (face,
forehead, neck, etc). fig. 3
b. Ladle-shaped electrode pipe: used for
medium areas of skin (chin, etc). fig.1
c. Ball-like electrode pipe: used for small
areas of skin (nose, etc).fig. 4
d. Straight electrode pipe: used for indirect
treatment. fig. 1
4. Switch the unit on by pressing the
“POWER” button and make sure the
“ENERGY” is set to the minimum.
5. Select the desired treatment time by
adjusting “TIME”.
6. Press the “START/PAUSE” button to
start the treatment.
7. Make sure you put your index finger on
the glass electrode before you touch the
client's skin. Afterwards touch the treatment
area with the glass electrode. You can then
slowly adjust the output using “ENERGY”.
8. During the course of the treatment,
when changing electrodes you should
return the output to the minimum level
before swapping the electrodes, and then
slowly adjust the energy level and return in
to the appropriate intensity required.
9. At the end of the treatment, slowly
reduce the “ENERGY” level to the
minimum output and then switch the
“POWER” button off before removing the
electrode from the customer’s face.
INDIRECT USAGE
1. Select the straight glass electrode and
insert the metal cap end into the output
mouthpiece of the handle.
2. Give the handset to the customer,
making sure they hold the glass electrode
and not the handset.
3. Switch on the unit by pressing the
“POWER” button and make sure the
“ENERGY” is set to the minimum.
4. Select the desired treatment time by
adjusting “TIME”.
5. Press the “START/STOP” button to start
the treatment.
6. Slowly adjust the output using
“ENERGY”.
7. Carry out the facial massage or
treatment using the prescribed product
as required. During the whole treatment
process, make sure you do not touch or
come into contact with the glass electrode
being held by the customer.
8. At the end of the treatment, slowly
reduce the “ENERGY” level to the
minimum output and then switch the
“POWER” button off.
CAUTIONS
• The glass electrode pole will sparkle
when it is still less than one inch away
from the skin with the instrument switched
on. In this case, reduce the energy of the
high frequency unit. If the customer still
feels the sparkle, they may cover their
face with a small, dry cotton towel but
never with a nylon or synthetic one.
• Before removing the glass electrode
from the skin, decrease the “ENERGY” to
its minimum setting, then switch the power
off before removing it from the skin.
• Customers should not be allowed to
wear any metal objects or jewelry; all
items must be removed prior to beginning
any treatment.
• High-frequency treatments should not
be carried out on pregnant women, or
any persons using a pace-maker (or any
electrical or rhythmic heart-regulating
device).
• The products used with the high-
frequency treatment must not contain
any alcohol or spirit-based substances in
order to prevent accidental combustion
from arcing.
• Never touch the inner eye (eyeball) area
with any high-frequency electrode.
• Only hold the handle of the high-
frequency handset.
MAINTENANCE
• Glass electrode pipes must be kept
clean and dry, and should be sterilized
before or after each use.
ACCESSORIES
REF. DESCRIPTION
10009 ELECTRODE 1
10010 ELECTRODE 2
10011 ELECTRODE 3
10012 ELECTRODE 4
10024 SPECIAL ELECTRODE 1
10025 SPECIAL ELECTRODE 2
10026 SPECIAL ELECTRODE 3
10040 HIGH FREQUENCY HANDLE
HIGH FREQUENCY
EN
F314A
Instruction Manual
WE-2019-F314A
© 2019 Weelko
Visit our website at www.weelko.com for more information
Whenever any of our electrical
products or their presentation
packaging bear this symbol, it means
that these products should not be treated
as conventional household waste in
Europe. To ensure proper treatment of this
waste, dispose of it in accordance with
local laws or as required for the disposal
of electrical equipment. This initiative will
help preserve save natural resources and
improve standards of environmental
protection in regard to the treatment of
electrical waste.
Importer : Weelko Barcelona, S.L.
ESB65397556
3.
2.
1.
4.
5.
6.
7.

SPÉCIFICATIONS
Poids et taille Taille de l'emballage (cm) 37x27,5x14
Poids brut (kg) 2,7
Dimensions produit (cm) 20,7x22x7
Caractéristiques de travail Puissance de travail 12 W
Fréquence de travail 250 KHz
Temps de travail 15 min
Caractéristiques élec-
triques
Tension nominale 220V ~ 240V
Fréquence 50Hz/60Hz
Puissance nominale 10 W
HAUTE FRÉQUENCE
HOHE FREQUENZ
ADVERTISSEMENT
• N’essayez en aucune circonstance
d’ouvrir ou d’inspecter les composants
internes ou les accessoires de votre
appareil. Si une inspection est nécessaire,
veuillez contacter votre fournisseur ou un
technicien qualifié.
• N’utilisez jamais votre appareil dans
un lieu humide ou peu ventilé (par
exemple, salles de bains) ; ceci pourrait
endommager les composants électriques
de votre appareil.
• N’utilisez jamais votre appareil à
l’extérieur, une exposition aux éléments
naturels pourrait endommager l’appareil.
• Si le cordon d’alimentation était rompu,
veuillez demander à un professionnel de
le remplacer pour éviter tout dommage,
ou demandez conseil à votre revendeur.
DÉCLARATION DE
CONFORMITÉ CE
Ce produit répond aux exigences
suivantes :
1. Conditions énoncées dans la Directive
« Basse tension »: 2014/35/EU.
2. Conditions énoncées dans la Directive
« Compatibilité électromagnétique » :
2014/30/EU.
RECYCLAGE
BIENVENUE!
Merci beaucoup d’avoir fait cet achat.
Veuillez lire les instructions avec attention
avant d’utiliser cet appareil. Vous pouvez
également demander conseil auprès
d’un professionnel afin de vous assurer
d’utiliser l’appareil correctement. Nous
n’endosserons aucune responsabilité
en cas d’accident provoqué par une
mauvaise utilisation.
L’entreprise se réserve le droit de modifier
les détails des instruments sans préavis.
Si vous détectez une erreur dans ces
instructions, n’hésitez pas à nous le faire
savoir afin d’y apporter une solution.
CONTENU DE L’EMBALLAGE
• Ces elements sount sujets à changement
sans préavis.
•L'apparence du produit peut différer de
l’image
No. PRODUIT RÉF. QTÉ.
1 ÉLECTRODE 1 10009 1
2 ÉLECTRODE 2 10010 1
3 ÉLECTRODE 3 10011 1
4 ÉLECTRODE 4 10012 1
5 POIGNÉE HAUTE
FRÉQUENCE
10040 1
6 UNITÉ PRINCIPALE - 1
7 CÂBLE ALIMENTATION - 1
PANNEAU AVANT/PANNEAU
ARRIÈRE
MODE D’EMPLOI
1.
1.
Branchez la source d’alimentation sur
le panneau arrière.
2.
2.
3.
4.
5.
6.
7.
Branchez les accessoires correctement
sur le panneau latéral.
3. Choisissez l’électrode en verre
adapté et insérez l’extrémité en métal dans
la partie de rendement du manche (veillez
à ne pas toucher l’électrode en verre avec
vos mains ou tout autre objet en métal).
Types d’électrode en verre :
a. Électrode en forme de champignon:
utilisé sur les larges zones de peau,
comme par exemple le visage, le
front, le cou, etc. fig. 3
b.Électrode en forme de louche:
utilisé sur les zones moyennes, telles que
le menton, etc. fig. 1
c. Électrode en forme de balle:
utilisé sur les petites zones, comme le nez,
etc. fig. 4
d. Électrode droit: utilisé en cas de
traitement indirect. fig. 2
4. Allumez l’appareil en appuyant sur le
bouton «POWER» et assurez-vous que
l’option «ENERGY» est réglée sur le
minimum.
5. Choisissez la durée du traitement
souhaitée en réglant l’option «TIME».
6. Appuyez sur le bouton «START/STOP»
pour commencer le traitement.
7. Assurez-vous d'appuyer votre doigt index
sur l'électrode en verre avant d’entrer en
contact avec la peau du client. Après touchez
la zone de traitement avec l’électrode en verre.
Vous pouvez ensuite ajuster doucement
l’éjection en réglant l’option «ENERGY».
8. Au cours du traitement, veuillez réduire
le niveau de rendement au niveau minimal
avant tout changement d’électrode, puis
ajustez lentement le niveau d’énergie et
choisissez l’intensité souhaitée.
9. À la fin du traitement, réduisez
doucement l’option «ENERGY» au
niveau minimal puis éteignez l’appareil en
appuyant sur le bouton «POWER» avant
de retirer l’électrode du visage du client.
USAGE INDIRECT
1. Choisissez l’électrode en verre droit et
insérez l’extrémité en métal dans la partie
de rendement du manche.
2. Donnez le combiné au client, en vous
assurant que le client tient l’électrode en
verre et non le manche.
3. Mettez l’appareil en marche en
appuyant sur le bouton «POWER» et en
vous assurant que l’option «ENERGY»
est réglée au minimum.
4. Choisissez la durée du traitement en
réglant l’option «TIMER».
5. Appuyez sur le bouton «START/STOP»
pour commencer le traitement.
6. Ajustez doucement l’éjection en réglant
l’option «ENERGY»
7. Effectuez le massage facial ou le
traitement en utilisant le produit prescrit
comme demandé. Pendant toute la
durée du traitement, assurez-vous de ne
pas toucher ou entrer en contact avec
l’électrode en verre tenue par le client.
8. À la fin du traitement, réduisez
doucement l’option «ENERGY» jusqu’au
minimum puis éteignez l’appareil en
appuyant sur le bouton «POWER».
CAUTIONS
• L’électrode en verre brillera lorsqu’il
se trouve à moins de 2 cm de la peau et
lorsque l’instrument est allumé. Dans ce
cas, réduisez l’énergie de l’appareil à
haute fréquence. Si le client sent toujours
l’étincelle, il peut se couvrir le visage
avec une petite serviette en coton mais
jamais avec une serviette en nylon ou
synthétique.
• Avant de retirer l’électrode en verre de la
peau, réduisez l’option «ENERGY» au
minimum puis éteignez l’appareil avant de
le retirer de la peau.
• Les clients ne peuvent pas porter
d’objets en métal ou de bijoux; tous
les objets doivent être retirés avant de
commencer le traitement.
• Les femmes enceintes ou les
personnes ayant un pacemaker (ou tout
appareil électrique ou de régulation des
battements du cœur) ne peuvent pas
être soumis à des traitements à haute
fréquence.
• Les produits utilisés lors d’un traitement
à haute fréquence ne doivent pas contenir
de l’alcool ni de substance à base d’alcool
afin d’empêcher toute combustion
accidentelle.
• Ne touchez jamais l’intérieur de l’œil
avec une électrode à haute fréquence.
• Veillez à ne toucher que la poignée du
combiné à haute fréquence.
MAINTENANCE
• Les électrodes en verre doivent
être gardés propres et secs, et doivent
être stérilisés avant et après chaque
utilisation.
ACCESSOIRES
RÉF. DESCRIPTION
10009 ÉLECTRODE 1
10010 ÉLECTRODE 2
10011 ÉLECTRODE 3
10012 ÉLECTRODE 4
10024 ÉLECTRODE SPÉCIALE 1
10025 ÉLECTRODE SPÉCIALE 2
10026 ÉLECTRODE SPÉCIALE 3
10040 POIGNÉE HAUTE FRÉQUENCE
HAUTE FRÉQUENCE
FR
F314A
Mode d’emploi
WE-2019-F314A
© 2019 Weelko
Vous trouverez plus d’information sur le site: www.weelko.com
Si l’un des composants électriques
ou leur emballage de présentation
porte ce symbole, cela signifie que ces
produits ne doivent pas être traités
comme des déchets ménagers habituels.
Afin de leur assurer un traitement
approprié, veuillez vous en débarrasser
en respectant les lois locales ou tel que
requis en cas d’élimination d’appareils
électriques. Ceci permettra de préserver
et de sauver les ressources naturelles et
d’améliorer les normes de protection de
l’environnement portant sur l’élimination
de déchets électriques.
Importateur : Weelko Barcelona, S.L.
ESB65397556

TECHNISCHE DATEN
Gewicht und Abmessun-
gen
Verpackungsgröße (cm) 37x27,5x14
Bruttogewicht (kg) 2,7
Produktabmessungen (cm) 20,7x22x7
Technische Daten Arbeitsleistung 12 W
Arbeitsfrequenz 250 KHz
Voreingestellte Arbeitszeit 15 Min
Elektrische Daten Nennspannung 220V ~ 240V
Frequenz 50Hz/60Hz
Nennleistung 10 W
WARNUNG
• Versuchen Sie niemals das Gerät
zu öffnen und die innen liegenden
Komponenten oder Zubehör zu
prüfen. Wenn eine Kontrolle
notwendig wird, setzen Sie sich dafür
mit Ihrem Lieferanten oder einem
kompetenten Techniker in Verbindung.
• Verwenden Sie das Gerät niemals in
feuchter oder unbelüfteter Umgebung,
wie z.B. Feuchträume oder Badezimmer,
um Schaden an den elektrischen
Komponenten Ihres Geräts zu vermeiden.
• Verwenden Sie das Gerät niemals
im Freien, Witterungseinflüsse können
Schäden verursachen.
• Wenn die elektrische Zuleitung
beschädigt ist, lassen Sie diese von
einem Fachmann kontrollieren und
austauschen, um Risiken zu vermeiden,
oder bitten Sie den Händler um
Kundendienstleistung.
EC-
KONFORMITÄTSERKLÄRUNG
Dieses Produkt erfüllt folgende
Anforderungen:
1. Die Vorschriften der
Niederspannungsrichtlinie: 2014/35/EU.
2. Die Vorschriften der Richtlinie über
elektromagnetische Verträglichkeit:
2014/30/EU.
RECYCLING
WILLKOMMEN!
Vielen Dank für Ihren Kauf! Bitte lesen
Sie die Anleitungen gründlich durch,
bevor Sie das Gerät in Betrieb nehmen.
Sie können auch Ihren Fachbetrieb um
eine Einweisung bitten, damit Sie sicher
sind, dass Sie das Gerät richtig einsetzen.
Wir haften nicht für Unfälle, die aufgrund
fehlerhafter Bedienung entstehen.
Der Hersteller behält sich technische
Änderungen der Geräte ohne vorherige
Ankündigung vor. Wenn Sie in diesen
Anleitungen Fehler finden, bitte senden
Sie uns eine E-Mail, damit wir diese
berichtigen können.
PACKUNGSINHALT
• Diese Komponenten können jederzeit
ohne vorherige Ankündigung geändert
werden.
•Das Aussehen des Produkts kann von
den Abbildungen abweichen.
Nr. PRODUCT REF. QTY.
1 ELEKTRODE 1 10009 1
2 ELEKTRODE 2 10010 1
3 ELEKTRODE 3 10011 1
4 ELEKTRODE 4 10012 1
5 HOCHFREQUENZ
HANDSTÜCK
10040 1
6 HAUPTEINHEIT - 1
7 STROMKABEL - 1
SCHALTTAFEL
GEBRAUCHSANWEISUNG
1. Stecken Sie das Stromkabel an der
Geräterückseite ein.
2. Die Zubehörteile richtig an der
Seite anschließen.
3. Wählen Sie die richtige Glaselektrode
und setzen Sie den Metallaufsatz in die
Öffnung des Handgriffs ein (Berühren Sie
die Glaselektrode nicht mit Ihren Händen
oder Metallgegenständen!).
Zuordnung der Glaselektroden:
a. Pilzförmige Elektrode: Einsatz bei
größeren Hautflächen (z.B. Gesicht,
Stirn, Nacken). fig. 3
b. Löffelförmige Elektrode: Einsatz
für mittlere Hautflächen, z.B. Kinn. fig. 1
c. Kügelförmige Elektrode: Einsatz für kleine
Hautflächen, z.B. Nase. fig. 4
d. Gerade Elektrode: Einsatz für indirekte
Behandlungen. fig. 2
4. Das Gerät mit dem “POWER”-Taster
einschalten und sicherstellen, dass
“ENERGY” auf Minimum eingestellt
ist.
5. Wählen Sie die gewünschte
Behandlungszeit mit “TIME” aus.
6. Drücken Sie die “START/PAUSE”-
Taste, um die Behandlung zu beginnen.
7. Stellen Sie den Zeigefinger auf die
Glaselektrode bevor das Gesicht des
Kunden mit dem Glas berührt wird. Jetzt
können Sie mit der Behandlung anfangen.
Sie können die Ausgangsleistung
mit Hilfe von “ENERGY” langsam anpassen.
8. Wenn Sie während der Behandlung
die Elektroden wechseln, sollten
Sie erstmal die Ausgangsleistung vor dem
Elektrodentausch auf Minimum
stellen und dann das Energieniveau
wieder auf die erforderliche
Intensität langsam bringen.
9. Verringern Sie zum Ende der
Behandlung das Energieniveau langsam
auf die geringste Ausgangsleistung
und schalten Sie anschließend die “POWER”-
Taste aus, bevor Sie die Elektroden vom
Gesicht des Kunden entfernen.
Indirekte Verwendung
1. Wählen Sie die gerade Glaselektrode
und stecken Sie den Metallaufsatz in
die Öffnung des Handgriffs ein.
2. Geben Sie dem Kunden das
Handstück und stellen Sie sicher,
dass er die Glaselektrode und nicht den
Handgriff hält.
3. Schalten Sie das Gerät mit “POWER”
ein und vergewissern Sie sich, dass
“ENERGY” auf dem Mindestwert steht.
4. Wählen Sie die gewünschte
Behandlungszeit mit Hilfe von “TIME”.
5. Drücken Sie die “START/STOP”-Taste,
um die Behandlung zu beginnen.
6. Passen Sie die Ausgangsleistung
mit Hilfe von “ENERGY” langsam an.
7. Führen Sie die Gesichtsmassage
oder Behandlung wie erforderlich und
verwenden Sie ein passendes Produkt
dazu. Stellen Sie während des gesamten
Behandlungsprozesses sicher, dass Sie
die vom Kunden gehaltene Glaselektrode
nicht berühren bzw. in Kontakt mit Ihren
geratet.
VORSICHT
• Der Pol der Glaselektrode gibt Funken
ab, wenn das eingeschaltete Gerät einen
Abstand von weniger als 2,5 cm von der
Haut hat. Verringern Sie die Energie des
Hochfrequenzgeräts. Wenn der Kunde
die Funken immer noch spürt, können Sie
das Gesicht mit einem kleinen trockenen
Baumwolltuch abdecken, nie mit einem
Tuch aus Nylon oder Synthetikmaterial.
• Bevor Sie die Glaselektrode von der
Haut nehmen, verringern Sie “ENERGY”
auf den eingestellten Minimalwert,
schalten Sie dann aus, bevor Sie das
Gerät von der Haut entfernen.
• Die Kunden dürfen keine
Metallgegenstände oder –Schmuck
tragen. Solche Gegenstände müssen vor
jeder Behandlung abgenommen werden.
• Hochfrequenzbehandlungen sollten
nicht an Schwangeren oder Personen mit
Herzschrittmachern (oder einem anderen
elektrischen oder rhythmischen Gerät zur
Regulierung) vorgenommen werden.
• Produkte, die mit
Hochfrequenzbehandlungen verwendet
werden, dürfen keinen Alkohol oder
alkoholhaltige Substanzen enthalten, um
eine versehentliche Verbrennung durch
Lichtbogenbildung zu vermeiden.
• Berühren Sie niemals den Bereich des
inneren Auges (Augapfel) mit irgendeiner
Hochfrequenzelektrode.
• Halten Sie nur den Handgriff des
Hochfrequenz-Handapparats.
WARTUNG
• Die Rohre der Glaselektrode müssen
sauber und trocken gehalten werden und
sind vor und nach jedem Gebrauch zu
sterilisieren.
ZUBEHÖR
REF. BESCHREIBUNG
10009 ELEKTRODE 1
10010 ELEKTRODE 2
10011 ELEKTRODE 3
10012 ELEKTRODE 4
10024 SPEZIAL-ELEKTRODE 1
10025 SPEZIAL-ELEKTRODE 2
10026 SPEZIAL-ELEKTRODE 3
10040 HOCHFREQUENZ HANDSTÜCK
HOHE FREQUENZ
DE
F314A
Bedienungsanleitung
WE-2019-F314A
© 2019 Weelko
Besuchen Sie unsere Webseite für weitere Informationen: www.weelko.com
Dieses Symbol auf unseren
elektrischen Geräten und auf den
Verpackungen bedeutet, dass diese
Produkte in Europa nicht mit dem Hausmüll
entsorgt werden dürfen. Für die Entsorgung
beachten Sie bitte die lokalen Vorschriften
oder die Anforderungen für die Entsorgung
von elektrischen Geräten. Diese Initiative
zur Entsorgung von Elektromüll hilft beim
klimaschutz und bei den natürlichen
Ressourcen.
Importeur : Weelko Barcelona, S.L.
ESB65397556
8.Verringern Sie zum Ende der Behand-
lung das Energieniveau langsam auf die
geringste Ausgangsleistung und schal-
ten Sie anschließend die “POWER”-
Taste aus.
3.
1.
4.
5.
6.
7.
2.

SCHEDA TECNICA
Peso e dimensioni Dimensioni imballaggio (cm) 37x27,5x14
Peso lordo (Kg) 2,7
Dimensioni consola (cm) 20,7x22x7
Caratteristiche di lavoro Potenza di lavoro 12 W
Frequenza di lavoro 250 KHz
Tempo di lavoro
prestabilito
15 min
Caratteristiche elettriche Voltaggio nominale 220V ~ 240V
Frequenza 50Hz/60Hz
Potenza nominale 10 W
AVVERTENZE DICHIARAZIONE
DI CONFORMITÀ CE
RICICLAGGIO
BENVENUTI!
CONTENUTO
DELL'IMBALLAGGIO
• I seguenti elementi possono essere
soggetti a modifiche senza previo avviso.
• L'aspetto del prodotto può differire
dall'immagine.
Nº PRODOTTO REF. QUANT.
1 ELETTRODO 1 10009 1
2 ELETTRODO 2 10010 1
3 ELETTRODO 3 10011 1
4 ELETTRODO 4 10012 1
5 COMANDO ALTRA
FREQUENZA
10040 1
6 UNITÀ PRINCIPALE - 1
7 CAVO ALIMENTAZIONE-
ELETTRICA
- 1
PANNELLO FRONTALE
ISTRUZIONI DI UTILIZZO
Scelta degli elettrodi:
USO INDIRETTO
PRECAUZIONI
MANUTENZIONE
ACCESSORI
REF. DESCRIZIONE
10009 ELETTRODO 1
10010 ELETTRODO 2
10011 ELETTRODO 3
10012 ELETTRODO 4
10024 ELETTRODO SPECIALE 1
10025 ELETTRODO SPECIALE 2
10026 ELETTRODO SPECIALE 3
10040 MANIPOLO ALTA FREQUENZA
ALTA FREQUENZA
IT
F314A
Manuale d’istruzioni
WE-2019-F314A
Il seguente simbolo, se presente
su uno degli apparati elettrici o
nell'imballaggio, indica che tali prodotti
non possono essere trattati come residui
domestici convenzionali in Europa. Per
assicurare un adeguato trattamento dei
rifiuti, smaltire il prodotto in conformità alle
leggi locali o alle consuetudini di
smaltimento delle apparecchiature
elettriche. Tale procedimento è
necessario per aiutare a migliorare gli
standard di protezione ambientale relativi
al trattamento dei residui elettrici.
Grazie per aver effettuato l’acquisto. Prima
di utilizzare l'apparecchio, leggere
attentamente il manuale d’istruzioni. È,
inoltre, consigliato seguire le indicazioni di
un professionista per assicurarsi di
utilizzare l'apparecchio correttamente.
L'Azienda declina ogni responsabilità
derivante da eventuali incidenti dovuti a
un utilizzo non corretto dell’apparecchio.
L'Azienda si riserva, inoltre, il diritto di
modificare o correggere informazioni sulle
apparecchiature senza previo avviso.
Qualora si dovessero riscontrare errori
nelle presenti istruzioni, vi preghiamo di
inviarci un'e-mail affinché possiamo
correggerli.
• Non aprire o ispezionare gli elementi
o gli accessori interni all’apparecchio.
Qualora fosse necessaria
un'ispezione, contattare il fornitore o
un tecnico specializzato.
Questo prodotto è conforme alle
disposizioni delle seguenti direttive:
1. Le misure della Direttiva di bassa
tensione: 2014/35/EC
1. Inserire la presa del cavo di
alimentazione nell’apposito
collegamento sul pannello posteriore.
2. Connettere gli accessori correttamente
sul pannello laterale.
3. Scegliere l’elettrodo di cristallo
adeguato ed inserirne l'estremo di metallo
nell’apposita fessura, situata sul manico
(stare attenti a non toccare l'elettrodo di
vetro con le mani o con oggetti metallici).
• Il polo dell’elettrodo di cristallo, se
acceso, produce una scintilla quando si
trova a meno di 2,5 cm di distanza dalla
pelle. In questo caso è necessario ridurre
l’energia. Qualora il cliente dovesse
avvertire ancora la scintilla, coprirgli il viso
con un panno secco di cotone (mai
utilizare materiale di nylon o sintetico).
• Prima di sollevare l’elettrodo di cristallo
dalla pelle del cliente, diminuire l’energia
riportando il comando potenza “ENERGY”
al valore minimo e spegnere la corrente.
• È indispensabile mantenere gli elettrodi
di cristallo puliti ed asciutti e sterilizzarli
prima e dopo il loro utilizzo.
• È assolutamente vietato, per il paziente,
indossare oggetti metallici o gioielli:
avvisarlo di toglierli prima di iniziare
qualsiasi tipo di trattamento.
• È vietato effettuare qualsiasi tipo di
trattamento ad alta frequenza su donne in
stato di gravidanza o persone dotate di
stimolatori cardiaci (o qualsiasi altro
apparecchio elettrico di ausilio al cuore).
• I prodotti usati nel trattamento di alta
frequenza non devono contenere alcool
né liquidi a base di spirito, per prevenirne
la combustione accidentale dovuta alla
formazione dell’arco elettrico.
• Stare attenti a non mettere in contatto
l’interno dell’occhio (globo oculare) con
un elettrodo di alta frequenza.
• Reggere l’apparecchiatura
esclusivamente dalla parte del manico.
a. Elettrodo a forma di fungo: indicato per
zone estese di pelle (viso, fronte, collo).
fig. 3
b. Elettrodo a forma di vanga: per zone
intermedie del viso (mento). fig. 1
c. Elettrodo con estremo a forma di sfera:
usato per piccole zone della pelle (naso).
fig. 4
d. Elettrodo a forma di tubo: per il tratta-
mento indiretto. fig. 2
4. Mettere in azione l’apparecchio attra-
verso il tasto "POWER" ed assicurarsi che
il comando potenza "ENERGY" sia situato
al livello minimo.
5. Selezionare il tempo di trattamento
desiderato attraverso il pulsante "TIME".
6. Premere il tasto di accensione "START /
POWER" per iniziare il trattamento.
7. Assicurarsi di porre il dito sul vetro
dell'elettrodo prima di qualsiasi tipo
contatto con la pelle del cliente: in segui-
to, mettere l’elettrodo di vetro in contatto
con la zona da trattare. A questo punto
regolarne la potenza a poco a poco
tramite il manipolo alta frequenza
"ENERGY".
8. Qualora fosse necessario cambiare
elettrodo durante il trattamento, diminuirne
la potenza al livello minimo, per poi
regolarne il livello moderatamente fino a
raggiungere l’intensità desiderata.
9. Al termine del trattamento regolare
gradualmente il comando “H/ENERGY”
fino a raggiungere livello minimo di
potenza. Quindi, spegnere l’apparecchia-
tura tramite il tasto “POWER” prima di
rimuovere l’elettrodo dal viso del cliente.
1. Selezionare l’elettrodo a forma di tubo
ed inserirlo nell’apposito manico.
2. Dare il manico al cliente, assicurandosi
che lo tenga dalla parte del cristallo.
3. Accendere l’apparecchio tramite il
tasto “POWER” ed assicurarsi che il
comando di potenza “ENERGY”sia al
minimo livello.
4. Selezionare la durata del trattamento
attraverso il tasto “TIME”.
5. Premere il pulsante di accensione
“START/STOP” per iniziare il trattamento.
6. Selezionare gradualmente la potenza
desiderate tramite il comando “ENERGY”.
7. Realizzare il massaggio facciale o il
trattamento con il prodotto adeguato.
Durante il trattamento, assicurarsi di non
toccare l’elettrodo di cristallo tenuto dal
cliente.
8. Alla fine del trattamento, ridurre
lentamente il comando “ENERGY” alla
potenza minima, dopodichè spegnere
l’apparecchio tramite il tasto di
accensione/spegnimento “POWER”.
2. Le misure della Direttiva sulla
compatibilità elettromagnetica:
2014/30/EC
• Non utilizzare mai l'apparecchio in
ambienti umidi o poco ventilati, in
modo da prevenire eventuali danni agli
elementi elettrici.
• Non utilizzare mai l'apparecchio
all'aperto, gli agenti meteorologici
potrebbero danneggiarlo.
• Qualora il cavo elettrico fosse rotto o
danneggiato, chiederne la sostituzione
da parte di un professionista per
evitare rischi, oppure contattare il
fornitore.
3.
1.
4.
5.
6.
7.
2.
© 2019 Weelko
Visita il nostro sito web per maggiori informazioni: www.weelko.com
Importatore : Weelko Barcelona, S.L.
ESB65397556
-
 1
1
-
 2
2
-
 3
3
-
 4
4
-
 5
5


in altre lingue
- English: Weelko F314A User manual
- français: Weelko F314A Manuel utilisateur
- español: Weelko F314A Manual de usuario
- Deutsch: Weelko F314A Benutzerhandbuch