Tascam CD-400U Manuale utente
- Categoria
- Lettore CD
- Tipo
- Manuale utente
Questo manuale è adatto anche per

OPCD400UTEA02
CD-400U
CD / MEMORY PLAYER
OWNER'S MANUAL

2
TASCAM CD-400U
IMPORTANT SAFETY PRECAUTIONS
The exclamation point within an equilateral triangle is intended to alert the user to the
presence of important operating and maintenance (servicing) instructions in the litera-
ture accompanying the appliance.
The lightning flash with arrowhead symbol, within equilateral triangle, is intended to alert
the user to the presence of uninsulated “dangerous voltage” within the product’s enclo-
sure that may be of sufficient magnitude to constitute a risk of electric shock to persons.
CAUTION: TO REDUCE THE RISK OF ELECTRIC SHOCK, DO NOT REMOVE COVER (OR
BACK). NO USER-SERVICEABLE PARTS INSIDE. REFER SERVICING TO QUALIFIED SERVICE
PERSONNEL.
1 Read these instructions.
2 Keep these instructions.
3 Heed all warnings.
4 Follow all instructions.
5 Do not use this apparatus near water.
6 Clean only with dry cloth.
7 Do not block any ventilation openings. Install in
accordance with the manufacturer’s instructions.
8 Do not install near any heat sources such as radiators,
heat registers, stoves, or other apparatus (including
ampliers) that produce heat.
9 Do not defeat the safety purpose of the polarized
or grounding-type plug. A polarized plug has two
blades with one wider than the other. A grounding
type plug has two blades and a third grounding
prong. The wide blade or the third prong are provid-
ed for your safety. If the provided plug does not fit
into your outlet, consult an electrician for replace-
ment of the obsolete outlet.
10 Protect the power cord from being walked on or
pinched particularly at plugs, convenience recepta-
cles, and the point where they exit from the appara-
tus.
11 Only use attachments/accessories specified by the
manufacturer.
12 Use only with the cart, stand, tripod, bracket, or table
specied by the manufacturer, or sold with the appa-
ratus. When a cart is used, use caution when moving
the cart/apparatus combination to avoid injury from
tip-over.
13 Unplug this apparatus during lightning storms or
when unused for long periods of time.
14 Refer all servicing to qualified service personnel.
Servicing is required when the apparatus has been
damaged in any way, such as power-supply cord or
plug is damaged, liquid has been spilled or objects
have fallen into the apparatus, the apparatus has
been exposed to rain or moisture, does not operate
normally, or has been dropped.
• The apparatus draws nominal non-operating power
from the AC outlet with its POWER or STANDBY/ON
switch not in the ON position.
• The mains plug is used as the disconnect device, the
disconnect device shall remain readily operable.
• Caution should be taken when using earphones or
headphones with the product because excessive
sound pressure (volume) from earphones or
headphones can cause hearing loss.
• If you are experiencing problems with this product,
contact TEAC for a service referral. Do not use the
product until it has been repaired.
CAUTION
• Do not expose this apparatus to drips or splashes.
• Do not place any objects filled with liquids, such as
vases, on the apparatus.
• Do not install this apparatus in a confined space
such as a book case or similar unit.
• The apparatus should be located close enough
to the AC outlet so that you can easily grasp the
power cord plug at any time.
• If the product uses batteries (including a battery
pack or installed batteries), they should not be
exposed to sunshine, fire or excessive heat.
• CAUTION for products that use replaceable lithium
batteries: there is danger of explosion if a battery is
replaced with an incorrect type of battery. Replace
only with the same or equivalent type.
WARNING
• Products with Class ! construction are equipped
with a power supply cord that has a grounding
plug. The cord of such a product must be plugged
into an AC outlet that has a protective grounding
connection.
WARNING: TO PREVENT FIRE OR SHOCK HAZARD, DO NOT EXPOSE THIS APPLIANCE TO RAIN OR MOISTURE.

TASCAM CD-400U
3
IMPORTANT SAFETY INSTRUCTIONS
8
RACK-MOUNTING THE UNIT
Use the supplied rack-mounting kit to mount the unit in a
standard 19-inch rack, as shown below.
Remove the feet of the unit before mounting.
CAUTION
•
Leave 1U of space above the unit for ventilation.
•
Allow at least 10 cm (4 in) at the rear of the unit for venti-
lation.
Laser information
This product contains a semiconductor laser system inside the
cabinet and is classified as a “CLASS 1 LASER PRODUCT”.
To prevent being exposed to the laser beam, do not try to open
the enclosure.
Notes on Laser Product
This product has been designed and manufactured according
to FDA regulations “title 21, CFR, chapter 1, subchapter J, based
on the Radiation Control for Health and Safety Act of 1968”,
and is classified as a class 1 laser product. There is no hazardous
invisible laser radiation during operation because invisible laser
radiation emitted inside of this product is completely confined
in the protective housings.
The label required in this regulation is shown at 1.
1
For USA
CAUTION
•
DO NOT REMOVE THE PROTECTIVE HOUSING USING A
SCREWDRIVER.
•
USE OF CONTROLS OR ADJUSTMENTS OR
PERFORMANCE OF PROCEDURES OTHER THAN THOSE
SPECIFIED HEREIN MAY RESULT IN HAZARDOUS
RADIATION EXPOSURE.
Optical pickup
Type: EP-C250L
Manufacturer: GUANGDONG EVER BRIGHT GROUP CO.,LTD
Laser output: Less than 0.30 mW on the objective lens
Wavelength: 792 +8 nm / −12 nm
CAUTIONS ABOUT BATTERIES
This product uses batteries. Misuse of batteries could
cause a leak, rupture or other trouble. Always abide by
the following precautions when using batteries.
•
Never recharge non-rechargeable batteries. The
batteries could rupture or leak, causing fire or injury.
•
When installing batteries, pay attention to the polarity
indications (plus/minus (+/–) orientation), and install
them correctly in the battery compartment as indicat-
ed. Putting them in backward could make the batteries
rupture or leak, causing fire, injury or stains around
them.
•
When you store or dispose batteries, isolate their
terminals with insulation tape or something like that
to prevent them from contacting other batteries or
metallic objects.
•
When throwing used batteries away, follow the dispos-
al instructions indicated on the batteries and the local
disposal laws.
•
Do not use batteries other than those specified. Do not
mix and use new and old batteries or different types of
batteries together. The batteries could rupture or leak,
causing fire, injury or stains around them.
•
Do not carry or store batteries together with small
metal objects. The batteries could short, causing leak,
rupture or other trouble.
•
Do not heat or disassemble batteries. Do not put them
in fire or water. Batteries could rupture or leak, causing
fire, injury or stains around them.
•
If the battery fluid leaks, wipe away any fluid on the
battery case before inserting new batteries. If the
battery fluid gets in an eye, it could cause loss of
eyesight. If fluid does enter an eye, wash it out thor-
oughly with clean water without rubbing the eye and
then consult a doctor immediately. If the fluid gets on
a person’s body or clothing, it could cause skin injuries
or burns. If this should happen, wash it off with clean
water and then consult a doctor immediately.
•
The unit power should be off when you install and
replace batteries.

4
TASCAM CD-400U
IMPORTANT SAFETY INSTRUCTIONS
8
For European Customers
Disposal of electrical and electronic equipment and
batteries and/or accumulators
(a) All electrical/electronic equipment and waste batteries/
accumulators should be disposed of separately from the
municipal waste stream via collection facilities designated
by the government or local authorities.
(b) By disposing of electrical/electronic equipment and waste
batteries/accumulators correctly, you will help save valuable
resources and prevent any potential negative effects on
human health and the environment.
(c) Improper disposal of waste electrical/electronic equipment
and batteries/accumulators can have serious effects on the
environment and human health because of the presence of
hazardous substances in the equipment.
(d) The Waste Electrical and Electronic Equipment
(WEEE) symbols, which show wheeled bins that have
been crossed out, indicate that electrical/electronic
equipment and batteries/accumulators must be
collected and disposed of separately from household
waste.
If a battery or accumulator contains more than the
specified values of lead (Pb), mercury (Hg), and/or
cadmium (Cd) as defined in the Battery Directive
(2006/66/EC), then the chemical symbols for those
elements will be indicated beneath the WEEE symbol.
(e) Return and collection systems are available to end users.
For more detailed information about the disposal of old
electrical/electronic equipment and waste batteries/
accumulators, please contact your city office, waste disposal
service or the shop where you purchased the equipment.
•
Remove the batteries if you do not plan to use the unit
for a long time. Batteries could rupture or leak, causing
fire, injury or stains around them. If the battery fluid
leaks, wipe away any fluid on the battery compartment
before inserting new batteries.
•
Do not disassemble a battery. The acid inside the
battery could harm skin or clothing.
V
WARNING
DO NOT INGEST BATTERY, CHEMICAL BURN HAZARD
followed by:
[The remote control supplied with] This product contains a coin/
button cell battery. If the coin/ button cell battery is swallowed,
it can cause severe internal burns in just 2 hours and can lead to
death.
Keep new and used batteries away from children. If the battery
compartment does not close securely, stop using the product
and keep it away from children.
If you think batteries might have been swallowed or placed
inside any part of the body, seek immediate medical attention.
Pb, Hg, Cd
8
For China
“仅适用于海拔 2000m 以下地区安全使用”
“仅适用于非熱帯气候条件下安全使用”
“环境保护使用年限”
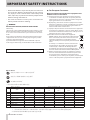
产品有毒有害物质或元素的名称及含量
机种 : CD-400U 有毒有害物质或元素
品名
铅
(Pb)
汞
(Hg)
镉
(Cd)
六价铬
(Cr6+)
多溴联苯
(PBB)
多溴二苯醚
(PBDE)
1 CHASSIS 部份 ○ ○ ○ ○ ○ ○
2 FRONT PANEL 部份 ○ ○ ○ ○ ○ ○
3 螺丝部份 ○ ○ ○ ○ ○ ○
4 线材部份 ○ ○ ○ ○ ○ ○
5 PCB Assy 部份 × ○ ○ ○ ○ ○
6 电源部份 ○ ○ ○ ○ ○ ○
7 附属品部份 × ○ ○ ○ ○ ○
8 LABEL 部份 ○ ○ ○ ○ ○ ○
9 包装部份 ○ ○ ○ ○ ○ ○
○ :表示该有毒有害物质在该部件所有均质材料中的含有量均在 GB/T26572 标准规定的限量要求以下。
× :表示该有毒有害物质至少在该部件的某一均质材料中的含量超出 GB/T26572 标准规定的限量要求。
(针对现在代替技术困难的电子部品及合金中的铅 )
IN USA/CANADA, USE ONLY ON 120 V SUPPLY.

TASCAM CD-400U
5
Wireless equipment precautions
Compliance of radio transmitter and interference
This product has the function of broadband transmitter
using 2.4 GHz Band.
Use frequency range: 2400 MHz - 2480 MHz
Maximum output power: Bluetooth® Class2 (less than
2.5 mW)
CAUTION
Use only in the country where you purchased the prod-
uct.
•
Authorization of wireless devices are different in coun-
tries or regions.
•
Depending on the country, restrictions on the use of
Bluetooth wireless technology might exist.
CAUTION
Changes or modifications to this equipment not expressly
approved by TEAC CORPORATION for compliance could
void the user’s authority to operate this equipment.
Radiation Exposure requirements
This equipment meets the regulation, which is recog-
nized internationally, for the case of human exposure to
radio waves generated by the transmitter.
8
Model for U.S.A
This device complies with Part 15 of the FCC Rules.
Operation is subject to the following two conditions: (1)
this device may not cause harmful interference, and (2)
this device must accept any interference received, includ-
ing interference that may cause undesired operation.
Labeling of authorization
FCC ID: XEG-CD400U
This equipment has been tested and found to comply
with the limits for a Class B digital device, pursuant to
Part 15 of the FCC Rules. These limits are designed to pro-
vide reasonable protection against harmful interference
in a residential installation. This equipment generates,
uses, and can radiate radio frequency energy and, if not
installed and used in accordance with the instruction
manual, may cause harmful interference to radio com-
munications. However, there is no guarantee that inter-
ference will not occur in a particular installation. If this
equipment does cause harmful interference to radio or
television reception, which can be determined by turning
the equipment off and on, the user is encouraged to try
to correct the interference by one or more of the follow-
ing measures.
a) Reorient or relocate the receiving antenna.
b) Increase the separation between the equipment and
receiver.
c) Connect the equipment into an outlet on a circuit different
from that to which the receiver is connected.
d) Consult the dealer or an experienced radio/TV technician for
help.
FCC Radiation Exposure Statement
This device complies with FCC radiation exposure limits
set forth for an uncontrolled environment and it also
complies with Part 15 of the FCC RF Rules.
This equipment must be installed and operated in accor-
dance with provided instructions and the antenna(s) used
for this transmitter must be installed to provide a separa-
tion distance of at least 20 cm from all persons and must
not be co-located or operating in conjunction with any
other antenna or transmitter.
End-users and installers must be provided with anten-
na installation instructions and consider removing the
no-collocation statement.
8
Model for Canada
Compliance of radio transmitter
This device complies with Industry Canada’s license-ex-
empt RSSs. Operation is subject to the following two con-
ditions:
(a) This device may not cause interference; and
(b) This device must accept any interference, including
interference that may cause undesired operation of the
device.
Labeling of authorization
IC: 1559C-CD400U
Compliance of interference
This Class B digital apparatus complies with Canadian
ICES-003.
Labeling of compliance
CAN ICES-3(B)/NMB-3(B)

6
TASCAM CD-400U
Wireless equipment precautions
Radiation Exposure requirements
The device meets the exemption from the routine evalu-
ation limits in section 2.5 of RSS 102 and compliance with
RSS-102 RF exposure, users can obtain Canadian informa-
tion on RF exposure and compliance.
This transmitter must not be co-located or operating in
conjunction with any other antenna or transmitter. This
equipment should be installed and operated with a min-
imum distance of 20 centimeters between the radiator
and your body.
8
Modèle pour le Canada
Conformité de l’émetteur radio
Le présent appareil est conforme aux CNR d’Industrie
Canada applicables aux appareils radio exempts de
licence. L’exploitation est autorisée aux deux conditions
suivantes :
1) l’appareil ne doit pas produire de brouillage;
2) l’utilisateur de l’appareil doit accepter tout brouillage
radioélectrique subi, même si le brouillage est
susceptible d’en compromettre le fonctionnement.
Marquage d’autorisation
IC: 1559C-CD400U
Conformité de brouillage
Cet appareil numérique de la classe B est conforme à la
norme NMB-003 du Canada.
Marquage d’autorisation
CAN ICES-3(B)/NMB-3(B)
Exigences relatives à l’exposition aux rayonnements
Le dispositif rencontre l’exemption des limites courantes
d’évaluation dans la section 2.5 de RSS 102 et la confor-
mité à l’exposition de RSS-102 rf, utilisateurs peut obtenir
l’information canadienne sur l’exposition et la conformité
de rf.
Cet émetteur ne doit pas être Co-placé ou ne fonction-
nant en même temps qu’aucune autre antenne ou émet-
teur. Cet équipement devrait être installé et actionné avec
une distance minimum de 20 centimètres entre le radia-
teur et votre corps.
8
Model for EUR
Hereby, TEAC Corporation declares that
the radio equipment type CD-400U is in
compliance with Directive 2014/53/EU.,
and the other Directives, and Commission
Regulations.
The full text of the EU declaration of conformity is avail-
able at the following internet address: Please contact us
by e-mail.
http://tascam.eu/en/kontakt.html
EU Importer: TEAC Europe GmbH
Bahnstrasse 12, 65205 Wiesbaden-Erbenheim, Germany
Radiation Exposure requirements
This equipment complies with EN.62311; Assessment of
electronic and electrical equipment related to human
exposure restrictions for electromagnetic fields; the har-
monised standard of DIRECTIVE 2014/53/EU.

TASCAM CD-400U
7
Contents
IMPORTANT SAFETY PRECAUTIONS ...................................... 2
Compliance of radio transmitter and interference .................5
1 – Introduction ....................................................................... 8
Features ....................................................................................................... 8
Items included with this product .......................................................8
Conventions used in this manual.......................................................8
Trademarks .................................................................................................9
Precautions for placement and use...................................................9
Notes about power supplies ................................................................9
Beware of condensation .......................................................................9
Cleaning the unit .....................................................................................9
About compact discs ........................................................................... 10
Precautions for use .......................................................................... 10
Slot loading of discs ............................................................................. 10
SD cards and USB flash drives .......................................................... 10
Precautions for use .......................................................................... 10
SD card write protection................................................................ 10
Bluetooth® ............................................................................................... 11
Profiles .................................................................................................. 11
Codecs .................................................................................................. 11
Content protection .......................................................................... 11
Transmission security ..................................................................... 11
Using the TEAC Global Site ................................................................ 11
Product registration ............................................................................. 11
2 – Names and Functions of Parts ........................................ 12
Front panel .............................................................................................. 12
Rear panel ................................................................................................ 15
Wireless remote control (TASCAM RC-CD400) ........................... 16
Home Screen .......................................................................................... 17
Menu structure ...................................................................................... 18
Basic MENU screen operations ........................................................ 18
Menu operation procedures ........................................................ 18
3 – Preparation ....................................................................... 19
Making connections ............................................................................ 19
Assembling the AM antenna........................................................ 19
Preparing the remote control ........................................................... 20
Installing batteries ........................................................................... 20
When to replace batteries ............................................................. 20
Battery precautions ......................................................................... 20
Using the wireless remote control ............................................. 20
Turning the unit on and off ............................................................... 20
Adjusting the display brightness .................................................... 20
Inserting and removing discs ........................................................... 21
Inserting discs.................................................................................... 21
Ejecting discs ..................................................................................... 21
Forcing disc ejection ....................................................................... 21
Inserting and removing SD cards ................................................... 21
Inserting SD cards ............................................................................ 21
Removing SD cards .......................................................................... 21
SD card write protection switches ............................................. 21
Connecting and disconnecting USB flash drives ...................... 22
Connecting USB flash drives ........................................................ 22
Disconnecting USB flash drives................................................... 22
Setting remote control reception ................................................... 22
Panel lock functions ............................................................................. 22
Selecting the playback source. ........................................................ 22
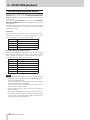
4 – CD/SD/USB playback .......................................................23
Files that can be played back ........................................................... 23
Tracks and folders on SD cards and USB flash drives ............... 23
Playback area .......................................................................................... 24
Setting the playback area.............................................................. 24
Basic playback operations ................................................................. 24
Playing tracks ..................................................................................... 24
Selecting tracks for playback ............................................................ 24
Skipping to earlier and later tracks ............................................ 24
Selecting tracks directly ................................................................. 25
Folder playback (SD cards and USB flash drives only) ............. 25
Playback modes .................................................................................... 26
Setting the playback mode .......................................................... 26
Searching backward and forward ................................................... 27
Using the repeat playback function ............................................... 27
Ordinary repeat playback settings ............................................. 27
A-B repeat playback settings (audio CDs only) ..................... 28
Using the power-on-play function ................................................. 28
Using the resume function ................................................................ 29
Using the incremental playback function .................................... 29
Time and text information display ................................................. 30
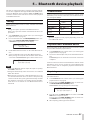
5 – Bluetooth device playback ............................................. 31
Pairing ....................................................................................................... 31
Usable controls ...................................................................................... 31
Playback from a Bluetooth device. ................................................. 31
Unpairing ................................................................................................. 31
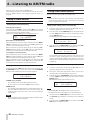
6 – Listening to AM/FM radio ................................................ 32
Tuning in radio stations ...................................................................... 32
Changing the received frequency.............................................. 32
Setting the FM mode ...................................................................... 32
Setting radio station presets............................................................. 32
Setting radio station presets automatically ............................ 32
Setting radio station presets manually .................................... 32
Selecting preset stations ............................................................... 33
Clearing preset assignments ........................................................ 33
Muting tuner broadcast sound ........................................................ 33
Setting the tuner broadcast outputs ............................................. 33
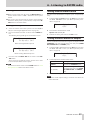
RDS (European model only) .............................................................. 34
PTY search ........................................................................................... 34
RDS Program type ............................................................................ 34
7 – Dubbing (copying) functions .......................................... 36
Dubbing overview ................................................................................ 36
Dubbing procedures ........................................................................... 36
Muting analog outputs while dubbing ........................................ 37
Make dubbing format settings ........................................................ 37
Recording times when dubbing .................................................... 37
8 – Other functions ................................................................ 38
Setting the automatic power saving function ........................... 38
Adjusting the analog output ............................................................ 38
Serial mode setting (when sold-separately Ethernet card
installed)................................................................................................... 38
Using the RS-232C connector .......................................................... 38
Setting the transmission speed (baud rate) ........................... 38
Using the AUX IN jack .......................................................................... 38
Checking the firmware version ........................................................ 39
Restoring factory default settings .................................................. 39
9 – Troubleshooting ............................................................... 40
10 – Specifications ................................................................. 41
Ratings ...................................................................................................... 41
Inputs and outputs ............................................................................... 41
Analog audio input and output ratings ................................... 41
Control input/output ...................................................................... 41
Audio performance .............................................................................. 41
Bluetooth ................................................................................................. 42
Tuner ......................................................................................................... 42
Other ......................................................................................................... 42
Dimensional drawings ........................................................................ 42

8
TASCAM CD-400U
1 – Introduction
Thank you very much for purchasing the TASCAM CD-400U CD/
MEMORY PLAYER.
Before using this unit, read this Owner's Manual carefully so that
you will be able to use it correctly and enjoy working with it for
many years. After you have finished reading this manual, please
keep it in a safe place for future reference.
You can also download this Owner’s Manual from the TEAC
Global Site (http://teac-global.com/).
Features
0
Playback of CDs, SD cards and USB flash drives possible
0
CD player supports CD-DA, CD-ROM, CD-R, CD-RW (CD-DA
format only), MP3-CD and WMA-CD formats
0
MP3, AAC, WAV and WMA files can be played from SD cards
and USB flash drives
0
Bluetooth® receiver built-in, enabling playback from smart
phones and other devices
0
AM/FM tuner built-in
0
AUX IN jack can be used for playback from mobile audio play-
ers and other devices
0
Analog outputs include pairs of XLR balanced and RCA unbal-
anced jacks
0
Incremental playback function jumps to the beginning of the
next track, enabling instant cueing
0
Recording from audio CDs and the tuner to SD cards and USB
flash drives is possible
0
RS-232C serial port allows external control
0
Unbalanced RCA connectors dedicated for tuner output
0
CD/SD/USB direct track searching using number keys or the
dedicated remote control
0
Power-on-play function can automatically start track play-
back when the unit is turned on
0
Panel lock function can disable use of front panel buttons to
increase operation confidence
0
Headphone output jack enables audio monitoring
0
1U rackmount size
Items included with this product
This product includes the following items.
Take care when opening the package to avoid damaging the
items. Keep the packing materials for transportation in the fu-
ture.
Please contact the store where you purchased this unit if any of
these items are missing or have been damaged during transpor-
tation.
0
Main unit ...............................................................................................× 1
0
Power cord ............................................................................................ × 1
0
Wireless remote control (TASCAM RC-CD400) ........................× 1
0
AAA batteries ....................................................................................... × 2
0
FM antenna ...........................................................................................× 1
0
AM antenna ......................................................................................... × 1
0
Rackmount screw kit .........................................................................× 1
0
Owner’s Manual (this document) including warranty .......... × 1
Conventions used in this manual
In this manual, we use the following conventions:
0
When we refer to buttons, connectors and other parts of
this unit and other equipment, we use a bold font like this:
HOME/MENU button.
0
When we show characters that appear on the display, the
typeface looks like this: MENU.
0
SD/SDHC memory cards are called “SD cards”.
0
The CD-DA format is sometimes called the "audio CD" format.
In addition, CDs with tracks recorded in the audio CD format
are sometimes called "audio CDs".
0
CDs with MP3 and WMA files are called "data CDs".
0
The input source that is currently selected is called the “current
source”.
0
The folder that is currently selected is called the "current fold-
er".
0
Computers, portable audio devices and other equipment
connected to this unit using Bluetooth are called "Bluetooth
devices".
0
As necessary, additional information is provided under TIP,
NOTE and CAUTION headings.
TIP
These are tips about how to use the unit.
NOTE
These provide additional explanations and describe special
cases.
CAUTION
Failure to follow these instructions could result in injury, dam-
age to equipment or lost recording data, for example.

TASCAM CD-400U
9
1 – Introduction
Trademarks
0
TASCAM is a registered trademark of TEAC Corporation.
0
The SDHC logo is a trademark of SD-3C, LLC.
0
The Bluetooth® word mark and logo are the property of Blue-
tooth SIG, Inc. and are used by TEAC Corporation with per-
mission.
0
Qualcomm® aptX™ is a product of Qualcomm® Technologies
International, Ltd.
0
Qualcomm® is a trademark of Qualcomm® Incorporated, reg-
istered in the United States and other countries, used with
permission. aptX is a trademark of Qualcomm® Technologies
International, Ltd., registered in the United States and other
countries, used with permission.
0
Supply of this product does not convey a license nor imply
any right to distribute MPEG Layer-3 compliant content
created with this product in revenue-generating broadcast
systems (terrestrial, satellite, cable and/or other distribution
channels), streaming applications (via Internet, intranets
and/or other networks), other content distribution systems
(pay-audio or audio-on-demand applications and the like) or
on physical media (compact discs, digital versatile discs, semi-
conductor chips, hard drives, memory cards and the like).
An independent license for such use is required. For details,
please visit http://mp3licensing.com.
0
Other company names, product names and logos in this doc-
ument are the trademarks or registered trademarks of their
respective owners.
Information is given about products in this manual only
for the purpose of example and does not indicate any
guarantees against infringements of third-party intel-
lectual property rights and other rights related to them.
TEAC Corporation will bear no responsibility for infringe-
ments on third-party intellectual property rights or their
occurrence because of the use of these products.
With the exception of personal enjoyment and similar
uses, copyrighted materials belonging to third parties
cannot be used without permission from the rights
holders in accordance with copyright law. Please use the
equipment appropriately.
TEAC Corporation will bear no responsibility for rights
infringements committed by users of this product.
Precautions for placement and use
0
The operating temperature range of this unit is 5–35 °C.
0
Do not install this unit in the following types of locations. Do-
ing so could make the sound quality worse or cause malfunc-
tion.
Locations with frequent vibrations
Near windows or other places exposed to direct sunlight
Near heaters or other extremely hot places
Extremely cold places
Very humid or poorly ventilated places
Very dusty places
0
Install the unit so that it is level.
0
To enable good heat dissipation, do not place anything on
top of the unit.
0
Do not place the unit on top of a power amplifier or other de-
vice that generates heat.
0
To mount this unit in a rack, use the included rackmount
screw kit and mount it as shown in the illustration below.
Leave at least 1U of space open above it in the rack.
Notes about power supplies
0
Insert the included power cord all the way into the AC IN con-
nector.
0
Do not connect a power supply other than one that is
AC100V - 240V (50/60Hz).
0
Hold the power cord by its plug when connecting or discon-
necting it.
Beware of condensation
Condensation could occur if the unit is moved from a cold place
to a warm place, it is used immediately after a cold room has
been heated or it is otherwise exposed to a sudden temperature
change.
To prevent this, or if this occurs, let the unit sit for one or two
hours at the new room temperature before using it.
Cleaning the unit
Use a dry soft cloth to wipe the unit clean. Do not wipe with
chemical cleaning cloths, thinner, alcohol or other chemical
agents. Doing so could damage the surface or cause discolor-
ation.

10
TASCAM CD-400U
1 – Introduction
About compact discs
In addition to commercially-available music CDs, this unit can
play CD-R and CD-RW discs recorded in the audio CD (CD-DA)
format as well as CD-R and CD-RW discs that contain MP3 and
WAV audio files.
CAUTION
8cm CDs cannot be used. If an 8cm CD is inserted, it will au-
tomatically be ejected. During ejection, if it stops at a place
where it cannot be removed, press and hold the EJECT but-
ton.
Precautions for use
0
Always insert discs with the label facing upward.
0
To remove a disc from its case, press down on the center of
the disc holder, then lift the disc out, holding it carefully by
the edges.
0
Do not touch the signal side (the unlabeled side). Finger-
prints, oils and other substances can cause errors during play-
back.
0
If fingerprints or dust adhere to the signal recording side of
a disc, wipe gently with a soft dry cloth from the center to-
wards the outside edge.
0
Dirt on discs can lower the sound quality, so clean them and
always store them in a clean state.
0
Do not use any record spray, anti-static solutions, benzene,
paint thinner or other chemical agents to clean CDs as they
could damage the delicate playing surface. It may cause CDs
to become unplayable.
0
Do not apply labels or other materials to discs. Do not use
discs that have had tape, stickers or other materials applied
to their surface. Do not use discs that have sticky residue
from stickers, etc. Such discs could become stuck in the unit
or cause it to malfunction.
0
Never use a commercially available CD stabilizer.
0
Using stabilizers with this player will damage the mechanism
and cause it to malfunction.
0
Do not use cracked discs.
0
Only use circular compact discs. Avoid using non-circular pro-
motional, etc. discs.
0
Copy Control CDs have been sold by several record compa-
nies in an attempt to protect their copyrights. Since some of
these discs do not comply with the CD specifications, they
may not be playable on the unit.
Slot loading of discs
1.
As shown in the illustration, hold the disc with the labeled
side up and insert it part way into the slot.
2.
Push the disc in further until just before it disappears. It will
automatically be drawn in to the slot.
If a disc will not load properly
If a disc becomes stuck during insertion, for example, and is diffi-
cult to push, do not try to force the disc in. Pull the disc out once,
press the EJECT button, and then try inserting it again. (Trying
to force the disc in could damage the unit.)
SD cards and USB flash drives
This unit uses SD cards and USB flash drives for recording and
playback.
A list of SD cards and USB flash drives that have been confirmed
for use with this unit can be found on our web site. Please access
to a product page of this product from the TEAC Global Site
(http://teac-global.com) to find the list or contact the TASCAM
customer support service.
Precautions for use
SD cards and USB flash drives are delicate media.
In order to avoid damaging SD cards and USB flash drives, please
take the following precautions when handling them.
0
Do not leave them in extremely hot or cold places.
0
Do not leave them in extremely humid places.
0
Do not let them get wet.
0
Do not put things on top of them or twist them.
0
Do not hit them.
0
Do not remove or insert them during recording, playback,
data transmission or other access.
0
When transporting them, put them into cases, for example.
SD card write protection
This unit writes track information to the media in order to im-
prove operation performance. Since track information cannot be
written to SD cards that are write-protected, the amount of time
needed to read media will become longer, for example.

TASCAM CD-400U
11
1 – Introduction
Bluetooth®
This unit has a built-in Bluetooth audio receiver, and can output
sound played on a computer or portable audio device that sup-
ports Bluetooth (Bluetooth device).
CAUTION
The Bluetooth function of this unit is not guaranteed to en-
able connection or operation with all Bluetooth devices.
Profiles
This unit supports the following Bluetooth profiles.
0
A2DP (Advanced Audio Distribution Profile)
0
AVRCP (Audio/Video Remote Control Profile)
In order to transfer audio by Bluetooth, the Bluetooth device
must support A2DP.
In order to control playback on the Bluetooth device, it must
support AVRCP.
Even if a Bluetooth device supports the same profiles, though,
its functions might differ according to its specifications.
Codecs
This unit supports the following codecs. It will automatically se-
lect one of them during audio transfer.
0
SBC
0
AAC
0
aptX
The unit will select the appropriate codec to use according to
the codec compatibility of the other Bluetooth device and com-
munication conditions.
NOTE
i
You cannot select the codec to be used by pressing a button,
for example.
i
Due to characteristics of Bluetooth wireless technology, play-
back from a Bluetooth device will be slightly delayed com-
pared to playback from this unit.
Content protection
This unit supports SCMS-T as a form of content protection when
transmitting audio, so it can play protected audio.
Transmission security
This unit supports security functions during Bluetooth transmis-
sion in accordance with the Bluetooth standard specifications,
but it does not guarantee the privacy of such transmissions.
TEAC CORPORATION will bear no responsibility should an infor-
mation leak occur during transmission by Bluetooth.
Using the TEAC Global Site
You can download updates for this unit from the TEAC Global
Site:
http://teac-global.com/
In the TASCAM Downloads section, select the desired language
to open the Downloads website page for that language.
Product registration
Customers in the USA, please visit the following TASCAM web-
site to register your TASCAM product online.
http://tascam.com/

12
TASCAM CD-400U
2 – Names and Functions of Parts
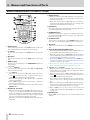
Front panel
1 POWER switch
This turns the unit on and off
CAUTION
Before turning the unit on, lower the volumes of connected
equipment to their minimum levels.
Failure to do so could result in a sudden loud noise that could
harm hearing, for example.
NOTE
Do not use this switch when the unit is operating (including
dubbing, playing back, or writing data to an SD card or USB
flash drive). Doing so could cause dubbing to fail or dubbed
data to be lost, for example.
2 Disc slot
Insert a disc here.
After a disc is inserted partway, the unit will automatically
draw it in.
3 EJECT button
Press to eject a disc. (see “Inserting and removing discs” on
page 21)
Press and hold for at least 10 seconds to force-eject a disc. (see
“Forcing disc ejection” on page 21)
4 Display
This shows various types of information.
5 HOME/MENU button
i
When the Home Screen is open, press to open the MENU
screen. (see “Menu structure” on page 18) (see “Basic
MENU screen operations” on page 18)
i
When the MENU screen is open, press this button to return
to the Home Screen.
6 MULTI JOG dial
This dial functions as a dial when turned and as a button
when pressed.
Dial functions
i
When the current source is CD, USB or SD and the play area
is set to "ALL", turn the MULTI JOG dial to skip tracks. (see
“Skipping to earlier and later tracks” on page 24)
i
When the current source is USB or SD and the play area is
folder ( icon shown), turn the MULTI JOG dial to move
among tracks and folders. (see “Folder playback (SD cards
and USB flash drives only)” on page 25)
i
When the current source is AM/FM, turn the MULTI JOG dial
to change the received frequency. (see “Tuning in radio sta-
tions” on page 32)
i
When the current source is AM/FM and preset mode is en-
abled, turn the MULTI JOG dial to move to the previous or
next preset number. (see “Setting radio station presets” on
page 32)
i
When a MENU screen is open, turn to select items and
change setting values. (see “Basic MENU screen operations”
on page 18)
i
When the unit is in shift mode (SHIFT indicator lit), turn the
MULTI JOG dial to adjust the display brightness. (see “Ad-
justing the display brightness” on page 20)
Button function
i
When a Menu Screen is open, press to confirm selections
and settings (ENTER button function).
7 STOP button
i
Press to stop playback.
i
When the incremental playback function is on, press this
button during playback to jump to the beginning of the
next track and pause. (see “Using the incremental playback
function” on page 29)
i
When the current source is AM or FM, press to switch be-
tween frequency and preset modes. (see “Changing the
received frequency” on page 32)
i
Press when dubbing to stop. (see “Dubbing procedures” on
page 36)
8 PLAY button
i
Press when stopped or in playback standby to start play-
back.
i
When the incremental playback function setting is ON,
press this button during playback to start playback of the
next track. (see “Using the incremental playback function”
on page 29)
9 PAUSE button
Press when stopped or playing back to start playback stand-
by.
0
m
/
,
[FAST] buttons
i
Press and hold these buttons to search backward/forward.
(see “Searching backward and forward” on page 27)
i
If the current source is CD and you are searching an audio
CD backward/forward, press and hold the button for the
opposite direction (
m
or
,
) to search at high-speed.
(see “Searching backward and forward” on page 27)
i
When the current source is AM or FM, press to automatically
search received frequencies for that frequency mode. (see
“Changing the received frequency” on page 32)

TASCAM CD-400U
13
2 – Names and Functions of Parts
q PHONES
Use this standard stereo jack to connect stereo headphones.
Use an adapter to connect headphones with a mini plug.
Use the PHONES knob to adjust the headphone output level.
PHONES jack output can be lowered up to −18 dB in 1dB
intervals using the A.Out Att. setting screen. (see “Adjusting
the analog output” on page 38)
CAUTION
Before connecting headphones, minimize the volume with
the PHONES knob. Failure to do so could result in a sudden
loud noise that could harm hearing, for example.
w AUX IN jack
This stereo mini jack is an audio line input jack.
Connect a portable digital player or other external audio de-
vice here. (see “Using the AUX IN jack” on page 38)
CAUTION
i
Before connecting another device to the AUX IN jack, mini-
mize the volume of that device. Failure to do so could result
in a sudden loud noise that could harm hearing, for example.
i
Before connecting or disconnecting with the AUX IN jack, set
the current source to something other than AUX (CD or Blue-
tooth) or turn the unit off.
e Remote control signal receiver
Signals from the wireless remote control (TASCAM RC-CD400)
are received here. When operating the remote control, point
it toward this receiver.
r 1 [LOCK] button
i
Press to input track number 1 when the current source is
CD, USB or SD and the play area is set to "ALL". (see “Selecting
tracks directly” on page 25)
i
When the current source is AM or FM, press to tune in a pre-
set station.
i
When the unit is in shift mode (SHIFT indicator lit), press to
turn the panel lock function (which disables button use to
prevent misoperation) on/off. (see “Panel lock functions” on
page 22)
NOTE
i
The number buttons on the unit (1 [FLASH] – 0 [DUB]) can
be used to specify numbers for track selection. For track num-
bers, a maximum of two digits can be input for audio CDs
and three digits for data CDs. (see “Selecting tracks directly”
on page 25)
i
When in SHIFT mode (SHIFT indicator lit), pressing a number
button will change the setting of the function shown in white
lettering below the button.
t 2 [P.O.PLAY] button
i
Press to input track number 2 when the current source is
CD, USB or SD and the play area is set to "ALL". (see “Selecting
tracks directly” on page 25)
i
When the current source is AM or FM, press to tune in a pre-
set station.
i
When in SHIFT mode (SHIFT indicator lit), press to turn the
power-on-play function on/off. (see “Using the power-on-
play function” on page 28)
y 3 [P.MODE] button
i
Press to input track number 3 when the current source is
CD, USB or SD and the play area is set to "ALL". (see “Selecting
tracks directly” on page 25)
i
When the current source is AM or FM, press to tune in a pre-
set station.
i
When the current source is CD, USB or SD, and shift mode is
active (SHIFT indicator lit) press to cycle through the play-
back modes (ordinary, single and random). (see “Playback
modes” on page 26)
u 4 [REPEAT] button
i
Press to input track number 4 when the current source is
CD, USB or SD and the play area is set to "ALL". (see “Selecting
tracks directly” on page 25)
i
When the current source is AM or FM, press to tune in a pre-
set station.
i
When the current source is CD, USB or SD, and shift mode is
active (SHIFT indicator lit) press to turn the repeat playback
function on/off. (see “Ordinary repeat playback settings” on
page 27)
i 5 [A-B REP] button
i
Press to input track number 5 when the current source is
CD, USB or SD and the play area is set to "ALL". (see “Selecting
tracks directly” on page 25)
i
When the current source is AM or FM, press to tune in a pre-
set station.
i
When the current source is CD, USB or SD, and shift mode
is active (SHIFT indicator lit) press to set the A-B repeat
function starting (A) and ending (B) points. (see “A-B repeat
playback settings (audio CDs only)” on page 28)
o 6 [A. PRESET] button
i
Press to input track number 6 when the current source is
CD, USB or SD and the play area is set to "ALL". (see “Selecting
tracks directly” on page 25)
i
When the current source is AM or FM, press to tune in a pre-
set station.
i
When the current source is AM or FM and shift mode is ac-
tive (SHIFT indicator lit) press to automatically program the
preset stations. (see “Setting radio station presets automat-
ically” on page 32)
p 7 [M.PRESET] button
i
Press to input track number 7 when the current source is
CD, USB or SD and the play area is set to "ALL". (see “Selecting
tracks directly” on page 25)
i
When the current source is AM or FM, press to tune in a pre-
set station.
i
When the current source is AM or FM and shift mode is active
(SHIFT indicator lit) press to manually program the preset
stations. (see “Setting radio station presets manually” on
page 32)

14
TASCAM CD-400U
2 – Names and Functions of Parts
a 8 [FM MODE] button
i
Press to input track number 8 when the current source is
CD, USB or SD and the play area is set to "ALL". (see “Selecting
tracks directly” on page 25)
i
When the current source is AM or FM, press to tune in a pre-
set station.
i
When the current source is FM, and shift mode is active
(SHIFT indicator lit), press to switch between stereo and
mono for FM broadcast reception. (see “Setting the FM
mode” on page 32)
s 9 [P.AREA] button
i
Press to input track number 9 when the current source is
CD, USB or SD and the play area is set to "ALL". (see “Selecting
tracks directly” on page 25)
i
When the current source is AM or FM, press to tune in a pre-
set station.
i
When the current source is USB or SD and shift mode is
active (SHIFT indicator lit), press to set the play area. (see
“Setting the playback area” on page 24)
d 0 [DUB] button and indicator
i
Press to input track number 0 when the current source is
CD, USB or SD and the play area is set to "ALL". (see “Selecting
tracks directly” on page 25)
i
When the current source is AM or FM, press to tune in a pre-
set station.
i
When the current source is CD and playback is stopped or
the current source is AM/FM, press with shift mode active
(SHIFT indicator lit) to start dubbing (copying) preparation.
The indicator lights when the dubbing (copying) function
is active. (see “Dubbing procedures” on page 36)
f CLEAR button
i
When the current source is CD, USB or SD, press this to clear
values input with number buttons.
i
Press to close a warning message that has appeared on the
Home Screen.
i
When the current source is AM or FM, press and hold to clear
all preset stations for that source. (see “Clearing preset as-
signments” on page 33)
g SHIFT button and indicator
Press this button to light the indicator and enable shift mode,
which activates the shift functions of other buttons. (These
functions are shown below the buttons with white letters on
dark blue backgrounds.)
To deactivate the shift mode (SHIFT indicator unlit), press the
SHIFT button again.
h SOURCE button
Press to switch the current source. (see “Selecting the play-
back source.” on page 22)
j DISPLAY button
i
Press during playback to show a variety of information. (see
“Time and text information display” on page 30)
i
Please ignore INFO on the remote control unit. (INFO func-
tion does not work on this unit.) This button does not work
at all on the USA/Canadian model.
i
Press when the current source is FM to switch the RDS
mode. (see “RDS (European model only)” on page 34)
k BACK [PAIRING] button
i
When the MENU screen is open, press to return to the Home
Screen.
i
When a MENU setting screen is open, press to go up one
menu level.
i
When the current source is USB or SD and the play area is
folder ( icon shown), press to move up one folder level.
(see “Playback area” on page 24)
i
When the current source is BLUETOOTH, press and hold to
activate Bluetooth pairing mode. When a Bluetooth con-
nection is active (Connected shown), press to disconnect
forcefully. (see “Pairing” on page 31)
l SD card slot
Insert SD cards in these slots. (see “Inserting and removing SD
cards” on page 21)
; USB port
Connect (and disconnect) USB flash drives here. (see “Con-
necting and disconnecting USB flash drives” on page 22)

TASCAM CD-400U
15
2 – Names and Functions of Parts
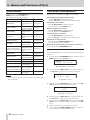
Rear panel
AC IN
100-240V 50/60Hz 20W
AC IN
100-240V 50/60Hz 20W
z ANTENNA FM connector
Connect the included FM antenna here.
Extend the antenna and attach it to a window frame, wall or
other surface where it provides the best reception.
x ANTENNA AM connector
Assemble the included AM loop antenna and connect it to
the AM antenna connector on the back of the unit.
Place the antenna in the position where it provides the best
AM broadcast reception.
c TUNER OUT jacks
These analog RCA pin output jacks always output the sound
from the tuner.
The nominal output level is -10 dBV.
v RS-232C connector
This is a 9-pin D-sub RS-422 control input/output connector.
Connect a computer, for example, here. (see “Using the RS-
232C connector” on page 38)
b Option slot
This slot is for installation of an Ethernet card (sold separate-
ly).
n ANALOG OUT (UNBALANCED) L/R jacks
These are analog RCA pin output jacks.
The default nominal output level is –10 dBV (OFF analog
output level setting), but it can also be lowered in 1dB incre-
ments to −28 dBV (-18dB analog output level setting). (see
“Adjusting the analog output” on page 38)
m ANALOG OUT (BALANCED) L/R jacks
These are balanced XLR analog output jacks.
The default nominal output level is +4 dBu (OFF analog
output level setting), but it can also be lowered in 1dB in-
crements to –14 dBu (-18dB analog output level setting). (1:
GND, 2: HOT, 3: COLD) (see “Adjusting the analog output” on
page 38)
, AC IN connector
Connect the included power cord here.

16
TASCAM CD-400U
2 – Names and Functions of Parts
Wireless remote control (TASCAM RC-CD400)
1 EJECT button
This has the same function as the EJECT button on the main
unit. (see “Inserting and removing discs” on page 21)
2
7
button
This has the same function as the PLAY button on the main
unit.
3
8
button
This has the same function as the STOP button on the main
unit.
4 MENU button
This has the same function as the HOME/MENU button on
the main unit.
5
m
/
.
buttons
These have the same functions as the
m
and
,
[FAST]
buttons on the main unit.
6
k
/
j
buttons
i
When the current source is USB or SD and the play area is
folder ( icon shown), press the
k
button to move up one
folder level. (see “Playback area” on page 24)
i
When the current source is AM or FM, press the
j
button to
select a preset station.
i
When a MENU setting screen is open, press the
k
button to
move up one menu level.
i
The
j
button has the same function as the remote control
ENTER button.
7 Number (0–9) buttons
i
When the current source is CD, USB or SD and the play area
is set to "ALL", use the number buttons to select tracks by
their track numbers. For track numbers, a maximum of two
digits can be input for audio CDs and three digits for data
CDs. (see “Selecting tracks directly” on page 25)
i
When the current source is AM or FM, press to tune in a pre-
set station.
8 PRESET button
i
When the current source is AM or FM, press to program pre-
set stations manually. (see “Setting radio station presets
manually” on page 32)
i
When the current source is AM or FM, press and hold to
program preset stations automatically. (see “Setting radio
station presets automatically” on page 32)
9 DUB button
Press when stopped to start dubbing (copying) preparation.
(see “Dubbing procedures” on page 36)
0 FM MODE button
When the current source is FM, press to switch between ste-
reo and mono for FM broadcast reception. (see “Setting the
FM mode” on page 32)
q SOURCE button
This has the same function as the SOURCE button on the
main unit. (see “Selecting the playback source.” on page 22)
w
9
button
This has the same function as the PAUSE button on the main
unit.
e DISPLAY/RDS/INFO [PAIRING] button
i
Press during playback to show a variety of information. (see
“Time and text information display” on page 30)
i
When the current source is BLUETOOTH, press and hold to
activate Bluetooth pairing mode. Press when pairing to
end pairing mode. (see “Pairing” on page 31)
i
Please ignore INFO on the remote control unit. (INFO func-
tion does not work on this unit.) This button does not work
at all on the USA/Canadian model.
i
Press when the current source is FM to switch the RDS
mode. (see “RDS (European model only)” on page 34)
r
.
/
/
[
l
/
;
] buttons
i
When the current source is CD, USB or SD and the play area
is set to "ALL", press to skip tracks. (see “Skipping to earlier
and later tracks” on page 24)
i
When the current source is USB or SD and the play area is
folder ( icon shown), press to move between tracks and
folders. (see “Playback area” on page 24)
i
If the current source is AM or FM, press to change the fre-
quency received. (see “Tuning in radio stations” on page
32)
i
When the current source is AM or FM and preset mode is
enabled, press to move to the previous or next preset num-
ber. (see “Setting radio station presets” on page 32)
i
When a MENU screen is open, turn to select items and
change setting values. (see “Basic MENU screen operations”
on page 18)
t ENTER button
When a MENU screen is open, press to confirm selections and
settings.

TASCAM CD-400U
17
2 – Names and Functions of Parts
y A-B REP button
When the current source is CD, press to set the A-B repeat
function starting (A) and ending (B) points. (see “A-B repeat
playback settings (audio CDs only)” on page 28)
u REPEAT button
Press to turn the repeat playback function on/off. (see “Ordi-
nary repeat playback settings” on page 27)
i P.MODE button
Press to cycle through the playback modes (ordinary, single
and random). (see “Playback modes” on page 26)
o P.AREA button
When the current source is USB or SD, press to set the play
area. (see “Setting the playback area” on page 24)
p CLEAR button
This has the same function as the CLEAR button on the main
unit.
a DIMMER button
Use to adjust the display brightness. (see “Adjusting the dis-
play brightness” on page 20)
s P.O.PLAY button
Press to turn power-on-play on/off. (see “Using the power-on-
play function” on page 28)
Home Screen
CD PLAY
01 00:10
Home Screen when CD/USB/SD selected
BLUETOOTH
Connected
Home Screen when Bluetooth selected
FM STEREO
P01 80.00MHz
Home Screen when AM/FM selected
1 Current source
This shows the name of the currently selected input source.
(see “Selecting the playback source.” on page 22)
2 Transport status/playback file format
i
When the current source is CD, this shows the transport sta-
tus.
i
When the current source is CD, but a data CD is loaded or
when the current source is USB/SD, this shows the playback
file format.
3 Track number
This shows the number of the currently playing track.
4 Elapsed time from track beginning
This shows the elapsed time from the beginning of the cur-
rent track (hours: minutes: seconds).
5 Connection status
This shows the connection status with other Bluetooth devic-
es and messages.
6 Preset number
When the current source is AM or FM and preset mode is en-
abled, this shows the preset number.
7 Frequency received
If the current source is AM or FM, this shows the frequency re-
ceived.

18
TASCAM CD-400U
2 – Names and Functions of Parts
Menu structure
Press the main unit HOME/MENU button or remote control
MENU button to open the MENU screen.
The various menu items are as follows.
Menu item Function Page
APS Setting
Automatic power
saving function set-
ting
see page 38
Tuner AutoMute
Tuner automatic mut-
ing function setting
see page 33
DUB AutoMute
Dubbing automatic
muting function
setting
see page 37
A.Out Att.
Analog output
attenuation function
setting
see page 38
Resume Setting
Resume playback
function setting
see page 29
Inc Play
Incremental playback
function setting
see page 29
Serial Mode
(when sold-separately
Ethernet card installed)
Serial Mode setting
when Ethernet card
installed (sold-sepa-
rately)
see page 38
IRBaud Rate
RS-232C transmission
speed setting
see page 38
Tuner Out Sel
Tuner broadcast
sound output setting
see page 33
Information
Show information see page 39
MP3 Bit rate
Set MP3 file bit rate see page 37
IR Remote Lock
Remote control lock
function setting
see page 22
Network Set.
(when sold-separately
Ethernet card installed)
Setting when Eth-
ernet card installed
(sold-separately)
FACTORY PRESET
Restore factory de-
fault settings
see page 39
NOTE
The settings for all menu items are retained even when the
unit is turned off.
Basic MENU screen operations
Operations are conducted on the MENU screen as follows.
Selecting items (moving vertically on a page):
Turn the MULTI-JOG dial on the main unit.
Use the
.
/
/
[
l
/
;
] buttons on the remote control.
Confirming a selected item:
Press the MULTI-JOG dial on the main unit.
Press the remote control ENTER button.
Opening a submenu from a page:
Press the MULTI-JOG dial on the main unit.
Press the remote control ENTER button.
Selecting an item in a submenu:
Press the MULTI-JOG dial on the main unit.
Use the
.
/
/
[
l
/
;
] buttons on the remote control.
Going back one step in a menu:
Press the main unit BACK [PAIRING] button.
Press the remote control
k
button.
Returning directly to the Home Screen from a menu screen:
Press the main unit HOME/MENU button.
Menu operation procedures
This example explains how to set the analog output attenuation
function.
1.
Press the main unit HOME/MENU button or remote control
MENU button to open the MENU screen.
MENU
< APS Setting >
APS Setting menu item shown
2.
Turn the main unit MULTI JOG dial or use the remote con-
trol
.
/
/
[
l
/
;
] buttons to select the setting item.
MENU
< A.Out Att. >
A.Out Att. selected
3.
Press the main unit MULTI JOG dial or remote control EN-
TER button to open the various setting screens.
A.Out Att.
< OFF >
A.Out Att. screen open
4.
Turn the main unit MULTI JOG dial or use the remote con-
trol
.
/
/
[
l
/
;
] buttons to change the setting.
5.
Press the main unit MULTI JOG dial or remote control EN-
TER button to confirm the setting and return to the MENU
screen.
6.
Repeat steps 3 to 5 as necessary to set each item.
7.
Press the main unit BACK [PAIRING] button or remote con-
trol
k
button to return to the Home Screen.

TASCAM CD-400U
19
3 – Preparation
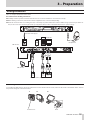
Making connections
This is an example of CD-400U connections.
Precautions before making connections
0
Carefully read the operation manuals of the devices to be connected and then connect them correctly.
0
Before making connections, turn this unit and all equipment to be connected off (standby).
0
Install all connected devices, including this unit, so that they are powered from the same line. When using a power strip or similar de-
vice, be sure to use one that has high current capacity (thick cable) in order to minimize fluctuations in power voltage.
AC IN
100-240V 50/60Hz 20W
AC IN
100-240V 50/60Hz 20W
ANALOG
IN
(UNBALANCED)
LR
ANALOG
IN
(UNBALANCED)
LR
ANALOG IN
(BALANCED)
LR
Portable audio player
Headphones
Mixer, recorder, amp, etc.
Computer
FM antenna
AM antenna
Assembling the AM antenna
To assemble the AM antenna, rotate the antenna base in the direction of the arrow, and insert the hook at the bottom of the antenna
loop into the long hole in the antenna base.
12 3
Antenna base Hook

20
TASCAM CD-400U
3 – Preparation
Preparing the remote control
Installing batteries
1.
Open the cover on the back.
2.
Insert two AAA batteries, being certain to use the correct
¥
and
^
orientations.
3.
Close the cover.
When to replace batteries
Replace both batteries with new ones if the distance from the
main unit that the remote can be used decreases or if the unit
stops responding to the remote buttons.
Battery precautions
Misuse of batteries could cause them to leak or rupture, for ex-
ample. Carefully read and follow the battery caution labels. (see
“CAUTIONS ABOUT BATTERIES” on page 3)
Using the wireless remote control
See Wireless remote control (TASCAM RC-CD400)page 16 for
the button functions.
When using the remote control, point it toward the receiver on
the unit and use it within the range shown below.
Remote control signal receiver
Remote control operation range
From any angle within 15° of front: 5 m
CAUTION
i
The range will vary according to the angle.
i
Operation might not be possible if there are obstacles.
i
Remove the battery if not using the remote control for a long
time (a month or more).
i
It battery fluid should leak, wipe away any fluid inside the
case thoroughly and install a new battery.
i
When using other devices that can be controlled by infrared
rays, operation of this remote control could cause those de-
vices to function improperly.
Turning the unit on and off
Press the POWER switch on the front of the unit.
TASCAM
CD-400U
Startup screen
CD
No Disc
Home Screen
After the unit starts and the startup screen is shown, the Home
Screen will open.
Turning the unit off
No special operations are necessary.
Press the POWER switch to turn the unit off.
CAUTION
Do not turn the power off or disconnect the power cord
when the unit is operating (including playing back or writing
data to an SD card or USB flash drive). Doing so could cause
proper dubbing (copying) to fail, dubbed (copied) data to be
lost, and sudden loud noises from monitoring equipment,
which might damage the equipment, harm hearing or cause
other trouble.
Adjusting the display brightness
Turn the MULTI JOG dial when the unit is in shift mode (SHIFT
indicator lit), or press the remote control DIMMER button to ad-
just the display brightness.
Main unit operation:
dim
sw
somewhat dim
sw
normal
Remote-control operation:
normal
w
somewhat dim
w
dim
w
normal, etc.
La pagina si sta caricando...
La pagina si sta caricando...
La pagina si sta caricando...
La pagina si sta caricando...
La pagina si sta caricando...
La pagina si sta caricando...
La pagina si sta caricando...
La pagina si sta caricando...
La pagina si sta caricando...
La pagina si sta caricando...
La pagina si sta caricando...
La pagina si sta caricando...
La pagina si sta caricando...
La pagina si sta caricando...
La pagina si sta caricando...
La pagina si sta caricando...
La pagina si sta caricando...
La pagina si sta caricando...
La pagina si sta caricando...
La pagina si sta caricando...
La pagina si sta caricando...
La pagina si sta caricando...
La pagina si sta caricando...
La pagina si sta caricando...
-
 1
1
-
 2
2
-
 3
3
-
 4
4
-
 5
5
-
 6
6
-
 7
7
-
 8
8
-
 9
9
-
 10
10
-
 11
11
-
 12
12
-
 13
13
-
 14
14
-
 15
15
-
 16
16
-
 17
17
-
 18
18
-
 19
19
-
 20
20
-
 21
21
-
 22
22
-
 23
23
-
 24
24
-
 25
25
-
 26
26
-
 27
27
-
 28
28
-
 29
29
-
 30
30
-
 31
31
-
 32
32
-
 33
33
-
 34
34
-
 35
35
-
 36
36
-
 37
37
-
 38
38
-
 39
39
-
 40
40
-
 41
41
-
 42
42
-
 43
43
-
 44
44


Tascam CD-400U Manuale utente
- Categoria
- Lettore CD
- Tipo
- Manuale utente
- Questo manuale è adatto anche per
in altre lingue
- English: Tascam CD-400U User manual
Documenti correlati
-
Tascam DR-100mkIII Guida utente
-
Tascam DR-100 MKIII Manuale del proprietario
-
Tascam DR-60D Manuale utente
-
-
-
Tascam RC-SS150 Manuale del proprietario
-
-
-
-
Tascam DR-680MKII Manuale del proprietario
Altri documenti
-
TEAC CD-P1260MKII Manuale del proprietario
-
 Denon Professional DN-300Z MK II Manuale utente
-
-
TEAC CD-2000 Manuale utente
-
TEAC MC-D800 Manuale del proprietario
-
Yamaha CD-C603 Manuale del proprietario
-
TEAC CD-1000 Manuale del proprietario
-
-
-
