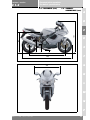
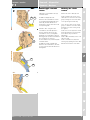
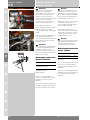
Ducati ST3 2004 Workshop Manual
- Categoria
- Motociclette
- Tipo
- Workshop Manual

Manuale d'officina
Workshop manual
Model Year 2004
St3
DUCATISPORTTOURING

A
B
C
D
E
F
G
H
L
M
N
P
Generalità 0
Description 0
Informazioni sul modello 0
Model-specific information 0
Caratteristiche tecniche 0
Specifications 0
Uso e manutenzione 0
Use and Maintenance operation 0
Vestizione 0
Fairing 0
Comandi - Dispositivi 0
Controls - Devices 0
Ruote - Sospensioni - Freni 0
Wheels - Suspension - Brakes 0
Mototelaio 0
Frame 0
Impianto di alimentazione - Scarico0
Fuel system - Exhaust system 0
Impianto iniezione - Accensione 0
Ignition - injection system 1
Motore 0
Engine 0
Impianto elettrico 0
Electric system 0
INDICE GENERALE 0
GENERAL SUMMARY 0

A
B
C
D
E
F
G
H
L
M
N
P
Indice generale
General summary
2 ST3 - M.Y. 2004 - edizione/edition 00
Sezione A
GENERALITÀ 0
1 - CONSULTAZIONE DEL MANUALE 3
Struttura del manuale 4
2 - SIMBOLOGIA - ABBREVIAZIONI -
RIFERIMENTI
5
Caratteristiche prodotti 6
3 - PRODOTTI PERICOLOSI -
AVVERTENZE
10
Regole generali di sicurezza 10
Regole per le operazioni di manutenzione 12
Sezione B
INFORMAZIONI SUL MODELLO 0
1 - IDENTIFICAZIONE MODELLO 3
Sezione C
CARATTERISTICHE TECNICHE 0
1.1 -DATI TECNICI 3
Generalità 3
Colori 4
Gruppo trasmissione 4
Distribuzione/valvole 4
Sistema di lubrificazione 5
Sistema di scarico 5
Cilindro / pistone 5
Cambio 6
Sistema di raffreddamento 6
Ruota anteriore 6
Sospensione anteriore 7
Ruota posteriore 7
Sospensione posteriore 7
Freni idraulici 8
Sistema di carica / alternatore 8
Sistema di accensione 8
Sistema di alimentazione 9
Luci / strumentazione 9
1.2 -INGOMBRI (mm) 17
2 - RIFORNIMENTI E LUBRIFICANTI 18
3 - COPPIE DI SERRAGGIO 19
Coppie di serraggio mototelaio 19
Coppie di serraggio motore 24
4 - ATTREZZI DI SERVIZIO 35
Attrezzatura specifica motore 35
Attrezzatura specifica mototelaio 40
Section A
DESCRIPTION 0
1 - HOW TO USE THE MANUAL 3
Manual layout 4
2 - SYMBOLS - ABBREVIATIONS -
REFERENCES
5
Product specifications 8
3 - DANGEROUS PRODUCTS -
WARNINGS
10
General safety rules 10
General maintenance indications 12
Section B
MODEL-SPECIFIC
INFORMATION 0
1 - IDENTIFICATION DATA 3
Section C
SPECIFICATIONS 0
1.1 -TECHNICAL DATA 10
Description 10
Colours 11
Transmission unit 11
Timing/valves 11
Lubrication system 12
Exhaust system 12
Cylinder / piston 12
Gearbox 13
Cooling system 13
Front wheel 13
Front suspension 14
Rear wheel 14
Rear suspension 14
Hydraulic brakes 15
Charging system / generator 15
Ignition system 15
Control unit 16
Lights / instrument panel 16
1.2 -OVERALL DIMENSIONS (mm) 17
2 - FUELS AND LUBRICANTS 18
3 - TORQUE SETTINGS 27
Frame torque settings 27
Engine torque settings 32
4 - SERVICE TOOLS 42
Engine special tools 42
Frame special tools 47

A
B
C
D
E
F
G
H
L
M
N
P
Indice generale
General summary
3ST3 - M.Y. 2004 - edizione/edition 00
Sezione D
USO E MANUTENZIONE 0
1 - CONTROLLI PRELIMINARI 3
Precauzioni per il primo periodo d'uso del motociclo 3
Controlli prima dell’avviamento 4
2 - AVVIAMENTO - RISCALDAMENTO
MOTORE
6
Avviamento motore 6
3 - TABELLA MANUTENZIONE
PERIODICA
8
4 - OPERAZIONI DI MANUTENZIONE 12
Spegnimento della indicazione “effettuazione tagliando”
sul quadro strumenti 12
Controllo livello olio motore 13
Sostituzione olio motore e cartuccia filtro 14
Controllo gioco valvole 16
Registrazione gioco valvole 17
Controllo livello liquido raffreddamento 18
Sostituzione liquido refrigerante 19
Sostituzione filtro benzina 21
Sostituzione filtro aria 22
Sostituzione liquido impianto frenante 23
Svuotamento circuiti impianti frenanti 25
Riempimento circuiti impianti frenanti 26
Sostituzione liquido impianto frizione 28
Svuotamento circuito impianto frizione 29
Riempimento circuito impianto frizione 30
Registrazione gioco cuscinetti dello sterzo 32
Registrazione leva comando frizione e freno anteriore 33
Regolazione tensione catena 34
Controllo usura e sostituzione pastiglie freno 35
Regolazione cavi di comando acceleratore e starter 38
Registrazione posizione pedale comando cambio e
freno posteriore 40
Regolazione forcella anteriore 41
Regolazione ammortizzatore posteriore 42
Variazione assetto moto 42
5 - STRUMENTI DI DIAGNOSI 43
Descrizione dello strumento di diagnosi 44
Connessione alla moto 45
Strumento di diagnosi Mathesis 46
Controllo e registrazione tensione cinghie distribuzione 47
Registrazione corpo farfallato 51
Controllo pressione olio motore 56
Controllo compressione cilindri motore 58
Controllo pressione carburante 60
Section D
USE AND MAINTENANCE
OPERATION 0
1 - PRELIMINARY CHECKS 3
Running-in precautions 3
Pre-ride checks 4
2 - STARTING - ENGINE WARM-UP 6
Starting the engine 6
3 - ROUTINE MAINTENANCE TABLE 10
4 - MAINTENANCE OPERATIONS 12
Cancelling the “Service” indicator on the instrument panel 12
Checking the engine oil level 13
Changing the engine oil and filter cartridge 14
Checking valve clearances 16
Adjusting valve clearances 17
Checking the coolant level 18
Changing the coolant 19
Changing the fuel filter 21
Changing the air filter 22
Changing the brake fluid 23
Draining the brake circuits 25
Filling the brake circuits 26
Changing the clutch fluid 28
Draining the clutch circuit 29
Refilling the clutch circuit 30
Steering angle adjustment 32
Adjusting the front brake and clutch levers 33
Adjusting chain tension 34
Checking brake pad wear. Changing brake pads 35
Adjusting the throttle and choke cables 38
Adjusting the position of the gear change and rear
brake pedals 40
Adjusting the front fork 41
Adjusting the rear shock absorber 42
Adjusting setup 42
5 - DIAGNOSTIC INSTRUMENTS 43
Description of the diagnostic tester 44
Connecting the tester to the motorcycle 45
The Mathesis Diagnostic Tester 46
Checking and adjusting cam belt tension 47
Adjusting the throttle body 51
Checking engine oil pressure 56
Checking cylinder compression 58
Checking fuel pressure 60

A
B
C
D
E
F
G
H
L
M
N
P
Indice generale
General summary
4 ST3 - M.Y. 2004 - edizione/edition 00
Sezione E
VESTIZIONE 0
1 - CUPOLINO -
SPECCHIETTI RETROVISORI
3
Smontaggio specchietti retrovisori e plance 4
Smontaggio cupolino 6
Rimontaggio cupolino 8
Rimontaggio specchietti retrovisori e plance 10
2 - CARENATURA 13
Smontaggio semicarene inferiori 14
Rimontaggio semicarene inferiori 15
Smontaggio carene complete 16
Rimontaggio carene complete 18
Smontaggio scudo frontale 20
Rimontaggio scudo frontale 20
3 - CODONE POSTERIORE 21
Smontaggio sella 22
Smontaggio fianchetti laterali 23
Smontaggio vaschette porta attrezzi -
paraspruzzi posteriore 24
Rimontaggio vaschette porta attrezzi -
paraspruzzi posteriore 24
Rimontaggio fianchetti laterali 25
Rimontaggio sella 26
4 - PARAFANGO ANTERIORE 27
Smontaggio parafango anteriore 27
Rimontaggio parafango anteriore 27
Sezione F
COMANDI - DISPOSIZIONE 0
1 - COMANDO ACCELERATORE -
STARTER
3
Regolazione cavo di comando acceleratore e starter 4
Smontaggio comando acceleratore 5
Rimontaggio comando acceleratore 6
Smontaggio comando starter 8
Rimontaggio comando starter 9
2 - COMANDO IDRAULICO FRIZIONE 12
Smontaggio gruppo pompa frizione 13
Rimontaggio gruppo pompa frizione 13
Smontaggio gruppo rinvio frizione 14
Rimontaggio gruppo rinvio frizione 15
3 - COMANDO FRENO ANTERIORE 17
Smontaggio pompa freno idraulico anteriore 18
Rimontaggio pompa freno idraulico anteriore 19
4 - COMANDO FRENO POSTERIORE 22
Smontaggio comando freno posteriore completo 23
Rimontaggio comando freno posteriore 24
5 - COMANDO CAMBIO 27
Smontaggio comando cambio 28
Rimontaggio comando cambio 28
6 - DISPOSITIVO APERTURA SELLA 29
Smontaggio dispositivo apertura sella 30
Rimontaggio dispositivo apertura sella 30
Section E
FAIRING 0
1 - HEADLIGHT FAIRING -
REAR-VIEW MIRRORS
3
Removing the rear view mirrors and dash panels 4
Disassembling the headlight fairing 6
Refitting the headlight fairing 8
Refitting the rear view mirrors and dash panels 10
2 - FAIRING 13
Removing lower side fairings 14
Reassembling lower side fairings 15
Removing the complete fairings 16
Reassembling the complete fairings 18
Removing the front shield 20
Reassembling the front shield 20
3 - TAIL GUARD 21
Removing the seat 22
Removing the side panels 23
Removing the tool compartments - rear splashguard 24
Reassembling the tool compartments - rear splashguard 24
Reassembling the side panels 25
Refitting the seat 26
4 - FRONT MUDGUARD 27
Removing the front mudguard 27
Reassembling the front mudguard 27
Section F
CONTROLS - DEVICES 0
1 - THROTTLE - CHOKE CONTROL 3
Adjusting the throttle and choke cables 4
Disassembling the throttle control 5
Reassembling the throttle control 6
Removing the choke control 8
Refitting the choke control 9
2 - CLUTCH HYDRAULIC CONTROL 12
Removing the clutch cylinder assembly 13
Fitting the clutch cylinder assembly 13
Removing the clutch slave cylinder assembly 14
Refitting the clutch slave cylinder assembly 15
3 - FRONT BRAKE CONTROL 17
Removing the front brake master cylinder 18
Refitting the front brake master cylinder 19
4 - REAR BRAKE CONTROL 22
Removing the rear brake master cylinder 23
Refitting the rear brake control 24
5 - GEAR CHANGE CONTROL 27
Removing the gear change control 28
Refitting the gear change control 28
6 - SEAT LOCK 29
Removing the seat opening device 30
Reassembling the seat opening device 30

A
B
C
D
E
F
G
H
L
M
N
P
Indice generale
General summary
5ST3 - M.Y. 2004 - edizione/edition 00
Sezione G
RUOTE - SOSPENSIONI - FRENI 0
1 - RUOTA ANTERIORE 3
Smontaggio ruota anteriore 4
Revisione ruota anteriore 5
Rimontaggio ruota anteriore 7
2 - FORCELLA ANTERIORE 8
Smontaggio forcella anteriore 9
Revisione forcella anteriore regolabile 10
Rimontaggio forcella anteriore 17
3 - FRENO IDRAULICO ANTERIORE 18
Operazioni di manutenzione impianto 19
Smontaggio impianto freno anteriore 20
Revisione componenti freno anteriore 21
Rimontaggio impianto freno anteriore 22
4 - RUOTA POSTERIORE 24
Smontaggio ruota posteriore 25
Revisione ruota posteriore 26
Rimontaggio ruota posteriore 27
5 - FORCELLONE POSTERIORE 28
Smontaggio forcellone posteriore 29
Controllo perno forcellone 30
Verifica gioco assiale forcellone 30
Rimontaggio forcellone posteriore 31
6 - FRENO IDRAULICO POSTERIORE 32
Smontaggio impianto freno posteriore 33
Rimontaggio impianto freno posteriore 35
7 - SOSPENSIONE POSTERIORE 36
Sistema sospensione posteriore 37
Smontaggio ammortizzatore posteriore 37
Revisione ammortizzatore posteriore 38
Smontaggio bilanciere sospensione posteriore 39
Revisione bilanciere sospensione posteriore 40
Smontaggio e revisione tirante ammortizzatore 41
Rimontaggio sospensione posteriore 42
8 - TRASMISSIONE SECONDARIA 44
Ispezione trasmissione secondaria 45
Smontaggio pignone catena 46
Rimontaggio pignone catena 46
Smontagggio corona 47
Rimontaggio corona 47
Lavaggio della catena 48
Lubrificazione della catena 48
Section G
WHEELS - SUSPENSION - BRAKES0
1 - FRONT WHEEL 3
Removing the front wheel 4
Overhauling the front wheel 5
Refitting the front wheel 7
2 - FRONT FORK 8
Removing the front fork 9
Overhauling the adjustable front fork 10
Refitting the front fork 17
3 - FRONT BRAKE 18
Braking system maintenance 19
Removing the front brake system 20
Overhauling the front brake components 21
Refitting the front brake system 22
4 - REAR WHEEL 24
Removing the rear wheel 25
Overhauling the rear wheel 26
Refitting the rear wheel 27
5 - REAR SWINGARM 28
Removing the rear swingarm 29
Inspecting the swingarm shaft 30
Checking swingarm axial play 30
Refitting the rear swingarm 31
6 - REAR BRAKE 32
Removing the rear brake system 33
Refitting the rear brake system 35
7 - REAR SUSPENSION 36
Rear suspension unit 37
Removing the rear shock absorber 37
Overhauling the rear shock absorber 38
Removing the rear suspension rocker arm 39
Overhauling the rear suspension rocker arm 40
Overhauling the monoshock linkage 41
Refitting the rear suspension 42
8 - FINAL DRIVE 44
Inspecting the final drive 45
Removing the front sprocket 46
Refitting the front sprocket 46
Removing the rear sprocket 47
Refitting the rear sprocket 47
Washing the chain 48
Lubricating the chain 48

A
B
C
D
E
F
G
H
L
M
N
P
Indice generale
General summary
6 ST3 - M.Y. 2004 - edizione/edition 00
Sezione H
MOTOTELAIO 0
1 - SEMIMANUBRI 3
Smontaggio semimanubri 4
Rimontaggio semimanubri 5
Smontaggio supporto semimanubri 6
Rimontaggio supporto semimanubri 7
Registrazione altezza supporti semimanubri 7
2 - STERZO 8
Registrazione gioco cuscinetti di sterzo 9
Registrazione sterzata 9
Smontaggio componenti cannotto di sterzo 10
Rimontaggio cuscinetti di sterzo 12
4 - SUPPORTI PEDANE 15
Smontaggio pedane 16
Rimontaggio pedane 18
5 - CAVALLETTI 20
Smontaggio cavalletto laterale 21
Scomposizione cavalletto laterale 21
Rimontaggio cavalletto laterale 22
Smontaggio cavalletto centrale 23
Rimontaggio cavalletto centrale 23
6 - CONTROLLO TELAIO 24
Componenti strutturali e telaio 25
Smontaggio componenti strutturali e telaio 25
Controllo del telaio 29
Rimontaggio componenti strutturali e telaio 29
7 - FANALE POSTERIORE E
PORTATARGA
30
Smontaggio e rimontaggio maniglia posteriore 31
Smontaggio fanale posteriore 32
Rimontaggio fanale posteriore 32
Smontaggio portatarga 33
Rimontaggio portatarga 33
Sezione L
IMPIANTO DI ALIMENTAZIONE -
SCARICO 0
1 - DESCRIZIONE IMPIANTO DI
ALIMENTAZIONE
3
2 - SERBATOIO CARBURANTE 5
Sollevamento serbatoio carburante 7
Smontaggio serbatoio carburante 8
Sostituzione gruppo tappo carburante 9
Sostituzione sonda livello carburante 9
Rimontaggio serbatoio carburante 10
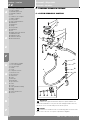
3 - POMPA CARBURANTE 12
Smontaggio pompa carburante 13
Rimontaggio pompa carburante 13
4 - FILTRO CARBURANTE 14
Sostituzione filtro carburante 15
Section H
FRAME 0
1 - HANDLEBARS 3
Removing the handlebars 4
Refitting the handlebars 5
Removing the handlebar mountings 6
Refitting the handlebar mountings 7
Adjusting the handlebar mountings height 7
2 - STEERING 8
Adjusting steering bearing play 9
Adjusting the steering 9
Removing the steering head bearings 10
Refitting the steering bearings 12
4 - FOOTPEG MOUNTS 15
Removing the footpegs 16
Refitting footpegs 18
5 - STANDS 20
Removing the side stand 21
Disassembling the side stand 21
Reassembling the side stand 22
Removing the center stand 23
Refitting the center stand 23
6 - FRAME INSPECTION 24
Frame and related components 25
Removing frame and structural parts 25
Checking the frame 29
Refitting frame and related components 29
7 - TAIL LIGHT AND NUMBER
PLATE HOLDER
30
Removing and refitting the rear grab rail 31
Removing the tail light 32
Refitting the tail light 32
Removing the number plate holder 33
Refitting the number plate holder 33
Section L
FUEL SYSTEM - EXHAUST
SYSTEM 0
1 - DESCRIPTION OF FUEL SYSTEM 3
2 - FUEL TANK 5
Raising the fuel tank 7
Removing the fuel tank 8
Changing the fuel filler cap assembly 9
Changing the fuel sensor 9
Refitting the fuel tank 10
3 - FUEL PUMP 12
Removing the fuel pump 13
Refitting the fuel pump 13
4 - FUEL FILTER 14
Changing the fuel filter 15
5 - PRESSURE REGULATOR 16
Changing the pressure regulator 16
6 - THROTTLE BODY 17

A
B
C
D
E
F
G
H
L
M
N
P
Indice generale
General summary
7ST3 - M.Y. 2004 - edizione/edition 00
5 - REGOLATORE DI PRESSIONE 16
Sostituzione regolatore di pressione 16
6 - CORPO FARFALLATO 17
Smontaggio corpo farfallato completo 18
Rimontaggio corpo farfallato completo 19
7 - FILTRO ARIA 22
Smontaggio scatola filtro 23
Rimontaggio scatola filtro 25
8 - IMPIANTO DI SCARICO 28
Principio di funzionamento del catalizzatore (Solo EU) 29
Smontaggio sistema di scarico 30
Rimontaggio sistema di scarico 31
10 -FILTRO A CARBONI ATTIVI
“CANISTER” (solo per versioni USA)
32
Descrizione impianto (solo per versioni USA) 33
Smontaggio filtro canister 34
Rimontaggio filtro canister 34
Sezione M
IMPIANTE INIEZIONE -
ACCENSIONE 0
1 - DESCRIZIONE IMPIANTO INIEZIONE-
ACCENSIONE
3
Informazioni generali sul sistema iniezione - accensione 3
Circuito carburante 7
Circuito aria aspirata 8
Fasi di funzionamento 9
2 - SCHEMA IMPIANTO 10
Schema iniezione - accensione 10
3 - COMPONENTI IMPIANTO 13
Centralina elettronica 13
Elettroiniettore 17
Sensore temperatura aria 18
Sensore pressione aria 18
Sensore temperatura acqua 19
Candela di accensione 20
Bobina 21
Potenziometro posizione farfalla 22
Sensore giri / fase 22
Relé iniezione 23
Linea CAN 24
4 - STRUMENTAZIONE 25
Sistema cruscotto 25
Funzioni display 28
Funzioni cruscotto 40
Removing the complete throttle body 18
Refitting the complete throttle body 19
7 - AIR FILTER 22
Removing the filter box 23
Refitting the filter box 25
8 - EXHAUST SYSTEM 28
Catalytic converter operating principle (EU only) 29
Removing the exhaust system 30
Reassembling the exhaust system 31
10 -CANISTER FILTER
(for US versions only)
32
System description (US versions only) 33
Removing the canister filter 34
Refitting the canister filter 34
Section M
IGNITION - INJECTION SYSTEM0
1 - DESCRIPTION OF THE FUEL
INJECTION-IGNITION SYSTEM
3
General information on the fuel injection-ignition system 3
Fuel circuit 7
Air circuit 8
Operating stages 9
2 - SYSTEM DIAGRAM 10
Fuel injection system diagram 10
3 - SYSTEM COMPONENTS 13
Electronic control unit 13
Electric injector 17
Air temperature sensor 18
Air pressure sensor 18
Coolant temperature sensor 19
Spark plug 20
Coil 21
Throttle position sensor 22
Rpm/timing sensor 22
Injection relay 23
The CAN line 24
4 - INSTRUMENTATION 25
The instrument panel system 25
Display functions 28
Instrument panel functions 40

A
B
C
D
E
F
G
H
L
M
N
P
Indice generale
General summary
8 ST3 - M.Y. 2004 - edizione/edition 00
Sezione N
MOTORE 0
1 - SMONTAGGIO - RIMONTAGGIO
MOTORE COMPLETO
5
Smontaggio motore 6
Smontaggio motore 8
Rimontaggio motore 9
2.1 -IMPIANTO DI LUBRIFICAZIONE:
POMPA OLIO
10
Schema impianto di lubrificazione 11
Smontaggio filtri olio 13
Smontaggio pompa olio 14
Revisione pompa olio 15
Rimontaggio pompa olio 16
2.2 -IMPIANTO DI LUBRIFICAZIONE:
RADIATORE OLIO
17
Smontaggio impianto di lubrificazione 18
Smontaggio tubo lubrificazione teste 19
Rimontaggio tubo lubrificazione teste 19
Rimontaggio impianto di lubrificazione 22
2.3 -IMPIANTO DI LUBRIFICAZIONE:
SERBATOIO SFIATO OLIO
26
Smontaggio serbatoio sfiato olio 27
Rimontaggio serbatoio sfiato olio 27
3.1 -IMPIANTO DI RAFFREDDAMENTO:
SERBATOIO
30
Impianto di raffreddamento 31
Smontaggio serbatoio acqua 32
Rimontaggio serbatoio acqua 33
3.2 -IMPIANTO DI RAFFREDDAMENTO:
RADIATORE ACQUA
34
Smontaggio radiatore acqua 35
Sostituzione elettroventola 37
Rimontaggio radiatore acqua 38
Smontaggio tubazioni e raccordi impianto
di raffreddamento 40
Rimontaggio tubazioni e raccordi impianto
di raffreddamento 42
3.3 -IMPIANTO DI RAFFREDDAMENTO:
POMPA ACQUA
45
Smontaggio pompa acqua 46
Rimontaggio pompa acqua 48
4.1 -GRUPPO TESTE: VERIFICHE E
REGOLAZIONI
52
Verifica e registrazione valvole 53
Verifica fasatura motore 57
4.2 -GRUPPO TESTE: COPERCHI LATERALI
/ DISTRIBUZIONE
59
Smontaggio componenti distribuzione 60
Smontaggio gruppo distribuzione 61
Rimontaggio gruppo distribuzione 64
Rimontaggio coperchi laterali distribuzione 71
4.3 -GRUPPO TESTE : ALBERI
DISTRIBUZIONE
72
Smontaggio collettori aspirazione 73
Section N
ENGINE 0
1 - REMOVING – REASSEMBLING THE
COMPLETE ENGINE
5
Removing the engine 6
Disassembling the engine 8
Reassembling the engine 9
2.1 -LUBRICATION SYSTEM: OIL PUMP 10
Lubrication system diagram 11
Removing the oil filters 13
Removing the oil pump 14
Overhauling the oil pump 15
Refitting the oil pump 16
2.2 -LUBRICATION SYSTEM/
OIL COOLER
17
Removing the lubrication system 18
Removing the cylinder head oil delivery line 19
Refitting the cylinder head oil delivery line 19
Refitting the lubrication system 22
2.3 -LUBRICATION SYSTEM: OIL
BREATHER TANK
26
Removing the oil breather reservoir 27
Refitting the oil breather reservoir 27
3.1 -COOLING SYSTEM / TANK 30
Cooling system 31
Removing the water reservoir 32
Refitting the water reservoir 33
3.2 -COOLING SYSTEM: WATER
RADIATOR
34
Removing the radiator 35
Replacing the electric fan 37
Refitting the water radiator 38
Removing the cooling system pipes and unions 40
Refitting the cooling system pipes and unions 42
3.3 -COOLING SYSTEM /
COOLANT PUMP
45
Removing the coolant pump 46
Reassembling the coolant pump 48
4.1 -HEAD UNIT / CHECKS AND
ADJUSTMENTS
52
Checking and adjusting valve clearance 53
Checking engine timing 57
4.2 -HEADS / TIMING SYSTEM
ASSEMBLY
59
Removing the timing system parts 60
Timing system disassembly 61
Reassembling the timing system 64
Refitting the timing side covers 71
4.3 -HEADS / SIDE COVERS ASSEMBLY 72
Removing the intake manifolds 73
Refitting the intake manifolds 73
Camshafts disassembly 74
Removing the valve covers 76
Refitting the valve covers 76
Removing the camshafts 77

A
B
C
D
E
F
G
H
L
M
N
P
Indice generale
General summary
9ST3 - M.Y. 2004 - edizione/edition 00
Checking camshafts 78
Checking the oil seals 78
Refitting the camshaft 79
Refitting the cam covers 80
4.4 -HEAD UNIT: VALVES -
ROCKER ARMS
82
Removing the valve rocker arms 88
Head parts overhaul 90
Reassembling the head 95
Reassembling the valve rocker arms 96
5 - CYLINDERS / PISTONS ASSEMBLY103
Removing cylinder / piston assy 104
Overhauling the cylinder / piston assy 106
Refitting cylinder / piston assy 111
6.1 -CLUTCH ASSEMBLY / CLUTCH 114
Clutch unit description 115
Disassembling the clutch 117
Checking and overhauling the components 120
Reassembling the clutch 121
6.2 -CLUTCH / CLUTCH COVER
ASSEMBLY
124
Removing the clutch cover 125
Fitting the clutch cover 127
6.3 -CLUTCH / PRIMARY DRIVE
GEAR ASSEMBLY
128
Disassembling the primary drive gears 129
Riassembling primary drive gear and
checking meshing clearance 131
7.1 -GEARBOX / GEAR SELECTOR
LEVER ASSEMBLY
133
Removing the gear selector levers 134
Removing the gear stopper and ratchet 135
Reassembling gear stopper and ratchet 135
Reassembling the gear selector lever 136
7.2 -GEARBOX / GEARBOX SHAFTS
ASSEMBLY
137
Removing the gearbox 139
Disassembling the gearbox shafts 140
Overhauling the gearbox 144
Overhauling the gear selector forks 146
Fork selector drum 146
Reassembling the gearbox shafts 147
Reassembling the gearbox 149
8 - FLYWHEEL - GENERATOR 150
Removing the generator cover 152
Disassembling the generator cover 153
Removing the flywheel - generator assembly 154
Checking the flywheel - generator assembly 155
Refitting flywheel / generator assembly 157
Reassembling the generator cover 158
Checking the air gap of engine sensor 160
9.1 -CASING UNIT 161
Removing outer components 162
Reassembling the outer parts 164
Removing the timing lay gear 165
Reassembling the timing lay gear 165
Removing the starter motor driven gear 166
Reassembling the starter motor driven gear 166
Rimontaggio collettori aspirazione 73
Smontaggio cappellotti laterali 74
Smontaggio coperchi valvole 76
Rimontaggio coperchi valvole 76
Smontaggio alberi distribuzione 77
Verifica alberi distribuzione 78
Verifica paraoli 78
Rimontaggio albero distribuzione 79
Rimontaggio cappellotti distribuzione 80
4.4 -GRUPPO TESTE: VALVOLE -
BILANCIERI
82
Smontaggio testa completa 83
Revisione componenti testa 90
Rimontaggio gruppo testa 95
5 - GRUPPO CILINDRI / PISTONI 103
Smontaggio gruppo cilindro / pistone 104
Revisione componenti gruppo cilindro / pistone 106
Rimontaggio gruppo cilindro / pistone 111
6.1 -GRUPPO FRIZIONE: FRIZIONE 114
Descrizione gruppo frizione 115
Smontaggio frizione 117
Revisione e verifiche componenti 120
Rimontaggio frizione 121
6.2 -GRUPPO FRIZIONE: COPERCHIO
FRIZIONE
124
Smontaggio coperchio frizione 125
Rimontaggio coperchio frizione 127
6.3 -GRUPPO FRIZIONE: COPPIA
PRIMARIA
128
Smontaggio coppia primaria 129
Rimontaggio coppia primaria e verifica
gioco ingranamento 131
7.1 -GRUPPO CAMBIO: LEVERAGGI 133
Smontaggio leveraggio selezione marce 134
Smontaggio puntalino e saltarello fissa marce 135
Rimontaggio saltarello e puntalino fissa marce 135
Rimontaggio leveraggio selezione marce 136
7.2 -GRUPPO CAMBIO:
ALBERI CAMBIO
137
Smontaggio gruppo cambio 139
Scomposizione alberi cambio 140
Revisione cambio di velocità 144
Ispezione forcelle selezione marce 146
Tamburo comando forcelle 146
Ricomposizione alberi cambio 147
Rimontaggio gruppo cambio 149
8 - VOLANO - ALTERNATORE 150
Smontaggio coperchio alternatore 152
Scomposizione coperchio alternatore 153
Smontaggio gruppo volano alternatore 154
Controllo gruppo volano alternatore 155
Rimontaggio gruppo volano/alternatore 157
Rimontaggio coperchio alternatore 158
Controllo traferro sensore motore 160
9.1 -GRUPPO CARTER: COMPONENTI
ESTERNI
161
Smontaggio componenti esterni 162
Rimontaggio componenti esterni 164
Smontaggio ingranaggio rinvio distribuzione 165

A
B
C
D
E
F
G
H
L
M
N
P
Indice generale
General summary
10 ST3 - M.Y. 2004 - edizione/edition 00
Rimontaggio ingranaggio rinvio distribuzione 165
Smontaggio ingranaggio rinvio motorino avviamento 166
Rimontaggio ingranaggio rinvio avviamento 166
9.2 -GRUPPO CARTER: SEMICARTER 167
Apertura semicarter 168
Revisione semicarter 170
Cuscinetti di banco 171
Rimontaggio semicarter 172
Spessorazione alberi 174
Chiusura semicarter 182
9.3 -GRUPPO CARTER: IMBIELLAGGIO 185
Smontaggio gruppo imbiellaggio 186
Ricomposizione imbiellaggio 192
Rimontaggio gruppo imbiellaggio 193
Sezione P
IMPIANTO ELETTRICO 0
1 - SCHEMA ELETTRICO 3
Legenda schema impianto elettrico 5
Legenda scatola fusibili impianto elettrico 7
Disposizione dei cablaggi sul motociclo 7
Tavola A 10
Tavola B 11
Tavola C 12
Tavola D 13
Tavola E 14
Tavola F 15
Tavola G 15
Tavola H 16
Tavola J 17
Tavola K 18
Tavola L 19
Tavola M 20
Tavola N 21
Tavola P 22
Tavola Q 23
Tavola R 24
Tavola S 25
Tavola T 26
Tavola U 27
2 - SISTEMA DI RICARICA - BATTERIA 28
Controllo impianto di ricarica 28
Metodi di ricarica 28
Batteria 30
Supporto batteria 31
Generatore 32
Regolatore raddrizzatore 33
3 - AVVIAMENTO ELETTRICO 35
Sistema avviamento elettrico 36
Motorino di avviamento 38
Teleruttore 40
4 - DISPOSITIVI DI ILLUMINAZIONE 41
Smontaggio cruscotto 41
Sostituzione lampadine luci 42
Relè luci abbaglianti 44
Orientamento del proiettore 45
5 - DISPOSITIVI SEGNALAZIONE 46
Controllo componenti dispositivi di segnalazione 46
Sostituzione lampadine 52
9.2 -CASING UNIT 167
Opening the casings 168
Overhauling the casings 170
Main bearings 171
Reassembling the casings 172
Shimming the shafts 174
Closing the casings 182
9.3 -CASING UNIT: CONNECTING
RODS
185
Removing the connecting rods 186
Reassembling the connecting rods 192
Refitting the connecting rod unit 193
Section P
ELECTRIC SYSTEM 0
1 - WIRING DIAGRAM 3
Key to wiring diagram 5
Electrical system fuse box legend 7
Arrangement of wiring on frame 7
Diagram A 10
Diagram B 11
Diagram C 12
Diagram D 13
Diagram E 14
Diagram F 15
Diagram G 15
Diagram H 16
Diagram J 17
Diagram K 18
Diagram L 19
Diagram M 20
Diagram N 21
Diagram P 22
Diagram Q 23
Diagram R 24
Diagram S 25
Diagram T 26
Diagram U 27
2 - CHARGING SYSTEM - BATTERY 28
Checking the charging system 28
Charging methods 28
Battery 30
Battery mount 31
Generator 32
Rectifier - regulator 33
3 - ELECTRIC STARTING 35
Electric starting system 36
Starter motor 38
Contactor 40
4 - LIGHTING DEVICES 41
Removing the instrument panel 41
Replacing bulbs 42
Headlight switching relay 44
Aligning dipped (LO) beam 45
5 - INDICATORS AND
LIGHTING SYSTEM
46
Checking the indicators and lighting system components 46
Changing light bulbs 52

A
B
C
D
E
F
G
H
L
M
N
P
Indice generale
General summary
11ST3 - M.Y. 2004 - edizione/edition 00
6 - DISPOSITIVI DI SICUREZZA
E PROTEZIONE
54
Controllo componenti 54
Controllo fusibili 55
8 - IMMOBILIZER E TRASPONDER 56
9 - STRUMENTI DI DIAGNOSI 65
L’uso del multimetro per il controllo degli impianti elettrici 65
10 -PRESA DI CORRENTE 68
6 - PROTECTION AND SAFETY DEVICES 54
Checking components 54
Fuses check 55
8 - IMMOBILIZER AND TRANSPONDER 56
9 - DIAGNOSTIC INSTRUMENTS 65
Using a multi-meter to test electrical systems 65
10 -POWER SOCKET 68

A
B
C
D
E
F
G
H
L
M
N
P
Indice generale
General summary
12 ST3 - M.Y. 2004 - edizione/edition 00

A
B
C
D
E
F
G
H
L
M
N
P
Generalità 0
Description 0

A
B
C
D
E
F
G
H
L
M
N
P
Generalità
Description
sezione / section
A
2 ST3 - M.Y. 2004 - edizione/edition 00
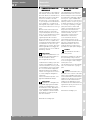
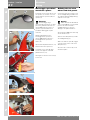
1 - CONSULTAZIONE DEL MANUALE 3
Struttura del manuale 4
2 - SIMBOLOGIA - ABBREVIAZIONI -
RIFERIMENTI
5
Caratteristiche prodotti 6
3 - PRODOTTI PERICOLOSI -
AVVERTENZE
10
Regole generali di sicurezza 10
Regole per le operazioni di manutenzione 12
1 - HOW TO USE THE MANUAL 3
Manual layout 4
2 - SYMBOLS - ABBREVIATIONS -
REFERENCES
5
Product specifications 8
3 - DANGEROUS PRODUCTS -
WARNINGS
10
General safety rules 10
General maintenance indications 12

A
B
C
D
E
F
G
H
L
M
N
P
Generalità
Description
sezione / section
A 1
3ST3 - M.Y. 2004 - edizione/edition 00
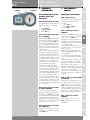
1 - CONSULTAZIONE DEL
MANUALE
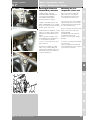
Il presente manuale è stato redatto al
fine di fornire ai tecnici delle Stazioni
di Servizio Ducati, le informazioni fon-
damentali per operare in perfetta ar-
monia con i moderni concetti di
"buona tecnica" e "sicurezza sul lavo-
ro", per tutti gli interventi di manuten-
zione, riparazione e sostituzione di
parti originali, sia per la parte ciclistica
che motoristica del motoveicolo in og-
getto.
Gli interventi descritti nel presente
manuale richiedono esperienza e
competenza da parte dei tecnici pre-
posti, che sono invitati al pieno rispet-
to delle caratteristiche tecniche
originali riportate dal Costruttore.
Alcune informazioni sono state volon-
tariamente omesse, in quanto devo-
no far parte dell'indispensabile cultura
tecnica di base che un tecnico spe-
cializzato deve possedere. Altre infor-
mazioni riguardanti il montaggio dei
componenti possono essere dedotte
dal catalogo ricambi.
Importante
La presente pubblicazione con-
templa inoltre gli indispensabili con-
trolli da effettuarsi in fase di
preconsegna del motoveicolo.
La Ducati Motor Holding S.p.A. decli-
na ogni responsabilità per errori ed
omissioni di carattere tecnico, prodot-
ti nella redazione del presente manu-
ale e si riserva il diritto di apportare
qualsiasi modifica richiesta dall'ev-
oluzione tecnologica dei suoi motoci-
cli, senza l'obbligo di divulgazione
tempestiva.
Tutte le informazioni riportate, sono
aggiornate alla data di stampa.
Importante
Riproduzioni o divulgazioni an-
che parziali degli argomenti trattati
nella presente pubblicazione, sono
assolutamente vietate. Ogni diritto è
riservato alla Ducati Motor Holding
S.p.A., alla quale si dovrà richiedere
autorizzazione (scritta) specifican-
done la motivazione.
Ducati Motor Holding S.p.A.
1 - HOW TO USE THE
MANUAL
This manual has been prepared for
Ducati Authorized Service Centers
and workshop personnel involved in
the maintenance and repair of Ducati
motorcycles. It gives fundamental
information on how to work in perfect
harmony with the concepts of "good
technique" and "safety on work sites"
for servicing or replacing of original
spare parts both for chassis and
engine concerning this motorcycle.
All operations described in this
manual must be carried out by senior
skilled technicians, who are
requested to strictly follow the
Manufacturer's instructions.
Some information has been
intentionally omitted, as, at our
advice, a specialized technician must
have this technical background.
Additional information on how to
install the different components is
provided in the spare parts catalogue.
Caution
This manual also describes
pre-delivery checks.
Ducati Motor Holding S.p.A. declines
all responsibility for any technical
errors or omissions in this manual and
reserves the right to make changes
without prior notice.
The information given in this manual
was correct at the time of going to
print.
Caution
Reproduction and disclosure of
all or part of the contents of this man-
ual are strictly forbidden without prior
written authorization of Ducati Motor
Holding S.p.A. All rights on this man-
ual are reserved for Ducati Motor
Holding S.p.A. Applications for au-
thorization must be submitted in writ-
ing and must specify the reasons for
reproduction or disclosure.
Ducati Motor Holding S.p.A.

A
B
C
D
E
F
G
H
L
M
N
P
Generalità
Description
sezione / section
A 1
4 ST3 - M.Y. 2004 - edizione/edition 00
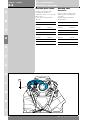
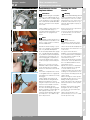
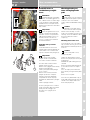
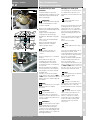
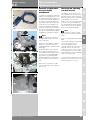
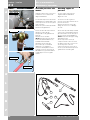
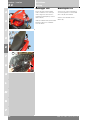
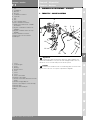
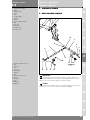
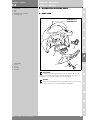
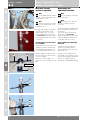
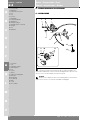
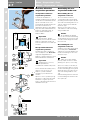
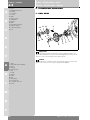
Struttura del manuale
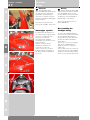
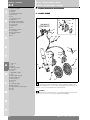
Il manuale è suddiviso in sezioni (1)
indicate ciascuna con una lettera.
Ogni sezione (1) è suddivisa in capitoli
(2) identificati da un numero
progressivo.
I capitoli (2) possono poi essere divisi
in paragrafi (3).
Il manuale descrive ogni intervento di
riparazione partendo dalla moto
completamente assemblata.
L’intervento viene descritto fino a
riportare il motociclo nella
configurazione di partenza.
Importante
Alcune sezioni di questo
manuale non sono presenti perchè il
motoveicolo è sprovvisto di tali
particolari.
Importante
La struttura del manuale è stata
studiata in modo da comprendere
tutte le tipologie dei modelli prodotti
da DUCATI MOTOR HOLDING.
Per una maggiore facilità di lettura del
manuale, l’indice dei capitoli viene
tenuto costante per tutti i modelli.
Manual layout
This manual is divided in sections (1),
each identified by a letter. Each
section (1) includes several chapters
(2), which are numbered
consecutively and may be divided in
paragraphs.
The repair procedures described in
this manual include the necessary
disassembly and re-assembly
instructions, i.e. the full procedure is
detailed starting with the motorcycle
fully assembled until bringing it back
to the original condition.
Caution
Some of the sections of this
manual are not present, being the
relevant parts not installed on the
vehicle.
Caution
The manual structure has been
designed to be applied to all the
different models manufactured by
DUCATI MOTOR HOLDING.
To make reading easier, the sub-
sections table of contents is kept
unchanged for all models.
1
2
3
2

A
B
C
D
E
F
G
H
L
M
N
P
Generalità
Description
sezione / section
A 2
5ST3 - M.Y. 2004 - edizione/edition 00
2 - SIMBOLOGIA -
ABBREVIAZIONI -
RIFERIMENTI
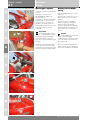
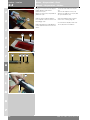
Per una lettura rapida e razionale sono
stati impiegati simboli che
evidenziano situazioni di massima
attenzione, consigli pratici o semplici
informazioni. Prestare molta
attenzione al significato dei simboli,
in quanto la loro funzione è quella di
non dovere ripetere concetti tecnici o
avvertenze di sicurezza. Sono da
considerare, quindi, dei veri e propri
“promemoria”. Consultare questa
pagina ogni volta che sorgeranno
dubbi sul loro significato.
Tutte le indicazioni destro o sinistro
si riferiscono al senso di marcia del
motociclo.
Attenzione
La non osservanza delle
istruzioni riportate può creare una
situazione di pericolo e causare gravi
lesioni personali e anche la morte.
Importante
Indica la possibilità di arrecare
danno al veicolo e/o ai suoi
componenti se le istruzioni riportate
non vengono eseguite.
Note
Fornisce utili informazioni
sull'operazione in corso.
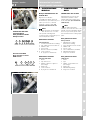
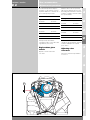
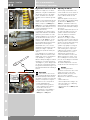
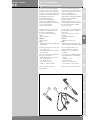
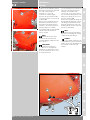
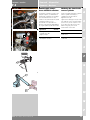
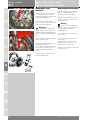
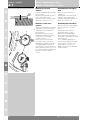
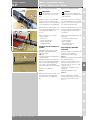
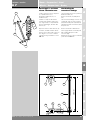
Riferimenti nel testo
(X)
Il riferimento in grassetto indica che il
particolare richiamato non è presente
nelle immagini a fianco del testo, ma
deve essere ricercato nelle tavole
esplose di inizio capitolo.
(X)
Il riferimento in sottile indica che il
particolare richiamato è presente
nelle immagini a fianco del testo.
2 - SYMBOLS -
ABBREVIATIONS -
REFERENCES
For easy and rational reading, this
manual uses graphic symbols for
highlighting situations in which
maximum care is required, practical
advice or simple information. Please
pay maximum attention to these
symbols as they are meant to avoid
repeating technical concepts or
safety rules throughout the text.
These symbols must be considered
as “hints” to important information.
Please refer to this page whenever in
doubt as to their meaning.
Left-hand and right-hand in the
descriptions refer to motorcycle
direction of travel.
Warning
Failure to follow the
instructions given in text marked with
this symbol can lead to serious
personal injury or death.
Caution
Failure to follow the
instructions in text marked with this
symbol can lead to serious damage to
the motorcycle and its components.
Note
This symbol indicates additional
useful information for the current
operation.
Text references
(X)
The bold reference indicates a part
that is not illustrated in the figures
next to the text, but can be found in
the exploded view at the beginning of
each section.
(X)
The non-bold reference indicates a
part that is illustrated in the figures
next to the text.

Generalità
Description
sezione / section
A 2
6
A
B
C
D
E
F
G
H
L
M
N
P
ST3 - M.Y. 2004 - edizione/edition 00
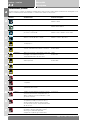
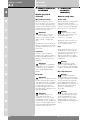
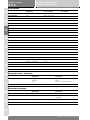
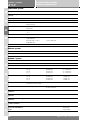
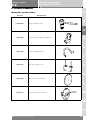
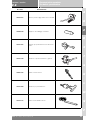
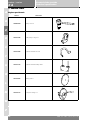
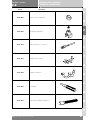
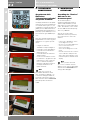
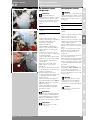
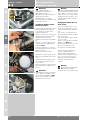
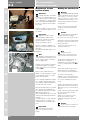
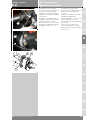
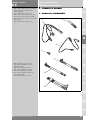
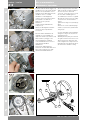
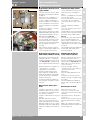
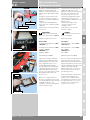
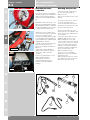
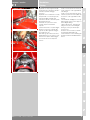
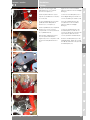
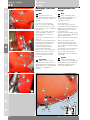
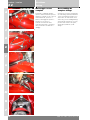
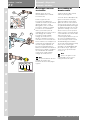
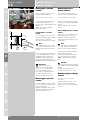
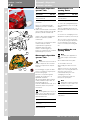
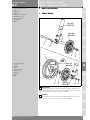
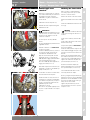
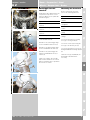
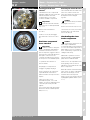
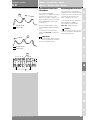
Caratteristiche prodotti
I prodotti usati per il serraggio, la sigillatura e la lubrificazione degli elementi verranno rappresentati all’interno della figura con un
simbolo. La tabella riporta i simboli utilizzati e le caratteristiche relative ai vari prodotti.
Simbolo Caratteristiche Prodotto consigliato
Olio motore (per caratteristiche vedi Sez. C 2) SHELL
Advance Ultra 4
Liquido speciale per i sistemi idraulici DOT 4. SHELL
Advance Brake DOT 4
Olio per ingranaggi SAE 80-90 o prodotti specifici
per catene con anelli OR.
SHELL
Advance Chain o Advance Teflon Chain
Liquido antigelo (totalmente assente da nitriti,
ammine e fosfati) 30÷40% + acqua.
SHELL
Advance coolant o Glycoshell
GREASE A Grasso a base di litio, a fibra media, di tipo
“multipurpose”.
SHELL Alvania R3
GREASE B Grasso al bisolfuro di molibdeno resistente ad
estreme sollecitazioni meccaniche e termiche.
SHELL
Retinax HDX2
GREASE C Grasso per cuscinetti e articolazioni sottoposti a
prolungate sollecitazioni meccaniche.
Temperatura di utilizzo da -10 a 110°C.
SHELL
Retinax LX2
GREASE D Grasso con proprietà protettive, anticorrosive e
di idrorepellenza.
SHELL
Retinax HD2
GREASE E Grasso PANKL - PLB 05.
GREASE F Grasso OPTIMOL - PASTE WHITE T.
LOCK 1 Frenafiletti a debole resistenza meccanica. Loctite 222
LOCK 2 Frenafiletti a media resistenza meccanica olio
compatibile.
Loctite 243
LOCK 3 Frenafiletti ad alta resistenza meccanica per
sigillatura di parti filettate.
Loctite 270
LOCK 4 Sigillante per piani ad alta reistenza meccanica e
ai solventi. Resiste al alte temperature (fino a
200°C), sigilla pressioni fino a 350 Atm e colma
giochi fino a 0,4 mm.
Loctite 510
LOCK 5 Adesivo strutturale permanente per
accoppiamenti cilindri a scorrimento libero o
filettati su parti meccaniche. Alta resistenza
meccanica ed ai solventi. Temperatura di utilizzo
da –55 a 175°C.
Loctite 128455
LOCK 6 Sigillante di tubazioni e raccorderie medio-grandi,
per acqua e ogni tipo di gas (ad eccezione
dell'ossigeno). Massima capacità di
riempimento: 0,40 mm (gioco diametrale).
Loctite 577
A
B
C
D
E
F
1
LOCK
2
LOCK
3
LOCK
4
LOCK
5
LOCK
6
LOCK

Generalità
Description
sezione / section
A 2
7
A
B
C
D
E
F
G
H
L
M
N
P
ST3 - M.Y. 2004 - edizione/edition 00
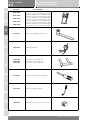
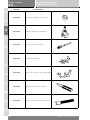
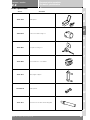
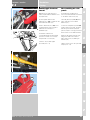
LOCK 7 Adesivo istantaneo gomma - plastica, con base
etilica caricato ad elastomeri.
Loctite 480
LOCK 8 Bloccante permanente di parti filettate,
cuscinetti, bussole, scanalati e chiavette.
Temperatura di esercizio da –55 a 150°C.
Loctite 601
LOCK 9 Frenafiletti a media resistenza meccanica. Loctite 401
LOCK 10 Prodotto adatto per sigillare e bloccare
accoppiamenti cilindrici a scorrimento libero o
accoppiamenti filettati, su parti metalliche.
Caratterizzato da una alta resistenza meccanica,
alta resistenza alla temperatura, eccellente
resistenza ai solventi ed all'agressione chimica.
Loctite 128443
LOCK 11 Adesivo istantaneo gelatinoso con resistenza a
trazione / taglio.
Loctite 454 gel
Guarnizione liquida DUCATI. 942470014
Pasta sigillante per tubi di scarico. Autosigillante
si indurisce al calore e resiste a temperature
superiori a 1000°C.
Fire gum holts
Spray impiegato nel trattamento degli impianti
elettrici. Rimuove umidità e condensa e offre alta
resistenza alla corrosione. Idrorepellente.
SHELL
Advance Contact Cleaner
Simbolo Caratteristiche Prodotto consigliato
7
LOCK
8
LOCK
LOCK
9
LOCK
10
LOCK
11
La pagina si sta caricando...
La pagina si sta caricando...
La pagina si sta caricando...
La pagina si sta caricando...
La pagina si sta caricando...
La pagina si sta caricando...
La pagina si sta caricando...
La pagina si sta caricando...
La pagina si sta caricando...
La pagina si sta caricando...
La pagina si sta caricando...
La pagina si sta caricando...
La pagina si sta caricando...
La pagina si sta caricando...
La pagina si sta caricando...
La pagina si sta caricando...
La pagina si sta caricando...
La pagina si sta caricando...
La pagina si sta caricando...
La pagina si sta caricando...
La pagina si sta caricando...
La pagina si sta caricando...
La pagina si sta caricando...
La pagina si sta caricando...
La pagina si sta caricando...
La pagina si sta caricando...
La pagina si sta caricando...
La pagina si sta caricando...
La pagina si sta caricando...
La pagina si sta caricando...
La pagina si sta caricando...
La pagina si sta caricando...
La pagina si sta caricando...
La pagina si sta caricando...
La pagina si sta caricando...
La pagina si sta caricando...
La pagina si sta caricando...
La pagina si sta caricando...
La pagina si sta caricando...
La pagina si sta caricando...
La pagina si sta caricando...
La pagina si sta caricando...
La pagina si sta caricando...
La pagina si sta caricando...
La pagina si sta caricando...
La pagina si sta caricando...
La pagina si sta caricando...
La pagina si sta caricando...
La pagina si sta caricando...
La pagina si sta caricando...
La pagina si sta caricando...
La pagina si sta caricando...
La pagina si sta caricando...
La pagina si sta caricando...
La pagina si sta caricando...
La pagina si sta caricando...
La pagina si sta caricando...
La pagina si sta caricando...
La pagina si sta caricando...
La pagina si sta caricando...
La pagina si sta caricando...
La pagina si sta caricando...
La pagina si sta caricando...
La pagina si sta caricando...
La pagina si sta caricando...
La pagina si sta caricando...
La pagina si sta caricando...
La pagina si sta caricando...
La pagina si sta caricando...
La pagina si sta caricando...
La pagina si sta caricando...
La pagina si sta caricando...
La pagina si sta caricando...
La pagina si sta caricando...
La pagina si sta caricando...
La pagina si sta caricando...
La pagina si sta caricando...
La pagina si sta caricando...
La pagina si sta caricando...
La pagina si sta caricando...
La pagina si sta caricando...
La pagina si sta caricando...
La pagina si sta caricando...
La pagina si sta caricando...
La pagina si sta caricando...
La pagina si sta caricando...
La pagina si sta caricando...
La pagina si sta caricando...
La pagina si sta caricando...
La pagina si sta caricando...
La pagina si sta caricando...
La pagina si sta caricando...
La pagina si sta caricando...
La pagina si sta caricando...
La pagina si sta caricando...
La pagina si sta caricando...
La pagina si sta caricando...
La pagina si sta caricando...
La pagina si sta caricando...
La pagina si sta caricando...
La pagina si sta caricando...
La pagina si sta caricando...
La pagina si sta caricando...
La pagina si sta caricando...
La pagina si sta caricando...
La pagina si sta caricando...
La pagina si sta caricando...
La pagina si sta caricando...
La pagina si sta caricando...
La pagina si sta caricando...
La pagina si sta caricando...
La pagina si sta caricando...
La pagina si sta caricando...
La pagina si sta caricando...
La pagina si sta caricando...
La pagina si sta caricando...
La pagina si sta caricando...
La pagina si sta caricando...
La pagina si sta caricando...
La pagina si sta caricando...
La pagina si sta caricando...
La pagina si sta caricando...
La pagina si sta caricando...
La pagina si sta caricando...
La pagina si sta caricando...
La pagina si sta caricando...
La pagina si sta caricando...
La pagina si sta caricando...
La pagina si sta caricando...
La pagina si sta caricando...
La pagina si sta caricando...
La pagina si sta caricando...
La pagina si sta caricando...
La pagina si sta caricando...
La pagina si sta caricando...
La pagina si sta caricando...
La pagina si sta caricando...
La pagina si sta caricando...
La pagina si sta caricando...
La pagina si sta caricando...
La pagina si sta caricando...
La pagina si sta caricando...
La pagina si sta caricando...
La pagina si sta caricando...
La pagina si sta caricando...
La pagina si sta caricando...
La pagina si sta caricando...
La pagina si sta caricando...
La pagina si sta caricando...
La pagina si sta caricando...
La pagina si sta caricando...
La pagina si sta caricando...
La pagina si sta caricando...
La pagina si sta caricando...
La pagina si sta caricando...
La pagina si sta caricando...
La pagina si sta caricando...
La pagina si sta caricando...
La pagina si sta caricando...
La pagina si sta caricando...
La pagina si sta caricando...
La pagina si sta caricando...
La pagina si sta caricando...
La pagina si sta caricando...
La pagina si sta caricando...
La pagina si sta caricando...
La pagina si sta caricando...
La pagina si sta caricando...
La pagina si sta caricando...
La pagina si sta caricando...
La pagina si sta caricando...
La pagina si sta caricando...
La pagina si sta caricando...
La pagina si sta caricando...
La pagina si sta caricando...
La pagina si sta caricando...
La pagina si sta caricando...
La pagina si sta caricando...
La pagina si sta caricando...
La pagina si sta caricando...
La pagina si sta caricando...
La pagina si sta caricando...
La pagina si sta caricando...
La pagina si sta caricando...
La pagina si sta caricando...
La pagina si sta caricando...
La pagina si sta caricando...
La pagina si sta caricando...
La pagina si sta caricando...
La pagina si sta caricando...
La pagina si sta caricando...
La pagina si sta caricando...
La pagina si sta caricando...
La pagina si sta caricando...
La pagina si sta caricando...
La pagina si sta caricando...
La pagina si sta caricando...
La pagina si sta caricando...
La pagina si sta caricando...
La pagina si sta caricando...
La pagina si sta caricando...
La pagina si sta caricando...
La pagina si sta caricando...
La pagina si sta caricando...
La pagina si sta caricando...
La pagina si sta caricando...
La pagina si sta caricando...
La pagina si sta caricando...
La pagina si sta caricando...
La pagina si sta caricando...
La pagina si sta caricando...
La pagina si sta caricando...
La pagina si sta caricando...
La pagina si sta caricando...
La pagina si sta caricando...
La pagina si sta caricando...
La pagina si sta caricando...
La pagina si sta caricando...
La pagina si sta caricando...
La pagina si sta caricando...
La pagina si sta caricando...
La pagina si sta caricando...
La pagina si sta caricando...
La pagina si sta caricando...
La pagina si sta caricando...
La pagina si sta caricando...
La pagina si sta caricando...
La pagina si sta caricando...
La pagina si sta caricando...
La pagina si sta caricando...
La pagina si sta caricando...
La pagina si sta caricando...
La pagina si sta caricando...
La pagina si sta caricando...
La pagina si sta caricando...
La pagina si sta caricando...
La pagina si sta caricando...
La pagina si sta caricando...
La pagina si sta caricando...
La pagina si sta caricando...
La pagina si sta caricando...
La pagina si sta caricando...
La pagina si sta caricando...
La pagina si sta caricando...
La pagina si sta caricando...
La pagina si sta caricando...
La pagina si sta caricando...
La pagina si sta caricando...
La pagina si sta caricando...
La pagina si sta caricando...
La pagina si sta caricando...
La pagina si sta caricando...
La pagina si sta caricando...
La pagina si sta caricando...
La pagina si sta caricando...
La pagina si sta caricando...
La pagina si sta caricando...
La pagina si sta caricando...
La pagina si sta caricando...
La pagina si sta caricando...
La pagina si sta caricando...
La pagina si sta caricando...
La pagina si sta caricando...
La pagina si sta caricando...
La pagina si sta caricando...
La pagina si sta caricando...
La pagina si sta caricando...
La pagina si sta caricando...
La pagina si sta caricando...
La pagina si sta caricando...
La pagina si sta caricando...
La pagina si sta caricando...
La pagina si sta caricando...
La pagina si sta caricando...
La pagina si sta caricando...
La pagina si sta caricando...
La pagina si sta caricando...
La pagina si sta caricando...
La pagina si sta caricando...
La pagina si sta caricando...
La pagina si sta caricando...
La pagina si sta caricando...
La pagina si sta caricando...
La pagina si sta caricando...
La pagina si sta caricando...
La pagina si sta caricando...
La pagina si sta caricando...
La pagina si sta caricando...
La pagina si sta caricando...
La pagina si sta caricando...
La pagina si sta caricando...
La pagina si sta caricando...
La pagina si sta caricando...
La pagina si sta caricando...
La pagina si sta caricando...
La pagina si sta caricando...
La pagina si sta caricando...
La pagina si sta caricando...
La pagina si sta caricando...
La pagina si sta caricando...
La pagina si sta caricando...
La pagina si sta caricando...
La pagina si sta caricando...
La pagina si sta caricando...
La pagina si sta caricando...
La pagina si sta caricando...
La pagina si sta caricando...
La pagina si sta caricando...
La pagina si sta caricando...
La pagina si sta caricando...
La pagina si sta caricando...
La pagina si sta caricando...
La pagina si sta caricando...
La pagina si sta caricando...
La pagina si sta caricando...
La pagina si sta caricando...
La pagina si sta caricando...
La pagina si sta caricando...
La pagina si sta caricando...
La pagina si sta caricando...
La pagina si sta caricando...
La pagina si sta caricando...
La pagina si sta caricando...
La pagina si sta caricando...
La pagina si sta caricando...
La pagina si sta caricando...
La pagina si sta caricando...
La pagina si sta caricando...
La pagina si sta caricando...
La pagina si sta caricando...
La pagina si sta caricando...
La pagina si sta caricando...
La pagina si sta caricando...
La pagina si sta caricando...
La pagina si sta caricando...
La pagina si sta caricando...
La pagina si sta caricando...
La pagina si sta caricando...
La pagina si sta caricando...
La pagina si sta caricando...
La pagina si sta caricando...
La pagina si sta caricando...
La pagina si sta caricando...
La pagina si sta caricando...
La pagina si sta caricando...
La pagina si sta caricando...
La pagina si sta caricando...
La pagina si sta caricando...
La pagina si sta caricando...
La pagina si sta caricando...
La pagina si sta caricando...
La pagina si sta caricando...
La pagina si sta caricando...
La pagina si sta caricando...
La pagina si sta caricando...
La pagina si sta caricando...
La pagina si sta caricando...
La pagina si sta caricando...
La pagina si sta caricando...
La pagina si sta caricando...
La pagina si sta caricando...
La pagina si sta caricando...
La pagina si sta caricando...
La pagina si sta caricando...
La pagina si sta caricando...
La pagina si sta caricando...
La pagina si sta caricando...
La pagina si sta caricando...
La pagina si sta caricando...
La pagina si sta caricando...
La pagina si sta caricando...
La pagina si sta caricando...
La pagina si sta caricando...
La pagina si sta caricando...
La pagina si sta caricando...
La pagina si sta caricando...
La pagina si sta caricando...
La pagina si sta caricando...
La pagina si sta caricando...
La pagina si sta caricando...
La pagina si sta caricando...
La pagina si sta caricando...
La pagina si sta caricando...
La pagina si sta caricando...
La pagina si sta caricando...
La pagina si sta caricando...
La pagina si sta caricando...
La pagina si sta caricando...
La pagina si sta caricando...
La pagina si sta caricando...
La pagina si sta caricando...
La pagina si sta caricando...
La pagina si sta caricando...
La pagina si sta caricando...
La pagina si sta caricando...
La pagina si sta caricando...
La pagina si sta caricando...
La pagina si sta caricando...
La pagina si sta caricando...
La pagina si sta caricando...
La pagina si sta caricando...
La pagina si sta caricando...
La pagina si sta caricando...
La pagina si sta caricando...
La pagina si sta caricando...
La pagina si sta caricando...
La pagina si sta caricando...
La pagina si sta caricando...
La pagina si sta caricando...
La pagina si sta caricando...
La pagina si sta caricando...
La pagina si sta caricando...
La pagina si sta caricando...
La pagina si sta caricando...
La pagina si sta caricando...
La pagina si sta caricando...
La pagina si sta caricando...
La pagina si sta caricando...
La pagina si sta caricando...
La pagina si sta caricando...
La pagina si sta caricando...
La pagina si sta caricando...
La pagina si sta caricando...
La pagina si sta caricando...
La pagina si sta caricando...
La pagina si sta caricando...
La pagina si sta caricando...
La pagina si sta caricando...
La pagina si sta caricando...
La pagina si sta caricando...
La pagina si sta caricando...
La pagina si sta caricando...
La pagina si sta caricando...
La pagina si sta caricando...
La pagina si sta caricando...
La pagina si sta caricando...
La pagina si sta caricando...
La pagina si sta caricando...
La pagina si sta caricando...
La pagina si sta caricando...
La pagina si sta caricando...
La pagina si sta caricando...
La pagina si sta caricando...
La pagina si sta caricando...
La pagina si sta caricando...
La pagina si sta caricando...
La pagina si sta caricando...
La pagina si sta caricando...
La pagina si sta caricando...
La pagina si sta caricando...
La pagina si sta caricando...
La pagina si sta caricando...
La pagina si sta caricando...
La pagina si sta caricando...
La pagina si sta caricando...
La pagina si sta caricando...
La pagina si sta caricando...
La pagina si sta caricando...
La pagina si sta caricando...
La pagina si sta caricando...
La pagina si sta caricando...
La pagina si sta caricando...
La pagina si sta caricando...
La pagina si sta caricando...
La pagina si sta caricando...
La pagina si sta caricando...
La pagina si sta caricando...
La pagina si sta caricando...
La pagina si sta caricando...
La pagina si sta caricando...
La pagina si sta caricando...
La pagina si sta caricando...
La pagina si sta caricando...
La pagina si sta caricando...
La pagina si sta caricando...
La pagina si sta caricando...
La pagina si sta caricando...
La pagina si sta caricando...
La pagina si sta caricando...
La pagina si sta caricando...
La pagina si sta caricando...
La pagina si sta caricando...
La pagina si sta caricando...
La pagina si sta caricando...
La pagina si sta caricando...
La pagina si sta caricando...
La pagina si sta caricando...
La pagina si sta caricando...
La pagina si sta caricando...
La pagina si sta caricando...
La pagina si sta caricando...
La pagina si sta caricando...
La pagina si sta caricando...
La pagina si sta caricando...
La pagina si sta caricando...
La pagina si sta caricando...
La pagina si sta caricando...
La pagina si sta caricando...
La pagina si sta caricando...
La pagina si sta caricando...
La pagina si sta caricando...
La pagina si sta caricando...
La pagina si sta caricando...
La pagina si sta caricando...
La pagina si sta caricando...
La pagina si sta caricando...
La pagina si sta caricando...
La pagina si sta caricando...
La pagina si sta caricando...
La pagina si sta caricando...
La pagina si sta caricando...
La pagina si sta caricando...
La pagina si sta caricando...
La pagina si sta caricando...
La pagina si sta caricando...
La pagina si sta caricando...
La pagina si sta caricando...
La pagina si sta caricando...
La pagina si sta caricando...
La pagina si sta caricando...
La pagina si sta caricando...
La pagina si sta caricando...
La pagina si sta caricando...
La pagina si sta caricando...
La pagina si sta caricando...
La pagina si sta caricando...
La pagina si sta caricando...
La pagina si sta caricando...
La pagina si sta caricando...
La pagina si sta caricando...
La pagina si sta caricando...
La pagina si sta caricando...
La pagina si sta caricando...
La pagina si sta caricando...
La pagina si sta caricando...
La pagina si sta caricando...
La pagina si sta caricando...
La pagina si sta caricando...
La pagina si sta caricando...
La pagina si sta caricando...
La pagina si sta caricando...
La pagina si sta caricando...
La pagina si sta caricando...
La pagina si sta caricando...
La pagina si sta caricando...
La pagina si sta caricando...
La pagina si sta caricando...
La pagina si sta caricando...
La pagina si sta caricando...
La pagina si sta caricando...
La pagina si sta caricando...
La pagina si sta caricando...
La pagina si sta caricando...
La pagina si sta caricando...
La pagina si sta caricando...
La pagina si sta caricando...
La pagina si sta caricando...
La pagina si sta caricando...
La pagina si sta caricando...
La pagina si sta caricando...
La pagina si sta caricando...
La pagina si sta caricando...
La pagina si sta caricando...
La pagina si sta caricando...
La pagina si sta caricando...
La pagina si sta caricando...
La pagina si sta caricando...
La pagina si sta caricando...
La pagina si sta caricando...
La pagina si sta caricando...
La pagina si sta caricando...
La pagina si sta caricando...
La pagina si sta caricando...
La pagina si sta caricando...
La pagina si sta caricando...
La pagina si sta caricando...
La pagina si sta caricando...
La pagina si sta caricando...
La pagina si sta caricando...
La pagina si sta caricando...
La pagina si sta caricando...
La pagina si sta caricando...
La pagina si sta caricando...
La pagina si sta caricando...
La pagina si sta caricando...
La pagina si sta caricando...
La pagina si sta caricando...
La pagina si sta caricando...
La pagina si sta caricando...
La pagina si sta caricando...
La pagina si sta caricando...
La pagina si sta caricando...
La pagina si sta caricando...
La pagina si sta caricando...
La pagina si sta caricando...
La pagina si sta caricando...
La pagina si sta caricando...
La pagina si sta caricando...
La pagina si sta caricando...
La pagina si sta caricando...
La pagina si sta caricando...
La pagina si sta caricando...
La pagina si sta caricando...
La pagina si sta caricando...
La pagina si sta caricando...
La pagina si sta caricando...
La pagina si sta caricando...
La pagina si sta caricando...
La pagina si sta caricando...
La pagina si sta caricando...
-
 1
1
-
 2
2
-
 3
3
-
 4
4
-
 5
5
-
 6
6
-
 7
7
-
 8
8
-
 9
9
-
 10
10
-
 11
11
-
 12
12
-
 13
13
-
 14
14
-
 15
15
-
 16
16
-
 17
17
-
 18
18
-
 19
19
-
 20
20
-
 21
21
-
 22
22
-
 23
23
-
 24
24
-
 25
25
-
 26
26
-
 27
27
-
 28
28
-
 29
29
-
 30
30
-
 31
31
-
 32
32
-
 33
33
-
 34
34
-
 35
35
-
 36
36
-
 37
37
-
 38
38
-
 39
39
-
 40
40
-
 41
41
-
 42
42
-
 43
43
-
 44
44
-
 45
45
-
 46
46
-
 47
47
-
 48
48
-
 49
49
-
 50
50
-
 51
51
-
 52
52
-
 53
53
-
 54
54
-
 55
55
-
 56
56
-
 57
57
-
 58
58
-
 59
59
-
 60
60
-
 61
61
-
 62
62
-
 63
63
-
 64
64
-
 65
65
-
 66
66
-
 67
67
-
 68
68
-
 69
69
-
 70
70
-
 71
71
-
 72
72
-
 73
73
-
 74
74
-
 75
75
-
 76
76
-
 77
77
-
 78
78
-
 79
79
-
 80
80
-
 81
81
-
 82
82
-
 83
83
-
 84
84
-
 85
85
-
 86
86
-
 87
87
-
 88
88
-
 89
89
-
 90
90
-
 91
91
-
 92
92
-
 93
93
-
 94
94
-
 95
95
-
 96
96
-
 97
97
-
 98
98
-
 99
99
-
 100
100
-
 101
101
-
 102
102
-
 103
103
-
 104
104
-
 105
105
-
 106
106
-
 107
107
-
 108
108
-
 109
109
-
 110
110
-
 111
111
-
 112
112
-
 113
113
-
 114
114
-
 115
115
-
 116
116
-
 117
117
-
 118
118
-
 119
119
-
 120
120
-
 121
121
-
 122
122
-
 123
123
-
 124
124
-
 125
125
-
 126
126
-
 127
127
-
 128
128
-
 129
129
-
 130
130
-
 131
131
-
 132
132
-
 133
133
-
 134
134
-
 135
135
-
 136
136
-
 137
137
-
 138
138
-
 139
139
-
 140
140
-
 141
141
-
 142
142
-
 143
143
-
 144
144
-
 145
145
-
 146
146
-
 147
147
-
 148
148
-
 149
149
-
 150
150
-
 151
151
-
 152
152
-
 153
153
-
 154
154
-
 155
155
-
 156
156
-
 157
157
-
 158
158
-
 159
159
-
 160
160
-
 161
161
-
 162
162
-
 163
163
-
 164
164
-
 165
165
-
 166
166
-
 167
167
-
 168
168
-
 169
169
-
 170
170
-
 171
171
-
 172
172
-
 173
173
-
 174
174
-
 175
175
-
 176
176
-
 177
177
-
 178
178
-
 179
179
-
 180
180
-
 181
181
-
 182
182
-
 183
183
-
 184
184
-
 185
185
-
 186
186
-
 187
187
-
 188
188
-
 189
189
-
 190
190
-
 191
191
-
 192
192
-
 193
193
-
 194
194
-
 195
195
-
 196
196
-
 197
197
-
 198
198
-
 199
199
-
 200
200
-
 201
201
-
 202
202
-
 203
203
-
 204
204
-
 205
205
-
 206
206
-
 207
207
-
 208
208
-
 209
209
-
 210
210
-
 211
211
-
 212
212
-
 213
213
-
 214
214
-
 215
215
-
 216
216
-
 217
217
-
 218
218
-
 219
219
-
 220
220
-
 221
221
-
 222
222
-
 223
223
-
 224
224
-
 225
225
-
 226
226
-
 227
227
-
 228
228
-
 229
229
-
 230
230
-
 231
231
-
 232
232
-
 233
233
-
 234
234
-
 235
235
-
 236
236
-
 237
237
-
 238
238
-
 239
239
-
 240
240
-
 241
241
-
 242
242
-
 243
243
-
 244
244
-
 245
245
-
 246
246
-
 247
247
-
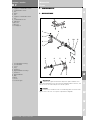 248
248
-
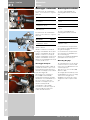 249
249
-
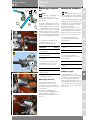 250
250
-
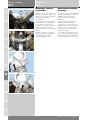 251
251
-
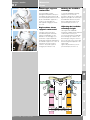 252
252
-
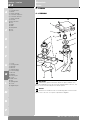 253
253
-
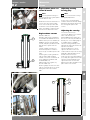 254
254
-
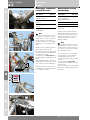 255
255
-
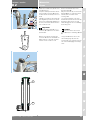 256
256
-
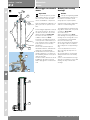 257
257
-
 258
258
-
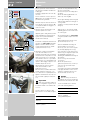 259
259
-
 260
260
-
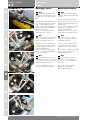 261
261
-
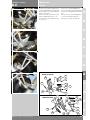 262
262
-
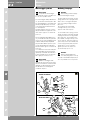 263
263
-
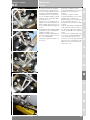 264
264
-
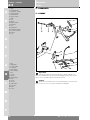 265
265
-
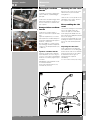 266
266
-
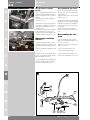 267
267
-
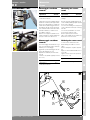 268
268
-
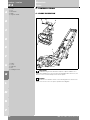 269
269
-
 270
270
-
 271
271
-
 272
272
-
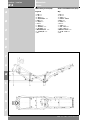 273
273
-
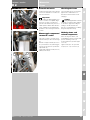 274
274
-
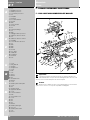 275
275
-
 276
276
-
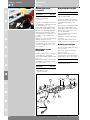 277
277
-
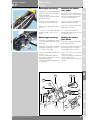 278
278
-
 279
279
-
 280
280
-
 281
281
-
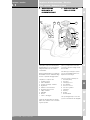 282
282
-
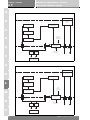 283
283
-
 284
284
-
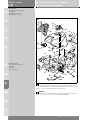 285
285
-
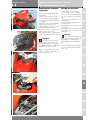 286
286
-
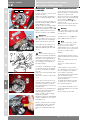 287
287
-
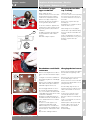 288
288
-
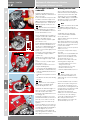 289
289
-
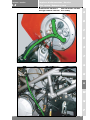 290
290
-
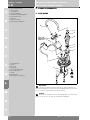 291
291
-
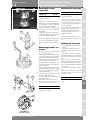 292
292
-
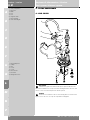 293
293
-
 294
294
-
 295
295
-
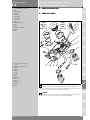 296
296
-
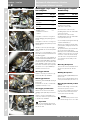 297
297
-
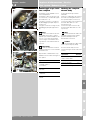 298
298
-
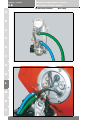 299
299
-
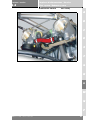 300
300
-
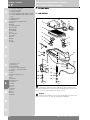 301
301
-
 302
302
-
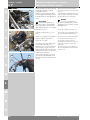 303
303
-
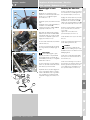 304
304
-
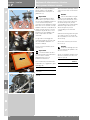 305
305
-
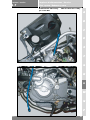 306
306
-
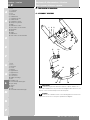 307
307
-
 308
308
-
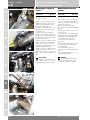 309
309
-
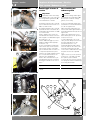 310
310
-
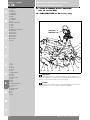 311
311
-
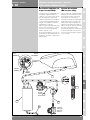 312
312
-
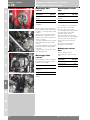 313
313
-
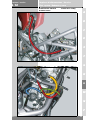 314
314
-
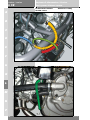 315
315
-
 316
316
-
 317
317
-
 318
318
-
 319
319
-
 320
320
-
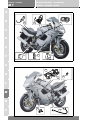 321
321
-
 322
322
-
 323
323
-
 324
324
-
 325
325
-
 326
326
-
 327
327
-
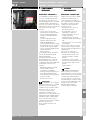 328
328
-
 329
329
-
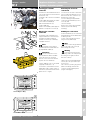 330
330
-
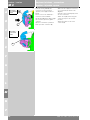 331
331
-
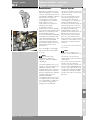 332
332
-
 333
333
-
 334
334
-
 335
335
-
 336
336
-
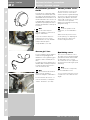 337
337
-
 338
338
-
 339
339
-
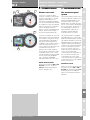 340
340
-
 341
341
-
 342
342
-
 343
343
-
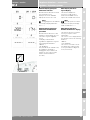 344
344
-
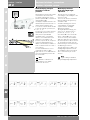 345
345
-
 346
346
-
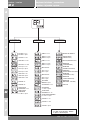 347
347
-
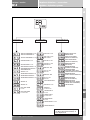 348
348
-
 349
349
-
 350
350
-
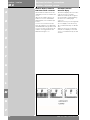 351
351
-
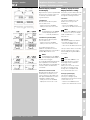 352
352
-
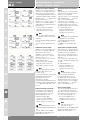 353
353
-
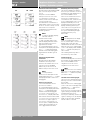 354
354
-
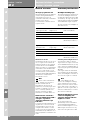 355
355
-
 356
356
-
 357
357
-
 358
358
-
 359
359
-
 360
360
-
 361
361
-
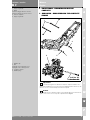 362
362
-
 363
363
-
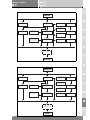 364
364
-
 365
365
-
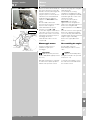 366
366
-
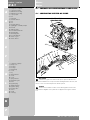 367
367
-
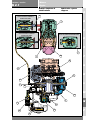 368
368
-
 369
369
-
 370
370
-
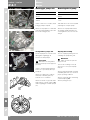 371
371
-
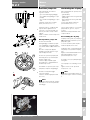 372
372
-
 373
373
-
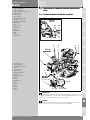 374
374
-
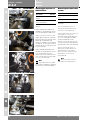 375
375
-
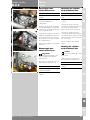 376
376
-
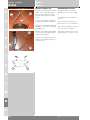 377
377
-
 378
378
-
 379
379
-
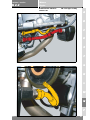 380
380
-
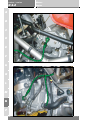 381
381
-
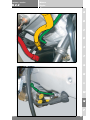 382
382
-
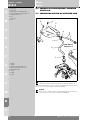 383
383
-
 384
384
-
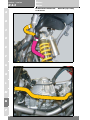 385
385
-
 386
386
-
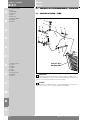 387
387
-
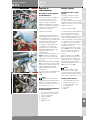 388
388
-
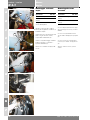 389
389
-
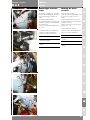 390
390
-
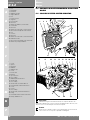 391
391
-
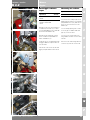 392
392
-
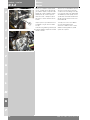 393
393
-
 394
394
-
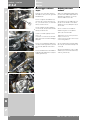 395
395
-
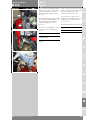 396
396
-
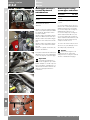 397
397
-
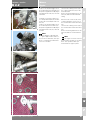 398
398
-
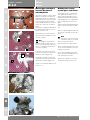 399
399
-
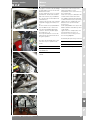 400
400
-
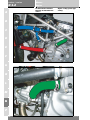 401
401
-
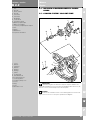 402
402
-
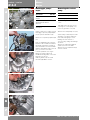 403
403
-
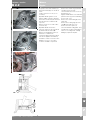 404
404
-
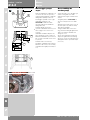 405
405
-
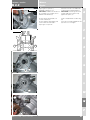 406
406
-
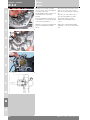 407
407
-
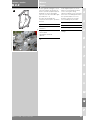 408
408
-
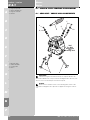 409
409
-
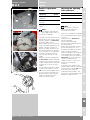 410
410
-
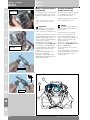 411
411
-
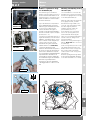 412
412
-
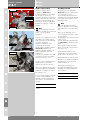 413
413
-
 414
414
-
 415
415
-
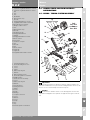 416
416
-
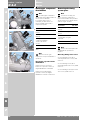 417
417
-
 418
418
-
 419
419
-
 420
420
-
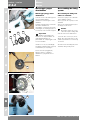 421
421
-
 422
422
-
 423
423
-
 424
424
-
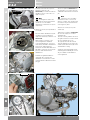 425
425
-
 426
426
-
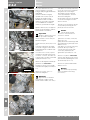 427
427
-
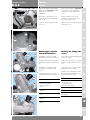 428
428
-
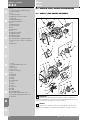 429
429
-
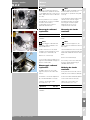 430
430
-
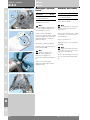 431
431
-
 432
432
-
 433
433
-
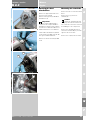 434
434
-
 435
435
-
 436
436
-
 437
437
-
 438
438
-
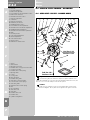 439
439
-
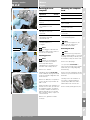 440
440
-
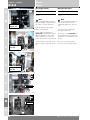 441
441
-
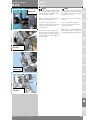 442
442
-
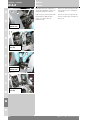 443
443
-
 444
444
-
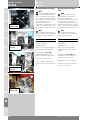 445
445
-
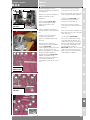 446
446
-
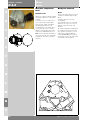 447
447
-
 448
448
-
 449
449
-
 450
450
-
 451
451
-
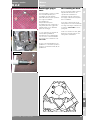 452
452
-
 453
453
-
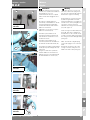 454
454
-
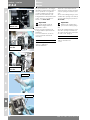 455
455
-
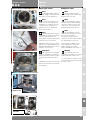 456
456
-
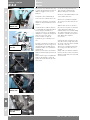 457
457
-
 458
458
-
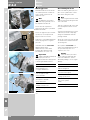 459
459
-
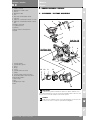 460
460
-
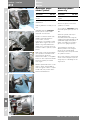 461
461
-
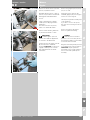 462
462
-
 463
463
-
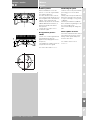 464
464
-
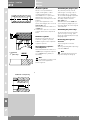 465
465
-
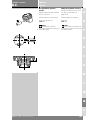 466
466
-
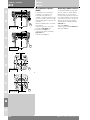 467
467
-
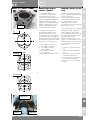 468
468
-
 469
469
-
 470
470
-
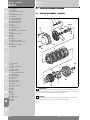 471
471
-
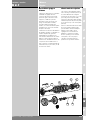 472
472
-
 473
473
-
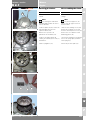 474
474
-
 475
475
-
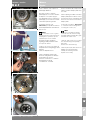 476
476
-
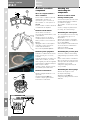 477
477
-
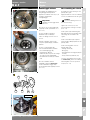 478
478
-
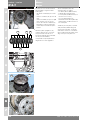 479
479
-
 480
480
-
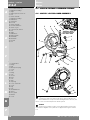 481
481
-
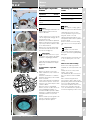 482
482
-
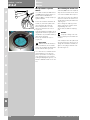 483
483
-
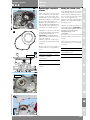 484
484
-
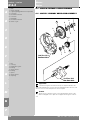 485
485
-
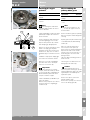 486
486
-
 487
487
-
 488
488
-
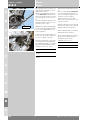 489
489
-
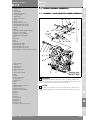 490
490
-
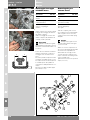 491
491
-
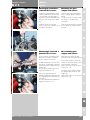 492
492
-
 493
493
-
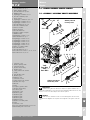 494
494
-
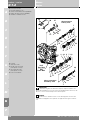 495
495
-
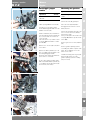 496
496
-
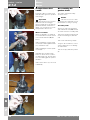 497
497
-
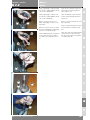 498
498
-
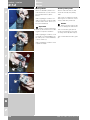 499
499
-
 500
500
-
 501
501
-
 502
502
-
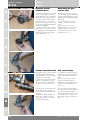 503
503
-
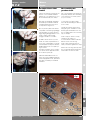 504
504
-
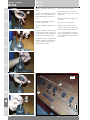 505
505
-
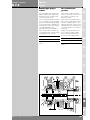 506
506
-
 507
507
-
 508
508
-
 509
509
-
 510
510
-
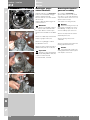 511
511
-
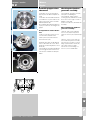 512
512
-
 513
513
-
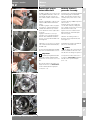 514
514
-
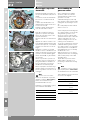 515
515
-
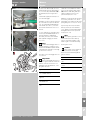 516
516
-
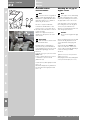 517
517
-
 518
518
-
 519
519
-
 520
520
-
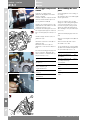 521
521
-
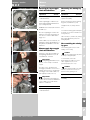 522
522
-
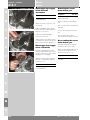 523
523
-
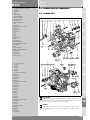 524
524
-
 525
525
-
 526
526
-
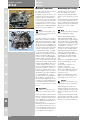 527
527
-
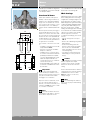 528
528
-
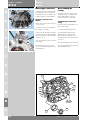 529
529
-
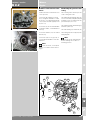 530
530
-
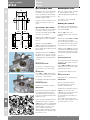 531
531
-
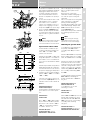 532
532
-
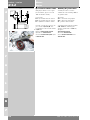 533
533
-
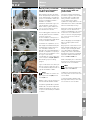 534
534
-
 535
535
-
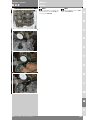 536
536
-
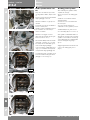 537
537
-
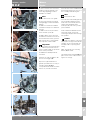 538
538
-
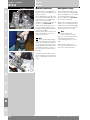 539
539
-
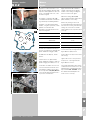 540
540
-
 541
541
-
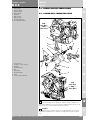 542
542
-
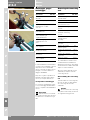 543
543
-
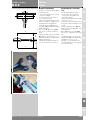 544
544
-
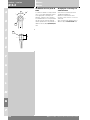 545
545
-
 546
546
-
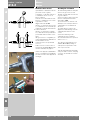 547
547
-
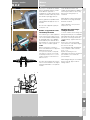 548
548
-
 549
549
-
 550
550
-
 551
551
-
 552
552
-
 553
553
-
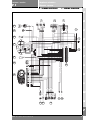 554
554
-
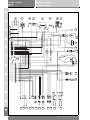 555
555
-
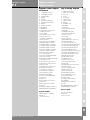 556
556
-
 557
557
-
 558
558
-
 559
559
-
 560
560
-
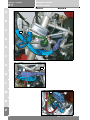 561
561
-
 562
562
-
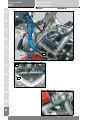 563
563
-
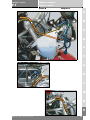 564
564
-
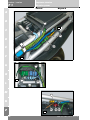 565
565
-
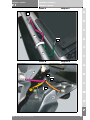 566
566
-
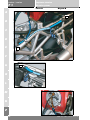 567
567
-
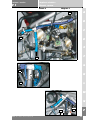 568
568
-
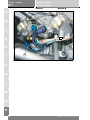 569
569
-
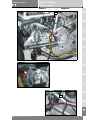 570
570
-
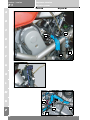 571
571
-
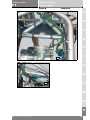 572
572
-
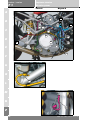 573
573
-
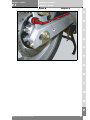 574
574
-
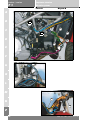 575
575
-
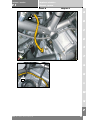 576
576
-
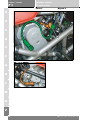 577
577
-
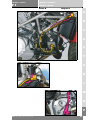 578
578
-
 579
579
-
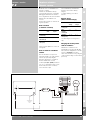 580
580
-
 581
581
-
 582
582
-
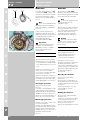 583
583
-
 584
584
-
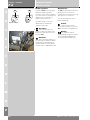 585
585
-
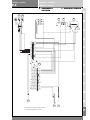 586
586
-
 587
587
-
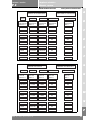 588
588
-
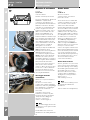 589
589
-
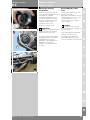 590
590
-
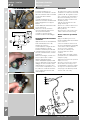 591
591
-
 592
592
-
 593
593
-
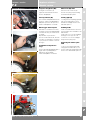 594
594
-
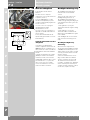 595
595
-
 596
596
-
 597
597
-
 598
598
-
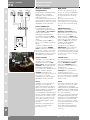 599
599
-
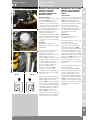 600
600
-
 601
601
-
 602
602
-
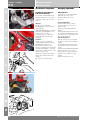 603
603
-
 604
604
-
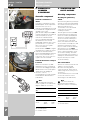 605
605
-
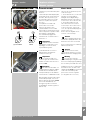 606
606
-
 607
607
-
 608
608
-
 609
609
-
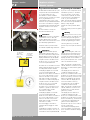 610
610
-
 611
611
-
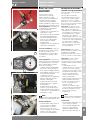 612
612
-
 613
613
-
 614
614
-
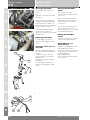 615
615
-
 616
616
-
 617
617
-
 618
618
-
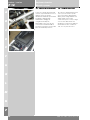 619
619
-
 620
620
-
 621
621
-
 622
622
-
 623
623
-
 624
624
-
 625
625
-
 626
626
-
 627
627
-
 628
628
-
 629
629
-
 630
630


Ducati ST3 2004 Workshop Manual
- Categoria
- Motociclette
- Tipo
- Workshop Manual
in altre lingue
- English: Ducati ST3 2004
Documenti correlati
-
Ducati 2006 Monster S2R800 Workshop Manual
-
-
-
-
-
-
-
-
-
Altri documenti
-
Yamaha FJR1300A Manuale utente
-
Shimpo RK-1 Ringcone Popet Manuale utente
-
Yamaha 2002 YFM400FWA Manuale utente
-
Ronda A5 Assembly Instruction
-
-
MOTO GUZZI QUOTA 1100 ES Workshop Manual
-
Ingco AGL02301 Manuale utente
-
-
Toro Pro Control Damper Kit, 2011 and After TimeCutter Riding Mower Guida d'installazione
-
Dometic GFA2303 Manuale utente