Blade BLH8500 Manuale utente
- Categoria
- Giocattoli telecomandati
- Tipo
- Manuale utente

1
3. Attach the fpv monitor holder to the MLP4DSM
transmitter.
a. Slide the holder down over the antenna.
b. Tighten the clamp screw. Do not overtighten.
c. Open the clamp jaws and place the monitor in the
jaws. The angle of the monitor can be adjusted by
loosening the angle adjustment knob, rotating the
clamp up or down and tightening the adjustment knob.
NOTICE: Consult local laws and ordinances before operating FPV (fi rst person view) equipment.
In some areas, FPV operation may be limited or prohibited. You are responsible for operating this
product in a legal and responsible manner.
FPV RTF/BNF
®
Instruction Manual / Bedienungsanleitung / Manuel d’utilisation / Manuale di Istruzioni
Age Recommendation: Not for children under 14 years. This is not a toy.
Charging Warnings
WARNING: Failure to comply with the
following warnings could result in product
malfunction, electrical issues, excessive heat,
FIRE, and ultimately injury and property damage.
• NEVER LEAVE CHARGING BATTERIES
UNATTENDED.
• NEVER CHARGE BATTERIES OVERNIGHT.
• Never charge damaged batteries. If the battery
begins to swell during charging or use, discontinue
immediately.
• Always use the included battery and charger.
Disconnect the battery after charging.
• Charge batteries away from fl ammable materials
in a well-ventelated area.
• Never charge, transport, or store batteries in hot,
cold, or very sunny places
(recommended between 40–120° F or 5–49° C).
EN
Specifications
Length
3.26 in (83mm)
Propeller Diameter
2.56 in (65mm)
Height
1.10 in (28mm)
Flying Weight
.85 oz (24 g)
Install 4 AA batteries into the transmitter, noting
polarity. Replace the transmitter batteries when the
power LED fl ashes and the transmitter beeps.
We recommend using only alkaline AA batteries
in the transmitter, however, it is possible to use
rechargeable NiMH batteries.
CAUTION: If using rechargeable batter-
ies, charge only rechargeable batteries.
Charging non-rechargeable batteries may cause
the batteries to burst, resulting in injury to
persons and/or damage to property.
Charge the Flight Battery
Install the Transmitter Batteries (RTF)
Transmitter and Receiver Binding
NOTICE: Inspect the battery to make sure it is not damaged e.g., swollen, bent, broken or
punctured. Charge only batteries that are cool to the touch and are not damaged.
Insert the charger into a USB port.
Connect the battery to the charger.
CHARGING (Solid Red LED)
MAX CHARGE (LED OFF )
Disconnect the fl ight battery from the charger immediately upon completion of charging.
CAUTION: Only use chargers specifi cally designed to charge the included Li-Po battery.
Failure to do so could result in fi re, causing injury or property damage.
CAUTION: Never exceed the recommended charge rate.
CAUTION: Once charging is complete, immediately remove the battery.
Never leave a battery connected to the charger.
Install the Flight Battery
1
2
BNF
®
Transmitter
If you are using a computer transmitter, in the channel input menu, set channel 6 (Aux1) to a momentary
switch such as the bind button (I). Set the model type to “Acro” or “Airplane” mode. Bind the quadcopter
to your transmitter following the directions below.
General Binding Procedure (BNF
®
)
1. Disconnect the fl ight battery from the quadcopter.
2. Set the model type in your transmitter settings to “Acro” mode.
3. Center all trims on your transmitter.
4. Power off the transmitter and fully lower the throttle.
5. Connect the fl ight battery in the quadcopter. The LED on the 3-in-1 control unit fl ashes red
during initialization, then fl ashes blue when it is ready to bind.
6. Put the transmitter into bind mode while powering on the transmitter.
7. Release the bind button/switch after 2–3 seconds. The quadcopter is bound when the blue LED
on the 3-in-1 control unit turns solid.
8. Disconnect the fl ight battery and power the transmitter off.
MLP4DSM Binding Procedure (RTF)
1. Disconnect the fl ight battery from the quadcopter.
2. Center all trims on your transmitter.
3. Power off the transmitter and fully lower the throttle.
4. Connect the fl ight battery in the quadcopter. The LED on the 3-in-1 control unit fl ashes red during
initialization, then fl ashes blue when it is ready to bind.
5. When the blue light is fl ashing, push in and hold down the left stick while powering on the trans-
mitter (you will hear a ‘click’ and a long tone).
6. Release the left stick. The transmitter will beep and the power LED will blink. The quadcopter is
bound when the blue LED on the 3-in-1 control unit turns solid.
7. Disconnect the fl ight battery and power the transmitter off.
If you encounter problems, obey the binding instructions and refer to the troubleshooting guide for
other instructions. If needed, contact the appropriate Horizon Product Support offi ce. For a list of
compatible DSM
®
transmitters, please visit www.bindnfl y.com.
CAUTION: Always disconnect the Li-Po battery from the aircraft
when not fl ying to avoid over-discharging the battery. Batteries
discharged to a voltage lower than the lowest approved voltage may
become damaged, resulting in loss of performance and potential fi re
when the batteries are charged.
Throttle down
Power ON
Transmitter Control (RTF)
A B C D E F
Mode
1
Aileron (Left/Right)
Throttle (Up/Down)
Throttle
Trim
Aileron
Trim
Rudder
Trim
Elevator
Trim
Rudder (Left/Right)
Elevator (Up/Down)
Mode
2
Aileron (Left/Right)
Elevator (Up/Down)
Elevator
Trim
Aileron
Trim
Rudder
Trim
Throttle
Trim
Rudder (Left/Right)
Throttle (Up/Down)
Operating Safety Precautions
• As the user of this product, you are responsible for
operating it safely, not endangering yourself and others,
or damaging the product or the property of others.
• Operate your product in open spaces away from
people and property.
• Never operate your product with damaged electrical
components.
• Keep the transmitter powered on while model is
powered on.
• Let parts cool after use before touching, motors will
get hot in use.
• Remove batteries after use, as applicable.
General Product Safety Precautions
• Keep all batteries, chemicals, small parts and
anything electrical out of the reach of children.
• Avoid water exposure to this product. Keep parts dry.
• Keep moving parts clean.
The LEDs on the Inductrix indicate the front and back of the quadcopter. The white LEDs indicate the front.
The red LEDs indicate the back.
Takeo
Increase the throttle until the model is approximately 2 ft. (600mm) off the ground in a low-level hover and
concentrate on balancing the throttle stick’s position so that the quadcopter holds a steady hover altitude. In
some cases, you may need to make a few short “hops” to an altitude of just a few inches until you become
familiar with the control inputs and trim settings required to maintain a steady hover and altitude.
Hovering
The Inductrix quadcopter requires minor throttle adjustments to maintain its altitude in hover. Remem-
ber to keep these throttle adjustments as minimal as possible. Large adjustments could result in a
loss of control or a possible crash.
While attempting to establish a low-level hover, check to see if any trim adjustments are required to
help keep the quadcopter from constantly drifting in various directions. If you fi nd that it constantly drifts
without any directional control input, land the model before making any adjustments to the trim settings.
• If the nose of the quadcopter rotates to the left or right, adjust the rudder trim.
• If the quadcopter continually drifts forward or backward, adjust the elevator trim.
• If the quadcopter continually drifts to the left or right, adjust the aileron trim.
Continue making minor trim adjustments until the machine hovers at a low altitude with very little
drifting and directional control input. If this is your fi rst multicopter or helicopter, seek the help of an
experienced pilot to trim the model for you before making your fi rst fl ight.
With your quadcopter properly trimmed and maintaining a stable low-level hover, practice using the
rudder, elevator and aileron controls to familiarize yourself with the machine’s responses to control
inputs. Remember to keep the control inputs as minimal as possible.
Average fl ight times are approximately 4 minutes.
NOTICE: Crash damage is not covered under warranty.
To prevent excessive wear to the motors, always allow the motors to cool between fl ights.
Fly the Quadcopter
Low Voltage Cuto (LVC)
Video Monitor (RTF)
FPV Camera and Video Transmitter
Once the battery reaches 3V under load, the ESC will continuously lower power supplied to the motor
until complete shutdown occurs. This helps prevent over-discharge of the Li-Po battery. Land imme-
diately once the ESC activates LVC. Continuing to fl y after LVC can damage the battery, cause a crash
or both. Crash damage and batteries damaged due to over-discharge are not covered under warranty.
Repeatedly fl ying the aircraft until LVC activates will damage the fl ight battery.
Disconnect and remove the Li-Po battery from the aircraft after use to prevent trickle discharge.
During storage, make sure the battery charge does not fall below 3V per cell.
3
4
Dual rate
selection
Bind/
Flight Mode
Selection
Rate Selection – RTF
The Inductrix
®
RTF quadcopter comes with the Blade
®
MLP4DSM transmitter.
• When powered on, this transmitter is automatically high rate.
• Change rates by pressing and releasing the right control stick.
• In low-rate mode, the quadcopter is limited to a lower bank
angle and will self-level when the control sticks are released.
This mode is typically preferred by pilots looking for smoother/
easier control response during fi rst time use.
• In high-rate mode, the quadcopter has a higer possible bank
angle and will self-level when the control sticks are released.
Flight Mode Selection
Cycle between the fl ight modes by pressing and releasing the left stick of the MLP4DSM or by pressing and
releasing the momentary switch on your computer transmitter as programmed in the binding section above.
• S tability mode (blue LED): the bank angle is limited. When the sticks are released, the quadcop-
ter will return to level fl ight.
• A gility mode (red LED): the quadcopter has no bank angle limits and will not return to level fi ght if
the sticks are released. Use rates and expo to tune the performance according to your fl ying style.
NOTICE: Do not attempt to change fl ight modes while fl ying with the MLP4DSM transmitter.
Attempting to do so will cause the transmitter to register a faulty center position. Always land the
quadcopter and release the sticks before changing fl ight modes.
Dual rate selection
Aileron
Elevator
Rudder
Understand the Primary Flight Controls
If you are not familiar with the controls of your Inductrix quadcopter, take a few minutes to familiarize
yourself with them before attempting your fi rst fl ight.
Throttle
Aileron left
Aileron right
ForwardElevator down
Elevator up
Backward
Left Side View Left Side View
Rudder left
Rudder right
Nose Yaws Right
Nose Yaws Left
Throttle down
Throttle up
Left Side View Left Side View
Descend
Climb
Left
Rear View
Right
Rear View
D
E
F
Power LED indicator
C
B
A
USB Li-Po
Charger
EFLC1008
SOLID RED LED
–Charging
DC Input:5.0V 350mA
DC Output:4.2V 300mA
LED OFF
–Charge
Complete
Your RTF transmitter comes prebound to the Inductrix. If you need to re-bind, follow the directions below.
On/Off Switch
When pressed down, trim buttons make a sound that increases or decreases in pitch at each
pressing. The middle or neutral trim position is heard as a middle tone in the pitch range of the
sounds. The end of the control range is sounded by a series of beeps.
To receive product updates, special offers and more, register your product at www.bladehelis.com.
1. Before using the Spektrum
®
4.3 inch Video Monitor make sure the monitor is charged thoroughly.
Connect the micro USB connector to a 5V USB power source. The charge indicator LED will glow
red while charging and green when the monitor is fully charged.
2. Attach the included antenna to the antenna connector located on
the top of the monitor.
CAUTION: Do not power the monitor on without the antenna
attached. Doing so will damage the video transmitter and
receiver amplifi ers. Amplifi er damage is not covered by warranty.
5.8GHz Antenna connector
Menu Button:
Use the + and – buttons to modify:
Channel Selection Button
Single push to change channel
Frequency Band Button
Single push to change band
75%
AV In
Brightness
Contrast
Color
Mode (16:9, 4:3)
Language
Reset
1. Power on your radio transmitter, then power on the aircraft.
2. Power on the video receiver to make sure the channel is clear.
3. Select the desired video transmitter channel by pressing the
button on the quadcopter as shown to scroll through the
available bands (Fat Shark/IRC or Race) and channels (1-8).
Fatshark channel 1 is indicated by a red internal LED on the
quadcopter. Keep pressing and releasing the button to scroll
through the remaining channels.
4. Perform a range test before fl ying.
If you experience static in the video feed, select a different channel.
NOTICE: The 25mW micro video transmitter range on your quadcopter is less than your fl ight
control transmitter range. Ensure you have adequate video camera range for fi lming.
Tip: If you are fl ying with an FPV headset and are prone to motion sickness, sit in a chair. If you start to
suffer from motion sickness while fl ying, lower your chin against your chest.
Fly in open areas, away from people, trees, cars, and buildings. The range of the system can be
impacted by any obstructions blocking your signal. It is normal to see break up in the video going
behind trees and other obstacles.
ON/Off Switch
Charge Status LED
Red = charging
Green = charged
5V Micro USB Charge Port
WARNING: Read the ENTIRE instruction manual to become familiar with the features of the product
before operating. Failure to operate the product correctly can result in damage to the product, personal
property and cause serious injury.
This is a sophisticated hobby product. It must be operated with caution and common sense and requires some
basic mechanical ability. Failure to operate this Product in a safe and responsible manner could result in injury
or damage to the product or other property. This product is not intended for use by children without direct
adult supervision. Do not attempt disassembly, use with incompatible components or augment product in any
way without the approval of Horizon Hobby, LLC. This manual contains instructions for safety, operation and
maintenance. It is essential to read and follow all the instructions and warnings in the manual, prior to assembly,
setup or use, in order to operate correctly and avoid damage or serious injury.
MEANING OF SPECIAL LANGUAGE
The following terms are used throughout the product literature to indicate various levels of potential
harm when operating this product:
NOTICE: Procedures, which if not properly followed, create a possibility of physical property damage
AND a little or no possibility of injury.
CAUTION: Procedures, which if not properly followed, create the probability of physical property damage
AND a possibility of serious injury.
WARNING: Procedures, which if not properly followed, create the probability of property damage,
collateral damage, and serious injury OR create a high probability of superfi cial injury.
NOTICE
All instructions, warranties and other collateral documents are subject to change at the sole
discretion of Horizon Hobby, LLC. For up-to-date product literature, visit horizonhobby.com and
click on the support tab for this product.
a
b
c
4. Turn on the monitor and look for a clear channel. Clear channels will have a consistent static background.
Channels with interference will display horizontal static lines. Select one of the clear channels. The video
transmitter included with the Inductrix FPV quadcopter transmits only on the Fat Shark/IRC and RaceBand
bands, channels 1-8.
5. Once you have chosen a clear channel on the monitor, select the same channel on the video transmitter.
BAND CH 1 CH 2 CH 3 CH 4 CH 5 CH 6 CH 7 CH 8
Fat Shark/IRC 5740 5760 5780 5800 5820 5840 5860 5880
RaceBand 5658 5695 5732 5769 5806 5843 5880 5917
Band E 5705 5685 5665 5645 5885 5905 5925 5945
Band A 5865 5845 5825 5805 5785 5765 5745 5725
If you are operating this product in North America, you are required to have
an Amateur Radio (HAM) license. Visit www.arrl.org for more information.

2
Parts List
Exploded View
Optional Parts List
Part # Description
BLH8500 Inductrix FPV RTF
BLH8580 Inductrix FPV BNF
1 BLH8501 Main Control Board
2 BLH8502 Clockwise Motor, Speed
3 BLH8503 Counter Clockwise Motor, Speed
4 BLH8504 Canopy: Inductrix FPV
5 BLH8505 FPV Camera 25mW w/ Raceband
6 BLH8506 Prop Set (4), Yellow
7 BLH8706 Main Frame
8 BLH2208 Smart Phone Holder: mLP TX
EFLC1008 1S USB Li-Po Charger, 300mA
EFLB2001S45 1S, 200mAh LiPo
SPMVM430 4.3 inch video monitor
Part # Description
EFLB1501S45 1S, 150mAh LiPo
SPMVM430HA Headset conversion
FCC Information
IC Information
This device complies with Industry Canada license-exempt RSS standard(s). Operation is subject to
the following two conditions: (1) this device may not cause interference, and (2) this device must ac-
cept any interference, including interference that may cause undesired operation of the device.
Compliance Information for the European Union
Instructions for disposal of WEEE by users in the European Union
This product must not be disposed of with other waste. Instead, it is the user’s
responsibility to dispose of their waste equipment by handing it over to a designated
collections point for the recycling of waste electrical and electronic equipment. The
separate collection and recycling of your waste equipment at the time of disposal will
help to conserve natural resources and make sure that it is recycled in a manner that
protects human health and the environment. For more information about where you
can drop off your waste equipment for recycling, please contact your local city offi ce,
your household waste disposal service or where you purchased the product.
EU Compliance Statement:
Horizon Hobby, LLC hereby declares that this product is in compliance with the essential
requirements and other relevant provisions of the R&TTE, RED, EMC and LVD Directives.
A copy of the EU Declaration of Conformity is available online at:
http://www.horizonhobby.com/content/support-render-compliance.
Troubleshooting Guide
Problem Possible Cause Solution
Will not respond to
throttle
Throttle too high and/or throttle
trim is too high
Reset controls with the throttle stick
and throttle trim at the lowest setting
Does not function
and smells burnt after
connecting the fl ight
battery
Flight battery connected with the
wrong polarity
Replace the 3-in-1 board. Connect the fl ight
battery noting proper polarity
LED on receiver fl ashes
rapidly and quadcopter
will not respond to trans-
mitter (during binding)
Transmitter too near aircraft
during binding process
Power off the transmitter. Move the transmit-
ter a larger distance from the aircraft. Dis-
connect and reconnect the fl ight battery to
the aircraft. Follow the binding instructions
Bind switch or button was not
held while transmitter was
powered on
Power off transmitter and repeat bind
process
Aircraft or transmitter is too close
to large metal object, wireless
source or another transmitter
Move aircraft and transmitter to another
location and attempt binding again
LED on the receiver
fl ashes rapidly and the
quadcopter will not re-
spond to the transmitter
(after binding)
Less than a 5-second wait
between fi rst powering on the
transmitter and connecting the
fl ight battery to the quadcopter
Leave the transmitter powered on. Discon-
nect and reconnect the fl ight battery to the
quadcopter
The quadcopter is bound to
a different model memory
(ModelMatch
™
transmitters only)
Select the correct model memory on the
transmitter. Disconnect and reconnect the
fl ight battery to the quadcopter
Flight battery or transmitter bat-
tery charge is too low
Replace or recharge batteries
Aircraft or transmitter is too
close to
large metal object, wireless
source or
another transmitter
Move aircraft and transmitter to another
location and attempt connecting again
Crashes immediately upon
lift-off or doesn’t lift off
Propellers in wrong locations Make necessary adjustments
Static in FPV feed
Interference on chosen channel
Change the video transmitter and receiver
channel
This equipment has been tested and found to comply with the limits for Part 15 of the FCC rules.
These limits are designed to provide reasonable protection against harmful interference in a resi-
dential installation. This equipment generates uses and can radiate radio frequency energy and, if
not installed and used in accordance with the instructions, may cause harmful interference to radio
communications.
However, there is no guarantee that interference will not occur in a particular installation. If this equip-
ment does cause harmful interference to radio or television reception, which can be determined by
turning the equipment off and on, the user is encouraged to try to correct the interference by one or
more of the following measures:
• Reorient or relocate the receiving antenna.
• Increase the separation between the equipment and receiver.
• Connect the equipment to an outlet on a circuit different from that to which the receiver is
connected.
This device complies with part 15 of the FCC rules. Operation is subject to the following two
conditions: (1) This device may not cause harmful interference, and (2) this device must accept any
interference received, including interference that may cause undesired operation.
NOTICE: Modifi cations to this product will void the user’s authority to operate this equipment.
4
6
8
5
1
7
2
3
HINWEIS
Alle Anweisungen, Garantien und anderen zugehörigen Dokumente können im eigenen Ermessen
von Horizon Hobby, LLC jederzeit geändert werden. Die aktuelle Produktliteratur fi nden Sie auf
horizonhobby.com unter der Registerkarte „Support“ für das betreffende Produkt.
BEDEUTUNG DER SIGNALWÖRTER
Die folgenden Begriffe werden in der gesamten Produktliteratur verwendet, um auf unterschiedlich hohe
Gefahrenrisiken beim Betrieb dieses Produkts hinzuweisen:
HINWEIS: Wenn diese Anweisungen nicht korrekt befolgt werden, können sich möglicherweise
Sachschäden UND geringe Gefahr von Verletzungen ergeben.
ACHTUNG: Wenn diese Anwesiungen nicht korrekt befolgt werden, ergeben sich wahrscheinlich
Sachschäden UND die Gefahr von schweren Verletzungen.
ACHTUNG: Lesen Sie die GESAMTE Bedienungsanleitung, um sich vor dem Betrieb mit den
Produktfunktionen vertraut zu machen. Wird das Produkt nicht korrekt betrieben, kann dies zu
Schäden am Produkt oder persönlichem Eigentum führen oder schwere Verletzungen verursachen.
Dies ist ein hochentwickeltes Hobby-Produkt. Es muss mit Vorsicht und gesundem
Menschenverstand betrieben werden und benötigt gewisse mechanische Grundfähigkeiten.
Versuchen Sie nicht ohne Genehmigung durch Horizon Hobby, LLC das Produkt zu zerlegen, es
mit inkompatiblen Komponenten zu verwenden oder auf jegliche Weise zu erweitern.
Warnungen zum Laden
WARNUNG: Alle Anweisungen und
Warnhinweise müssen genau befolgt
werden. Falsche Handhabung von Li-Po-
Akkus kann zu Brand, Personen- und/oder
Sachwertschäden führen.
• ADEN SIE NIEMALS AKKUS UNBEAUFSICHTIGT.
• LADEN SIE NIEMALS AKKUS ÜBER NACHT.
• Laden Sie njemals beschädigte Akkus Sollte der
Akku zu einem beliebigen Zeitpunkt beginnen, sich
aufzublähen oder anzuschwellen, stoppen Sie die
Verwendung unverzüglich.
• Verwenden Sie immer das Ladegerät und den Akku
aus dem Lieferumfang. Trennen Sie nach dem Laden
den Akku.
• Laden Sie die Akkus immer weit entfernt von
brennbaren in gut belüfteten Bereichen.
• Laden, transportieren oder lagern Sie niemals
Akkus in heißen, kalten oder Plätzen mit starker
Sonneneinstrahlung. (Empfohlener Temperaturbereich
40 - 120°)
Sicherheitsvorkehrungen und Warnhinweise
• Als Nutzer dieses Produktes sind Sie allein für den
sicheren Betrieb ohne Gefährdung des Produktes,
ihrer selbst und dritter oder deren Eigentum
verantwortlich.
• Betreiben Sie ihr Produkt auf weiten, offenen Flächen
weg von Menschen und anderem Eigentum
• Betreiben Sie das Produkt niemals mit beschädigten
elektrischen Komponenten
• Lassen Sie den Sender eingeschaltet wenn das
Modell eingeschaltet ist
• Lassen Sie die Teile abkühlen bevor Sie sie anfassen.
Die Motoren werden während des Betriebes heiß
• Allgemeine Sicherheitshinweise zum Produkt
• Halten Sie alle Batterien, Akkus, Chemikalien Kleinteile
und Elektronikkomponenten aus der Reichweite von
Kindern
Allgemeine Sicherheitshinweise zum Produkt
• Halten Sie alle Akkus, Batterien, Chemikalien und
Kleinteile und andere elektrische Komponenten aus
der Reichweite von Kindern.
• Vermeiden Sie mit diesem Produkt Wasserkontakt.
Halten Sie die Teile trocken.
• Halten Sie die beweglichen Teile sauber.
Nicht geeignet für Kinder unter 14 Jahren. Dies ist kein Spielzeug.
Spezifikationen
Länge
83mm
Rotordurchmesser
65mm
Höhe
28mm
Fluggewicht
24 g
Bitte registrieren Sie ihr Produkt unter www.bladehelis.com um Updates, spezielle Angebote und
weitere Informationen zu erhalten.
Setzen Sie unter Beobachtung der Polarität die
Senderbatterien ein. Ersetzen Sie die Batterien
wenn die LED blinkt und der Sender piept.
Wir empfehlen AA Alkaline Batterien in dem Sender
zu verwenden. Sie können auch wiederaufl adbare
NiMH Akkus verwenden.
ACHTUNG: Wenn Sie wiederaufl adbare
Akkus verwenden, laden Sie nur diese. Das
Laden von nicht wiederaufl adbaren Batterien kann die
Batterien zur Explosion bringen, was Körperverletzung
und Sachbeschädigung zur Folge haben kann.
Laden des Flugakkus
Einsetzen der Senderbatterien (RTF)
HINWEIS: Laden Sie Akkus nur, wenn sie auf Umgebungstemperatur abgekühlt sind. Schauen Sie sich
den Akku an und stellen Sie sicher, dass dieser nicht beschädigt oder aufgequollen ist.
Stecken Sie den Lader in den USB Port.
Schließen Sie den Akku an das Ladegerät.
Laden (LED rot )
Fertig geladen (LED aus)
Entnehmen Sie den Akku immer aus dem Lader, sobald der Ladevorgang beendet ist.
ACHTUNG: Verwenden Sie nur Ladegeräte, die für LIPO Akkus vorgesehen sind.
Nichtbeachtung kann zu Feuer, Beschädigungen oder Verletzungen führen.
ACHTUNG: Überschreiten Sie niemals die vorgesehene Ladezeit.
ACHTUNG: Entnehmen Sie den Akku aus dem Lader, sobald dieser fertig geladen ist.
Belassen Sie den Akku niemals im Lader.
USB Li-Po
Charger
EFLC1008
SOLID RED LED
–Charging
DC Input:5.0V 350mA
DC Output:4.2V 300mA
LED OFF
–Charge
Complete
Einsetzen des Flugakkus
ACHTUNG: Trennen Sie den Li-Po-Akku immer vom Empfänger
des Flugzeugs wenn Sie nicht fl iegen um eine Tiefentladung zu
vermeiden. Akkus die unter die zulässige Mindestspannung entladen wer-
den, können dadurch beschädigt werden, was sich in Leistungsverlust und
potentieller Brandgefahr bei dem Laden bemerkbar machen kann.
1 Gas nach unten 2 Einschalten
3
4
Binden von Sender und Empfänger
Wenn Probleme auftreten beachten Sie bitte die Bindeanweisungen und schauen in die Hilfestellung
zur Problemlösung. Kontaktieren Sie falls notwendig den technischen Service von Horizon Hobby. Eine
Liste der kompatiblen DSM Sender sehen Sie unter www.bindnfl y.com.
Der Bindevorgang
1. Trennen Sie den Flugakku von ihrem Quadcopter.
2. Wählen Sie im Sender den Modelltyp Acro.
3. Zentrieren Sie im Sender alle Trimmungen.
4. Schalten Sie den Sender aus und reduzieren das Gas vollständig.
5. Installieren Sie den Akku im Quadcopter. Die LED auf der 3in1 Platine blinkt rot bei der Initialisierung
und dann blau, um Bindebereitschaft anzuzeigen.
6. Bringen Sie den Sender in den Bindemode während Sie ihn einschalten.
7. Lassen Sie den Bindeschalter nach 2 -3 Sekunden los. Der Quad-Copter ist gebunden wenn die blaue
LED auf der 3-in-1 Einheit leuchtet.
8. Trennen Sie den Flugakku und schalten den Sender aus.
MLP4DSM Bindeprozess
1. Trennen Sie den Flugakku vom Quadcopter.
2. Zentrieren Sie alle Trimmungen auf dem Sender.
3. Schalten Sie den Sender aus und reduzieren das Gas vollständig.
4. Installieren Sie den Akku im Quadcopter. Die LED auf der 3in1 Platine blinkt rot bei der Initialisierung
und dann blau, um Bindebereitschaft anzuzeigen.
5. Drücken Sie wenn die blaue LED blinkt den linken Steuerhebel ein während Sie den Sender ein-
schalten (Sie hören dabei ein Klick und einen langen Ton).
6. Lassen Sie den Stick los. Der Sender piept und die Power LED blinkt. Der Quad-Copter ist gebunden
wenn die LED auf der 3-in-1 Einheit blau leuchtet (nicht blinkt).
7. Trennen Sie den Flugakku und schalten den Sender aus.
Ihr RTF Sender ist bereits an das Modell gebunden. Sollten Sie neu binden wollen folgen Sie bitte den
untenstehenden Anweisungen.
BNF-Sender
Wenn Sie einen Computersender verwenden, stellen Sie im Kanaleingabemenü den Kanal6 (Aux1) auf
einen Taster, wie den Bindungsschalter (I). Stellen Sie den Modelltyp auf „Acro“ oder „Flugzeug“-Modus.
Binden Sie den Quadcopter an Ihren Sender unter Beachtung der nachfolgenden Anweisungen.
Auswahl des Flugmodus
Zwischen den Flugmodi umschalten indem der linke Steuerknüppel auf MLP4DSM betätigt und freigeben
wird oder durch Betätigen und Freigeben des Tasters auf Ihrem Computersender, wie im Abschnitt zur
Bindung beschrieben.
• Stabilitätsmodus (blaue LED): die Schräglage ist begrenzt. Werden die Steuerknüppel losgelas-
sen, wird der Quadcopter in den Horizontalfl ug zurückkehren.
• Agilitätsmodus (rote LED): der Quadcopter verfügt über keine Begrenzung der Schräglage und
wird nicht in den Horizontalfl ug zurückkehren, wenn die Steuerknüppel losgelassen werden. Verwen-
den Sie Geschwindigkeiten und Exponential zum Einstellen der Leistung entsprechend Ihres Flugstils.
HINWEIS: Versuchen Sie nicht die Flugmodi während des Fliegens mit dem MLP4DSM-Sender zu ändern.
Der Versuch wird dazu führen, dass der Sender eine fehlerhafte Mittelposition erkennt. Landen Sie immer
den Quadcopter und lassen Sie die Steuerknüppel los, ehe Sie die Flugmodi ändern.
H A B C D E F
Modus
1
Querruder
(links/rechts)
Gas (auf/ab)
Gas trimm
Querruder-
trimm
Seitenruder-
trimm
Höhenruder-
trimm
Seitenruder
(links/rechts)
Höhenruder
(auf/ab)
Modus
2
Querruder
(links/rechts)
Höhenruder
(auf/ab)
Höhenruder-
trimm
Querruder-
trimm
Seitenruder-
trimm
Gas trimm
Seitenruder
(links/rechts)
Gas (auf/ab)
Sendersteuerung (RTF)
Auswahl
Dual Rate
D
E
F
C
B
A
Auswahl
Dual Rate
EIN/AUS-Schalter
Ein/Aus-LED
Wenn die Trimmtasten gedrückt werden, geben sie einen Signalton von sich, der bei jedem erneuten
Drücken höher oder tiefer wird. Die mittlere oder neutrale Trimmstellung erklingt in der mittleren
Tonhöhe. An den äußeren Enden des Steuerbereichs erklingt eine Tonfolge.
Seitenruder
Erklärung der Flugkontrollen
Bitte nehmen Sie sich vor dem Erstfl ug des Inductrix Quadcopter Zeit um sich mit den Kontrollen
vertraut zu machen.
Gasgeber
Seitenruder
nach links
Nase dreht nach rechts
Nase dreht nach links
Gasgeber
nach oben
Seitenansicht Seitenansicht
Sinken
Aufsteigen
Gasgeber
nach unten
Seitenruder
nach rechts
Dual Rate (RTF)
Der Glimpse RTF Quadcopter wird mit dem
Blade MLP4DSM Sender geliefert.
• Wenn Sie den Sender einschalten, befi ndet sich im Dual
Rate in Max.
• Die Dual Rate Einstellung ändern Sie durch drücken des
rechten Knüppels.
• Im Low Rate Mode mit den kleinen Ruderausschlägen
ist der Copter in der Schräglage limitiert und richtet sich
selber aus wenn die Steuerhebel los gelassen werden.
Dieser Mode ist für Piloten geeignet die für die ersten
Flüge gutmütige Reaktionen und einfache Kontrolle erwarten.
• Im High Rate Mode ist die mögliche Schräglage größer, der Copter richtet sich aber noch selber auf
wenn die Steuerhebel losgelassen werden.
Dual Rate Auswahl
DE
Auswahl des
Bindungs-/
Flugmodus

3
Teil # Beschreibung
BLH8500
Inductrix FPV RTF
BLH8580
Inductrix FPV BNF
1
BLH8501
Main Control Board
2
BLH8502
Clockwise Motor, Speed
3
BLH8503
Counter Clockwise Motor, Speed
4
BLH8504
Canopy: Inductrix FPV
5
BLH8505
FPV Camera 25mW w/ Raceband
6
BLH8506
Prop Set (4), Yellow
7
BLH8706
Main Frame
Teil # Beschreibung
8
BLH2208
Smart Phone Holder: mLP TX
EFLC1008
1S USB Li-Po Charger, 300mA
EFLB2001S45
1S, 200mAh LiPo
SPMVM430
4.3 inch video monitor
Rechtliche Informationen für die Europäische Union
EU Konformitätserklärung
Horizon LLC erklärt hiermit, dass dieses Produkt konform zu den essentiellen Anforder-
ungen der R&TTE, RED, EMC Direktive, und LVD ist.
Eine Kopie der Konformitätserklärung ist online unter folgender Adresse verfügbar : http://www.
horizonhobby.com/content/support-render-compliance.
Anweisungen zur Entsorgung von Elektro-und Elektronik-Altgeräten für
Benutzer in der Europäischen Union
Dieses Produkt darf nicht zusammen mit anderem Abfall entsorgt werden. Stattdessen
ist der Benutzer dafür verantwortlich, unbrauchbare Geräte durch Abgabe bei einer
speziellen Sammelstelle für das Recycling von unbrauchbaren elektrischen und
elektronischen Geräten zu entsorgen. Die separate Sammlung und das Recycling von
unbrauchbaren Geräten zum Zeitpunkt der Entsorgung hilft, natürliche Ressourcen zu
bewahren und sicherzustellen, dass Geräte auf eine Weise wiederverwertet werden,
bei der die menschliche Gesundheit und die Umwelt geschützt werden. Weitere
Informationen dazu, wo Sie unbrauchbare Geräte zum Recycling abgeben können, erhalten Sie bei
lokalen Ämtern, bei der Müllabfuhr für Haushaltsmüll sowie dort, wo Siedas Produkt gekauft haben.
Niederspannungabschaltung (LVC)
Die ESC versorgt den Motor durchgehend mit weniger Leistung, bis dieser sich vollständig abschaltet,
wenn der Akku unter Last unter 9 V entladen wird. Dadurch wird eine Tiefentladung des LiPo-Akkus
vermieden. Wenn die ESC die LVC aktiviert, setzen Sie sofort zur Landung an. Wenn Sie das Fluggerät
dennoch weiterfl iegen, kann dies zu Akkuschaden, Absturz oder beidem führen. Absturzschäden und
Akkuschäden, die durch eine Tiefentladung bedingt sind, werden von der Garantie nicht abgedeckt.
Durch wiederholtes Fliegen des Helikopters bis zur LVC-Aktivierung wird der Akku des Helikopters beschädigt.
Entfernen Sie den LiPo-Akku nach Gebrauch aus dem Fluggerät, um eine allmähliche Entladung zu ver-
hindern. Stellen Sie während der Lagerung sicher, dass die Akkuladung nicht unter 3 V pro Zelle abfällt.
Hilfestellung zur Problemlösung
Problem mögliche Ursache Lösung
Keine Reaktion auf Gas
Gastrimmung oder Gasknüppel
zu hoch
Bringen Sie Gashebel und Trimmung auf die
niedrigste Einstellung
Keine Funktion und
riecht nach Anschluss
des Flugakkus verbrannt
Flugakku ist mit der falschen
Polarität angeschlossen
Ersetzen Sie das 3-in-1 Kontrollboard.
Schließen Sie den Flugakku in richtiger
Polarität an
LED auf dem Empfänger
blinkt schnell , Quad-
copter reagiert wärend
des Bindens nicht auf
Sender
Sender war zu nah am Flugzeug
während des Bindevorganges
Schalten Sie den Sender aus. Stellen Sie den
Sender weiter vom Fluggerät weg. Trennen
und schließen Sie den Akku erneut an den
Quad-Copter an. Folgen Sie den Bindean-
weisungen
Bindeschalter wurde beim
Einschalten des Senders nicht
gedrückt
Schalten Sie den Sender aus und wiederho-
len Sie den Bindeprozess
Das Fluggerät oder der Sender ist
zu nahe an einem Metallkörper,
einer Strahlungsquelle oder einem
anderen Sender
Versuchen Sie den Vorgang noch einmal an
einem anderen Ort
LED auf dem Empfänger
blinkt schnell, Quadcop-
ter reagiert nach dem
Binden nicht auf den
Sender
Sie haben weniger als 5 Sekun-
den gewartet nachdem Sie den
Sender eingeschaltet und den
Flugakku angeschlossen haben
Lassen Sie den Sender eingeschaltet.
Trennen und schließen Sie den Flugakku
erneut an
Der nano QX ist an ein anderen
Modellspeicher gebunden. (Betrifft
nur Sender mit ModelMatch)
Wählen Sie auf dem Sender den richtigen
Modellspeicher. Trennen und schließen Sie
den Flugakku erneut an
Ladung des Flugakkus zu ge-
ring oder Senderbattereien zu
schwach
Ersetzen oder laden Sie die Akkus
Das Fluggerät oder der Sender ist
zu nahe an einem Metallkörper,
einer Starhlungsquelle oder einem
anderen Sender
Versuchen Sie den Vorgang noch einmal an
einem anderen Ort
Hebt nicht ab oder stürzt
nach dem Start sofort ab
Propeller falsch montiert oder
falscher Flug Mode gewählt
Führen Sie die notwendigen Einstellungen
durch
Die LEDs des Inductrix zeigen die Vorder und Rückseite des Quacopters an. Die weisse LED zeigt die Front,
die rote LED zeigt das Heck.
Starten
Geben Sie Gas bis das Modell ca 60cm Höhe erreicht hat und konzentrieren Sich darauf mit dem
Gashebel eine stabile Schwebefl ughöhe zu halten. In einigen Fällen braucht es nur ein paar kurze
Hüpfer um das Modell in einen niedrigen stabilen Schwebefl ug zu bekommen.
Schwebefl ug
Der Quadcopter braucht für das Halten des Schwebefl ug nur minimale Gaseingaben. Halten Sie die
Gaseingaben so gering wie möglich, da große Gasbewegungen einen Verlust der Höhe und Kontrolle mit
möglichen Absturz bedeuten können.
Während Sie den Schwebefl ug einsteuern können Sie auch überprüfen ob der Quadcopter in eine bestim-
mte Richtung driftet. Falls ja, landen Sie zur Einstellung das Modell. Zusätzliche Informationen über die
Funktion und Anordnung der Trimmung des Modells können Sie dem Abschnitt der Verstehen der Flugkon-
trollen in dieser Anleitung entnehmen.
• Sollte die Nase des Quadcopter nach links oder rechts drehen stellen Sie die Seitenrudertrimmung ein.
• Sollte der Quadcopter kontinuierlich vorwärts oder rückwärts driften stellen Sie die Höhenrudertrimmung ein.
• Sollte der Quadcopter kontinuierlich nach links oder rechts driften stellen Sie die Querrudertrimmung ein.
Trimmen Sie das Modell so weit dass es im Schwebefl ug sehr wenig driftet und dazu wenig Eingaben in die
Steuerung benötigt.
Üben Sie mit den korrekt getrimmten Copter im Schwebefl ug die Wirkung von Seiten- Höhen- (Nick) und
Querruder (Roll), um sich mit den Reaktionen des Copters vertraut zu machen. Halten Sie die Ruderauss-
chläge dabei so gering wie möglich.
Die durchschnittliche Flugdauer beträgt etwa 4Minuten.
HINWEIS: Absturzschäden sind nicht durch die Garantie gedeckt.
Lassen Sie die Motoren zwischen den Flügen abkühlen um einen größeren Verschleiß zu vermeiden.
Fliegen des Quadcopters
Querruder
Höhenruder
Querruder
nach links
Nach links
Nach rechts
Rückansicht
Vorwärts
Rückwärts
Seitenansicht Seitenansicht
Rückansicht
Höhenruder
nach unten
Höhenruder
nach oben
Querruder
nach rechts
HINWEIS: Bitte beachten Sie lokale Vorschriften und Gesetze bevor Sie FPV Ausrüstung in Betrieb nehmen.
Sie sind alleine dafür verantwortlich das Produkt in legaler und verantwortlicher Weise zu nutzen.
1. Schalten Sie zuerst Ihren Funksender ein und dann das Fluggerät.
2. Schalten Sie den Videoempfänger ein, um sicherzustellen, dass der Kanal ungestört ist.
3. Wählen Sie den gewünschten Kanal für den Videosender, indem Sie den Schalter wie abgebildet
betätigen, um durch die verfügbaren Bänder (Fatshark/IRC oder Race) und Kanäle (1-8) zu
scrollen. Fatshark-Kanal1 wird durch eine rote interne LED auf dem Quadcopter angezeigt. Zum
Scrollen durch die verbleibenden Kanäle betätigen Sie den Schalter und lassen ihn wieder los.
4. Führen Sie vor dem Flug einen Reichweitentest durch.
Falls es im Videozuspielsystem zu Statik kommt, wählen Sie einen anderen Kanal.
HINWEIS: Die Reichweite der 25mW Videokamera ist geringer als die Reichweite der Fernsteue-
rung. Stellen Sie bitte sicher, dass Sie sich stets innerhalb der adäquaten Videoreichweite mit dem
Copter bewegen.
Tipp: Sollten Sie dem Headset fl iegen und anfällig für Seekrankheit sein, setzen Sie sich bitte in einen Stuhl.
Sollte die Symptome während des Fliegens vorkommen drücken Sie das Kinn auf die Brust, das hilft.
Fliegen Sie in weiten offenen Gegenden, weit weg von Menschen, Bäumen, Autos und Gebäuden. Die
Reichweite des Systems kann durch jedes Hinderniss beeinträchtigt oder geblockt werden. So ist es
vollkommen normal dass das Videosignal hinter Bäumen oder anderen Hindernissen abbricht.
FPV-Kamera und Videosender
3. Befestigen Sie die FPV-Monitorhalterung
am MLP4DSM-Sender.
a. Schieben Sie die Halterung über die Antenne.
b. Ziehen Sie die Klemmschraube fest. Nicht zu stark
anziehen.
c. Öffnen Sie die Klemmbacken und setzen Sie den
Monitor in die Backen. Der Winkel des Monitors
kann angepasst werden, indem der Winkelein-
stellknopf gelöst, die Klemme nach oben oder unten
gedreht und der Einstellknopf festgezogen wird.
Videomonitor (RTF)
1. Stellen Sie vor der Verwendung des Spektrum® 4,3-Zoll-Videomonitors sicher, dass der Monitor
vollständig geladen ist. Schließen Sie den Micro-USB-Stecker an eine 5V-USB-Stromquelle an.
Die LED-Ladeanzeige wird während des Ladevorgangs rot leuchten
und grün, wenn der Monitor vollständig geladen ist.
2. Bringen Sie die mitgelieferte Antenne an den Antennenanschluss
auf der Oberseite des Monitors an.
ACHTUNG: Schalten Sie den Monitor nicht ein, solange die
Antenne nicht befestigt ist. Dies führt ansonsten zu Schäden
am Videosender und an den Empfangsverstärkern. Schäden an den
Verstärkern sind nicht durch die Gewährleistung gedeckt.
5,8GHz Antennenstecker
Menütaste:
Verwenden Sie die Schalter + und – zu folgendem:
Kanalwahltaste
Einmaliges Betätigen zum Kanalwechsel
Frequenzbandtaste
Einmaliges Betätigen zum Bandwechsel
75%
AV Ein
Helligkeit
Kontrast
Farbe
Modus (16:9, 4:3)
Sprache
Zurücksetzen
EIN/AUS-Schalter
Ladezustand der LED
Rot = Laden
Grün = Geladen
5V Micro-USB-Ladeanschluss
a
b
c
4. Schalten Sie den Monitor ein und suchen Sie nach einem ungestörten Kanal. Ungestörte Kanäle verfügen
über einen gleichbleibenden statischen Hintergrund. Kanäle mit Interferenzen zeigen horizontale statische
Linien. Wählen Sie einen der ungestörten Kanäle. Der mit dem Inductrix FPV Quadcopter mitgelieferte
Videosender überträgt nur auf den Fatshark/IRC- und Raceband-Bändern, Kanäle 1-8.
5. Sobald Sie einen ungestörten Kanal auf dem Monitor gewählt haben, wählen Sie denselben Kanal auf
dem Videosender.
BAND CH 1 CH 2 CH 3 CH 4 CH 5 CH 6 CH 7 CH 8
Fat Shark/IRC 5740 5760 5780 5800 5820 5840 5860 5880
RaceBand 5658 5695 5732 5769 5806 5843 5880 5917
Band E 5705 5685 5665 5645 5885 5905 5925 5945
Band A 5865 5845 5825 5805 5785 5765 5745 5725
Teileliste
Explosionszeichnung
Optionale Bauteile
Teil # Beschreibung
EFLB1501S45 1S, 150mAh LiPo
SPMVM430HA Headset conversion
4
6
8
5
1
7
2
3
FR
REMARQUE
La totalité des instructions, garanties et autres documents est sujette à modifi cation à la seule
discrétion d’Horizon Hobby, LLC. Pour obtenir la documentation à jour, rendez-vous sur le site
horizonhobby.com et cliquez sur l’onglet de support de ce produit.
SIGNIFICATION DE MOTS DE SIGNALISATION DE SÉCURITÉ
Les termes suivants sont utilisés dans l’ensemble du manuel pour indiquer différents niveaux de danger
lors de l’utilisation de ce produit:
REMARQUE: Les instructions, si elles ne sont pas suivies, peuvent entrainer des dommages matériels ET
blessures légères.
ATTENTION: Les instructions, si elles ne sont pas suivies, peuvent entrainer des dommages matériels ET blessures.
ATTENTION: Lire et suivre toutes les instructions et mises en garde du manuel avant le réglage et
l’utilisation. Une mauvaise utilisation du produit peut endommager ce dernier, vos biens et/ou
entrainer des blessures.
Ceci est un produit de loisirs sophistiqué. Il doit être manipulé avec prudence et bon sens et requiert des
aptitudes de base en mécanique. N’essayez pas de démonter le produit, de l’utiliser avec des composants
incompatibles ou d’en améliorer les performances sans l’accord d’Horizon Hobby, LLC.
Avertissements de charge
AVERTISSEMENT: Le non-respect
de ces avertissements peut entrainer
un mauvais fonctionnement du produit, des
problèmes électriques, une surchauffe, INCENDIE
et à terme blessures et dommages matériels.
• NE LAISSEZ JAMAIS LA BATTERIE ET LE
CHARGEUR SANS SURVEILLANCE DURANT
L’UTILISATION.
• NE CHARGEZ JAMAIS LES BATTERIES
DURANT LA NUIT.
• Ne jamais mettre des batteries endommagées en
charge. Si la batterie commence à gonfl er lors de la
charge ou l’utilisation, débranchez-la immédiatement.
• Utilisez toujours la batterie et le chargeur fournis.
Débranchez la batterie après charge.
• Chargez les batteries à l’écart de matières
infl ammables dans un endroit bien aéré.
• Ne chargez, transportez ou stockez jamais dans un
endroit chaud, froid ou très ensoleillé (température
recommandée entre 5 et 49°).
Précautions de sécurité lors de l’utilisation
• En tant qu’utilisateur de ce produit, vous êtes
responsable de la sécurité lors de son utilisation, de
ne pas mettre en danger les autres et vous-même
ou des dommages causés à ce produit et aux biens
des autres.
• Utilisez ce produit dans un endroit ouvert à l’écart des
autres et des habitations.
• N’utilisez jamais ce produits avec des composants
électriques endommagés.
• Gardez l’émetteur sous tension quand le modèle est
sous tension.
• Laissez les pièces refroidir avant de les toucher, le
moteur chauffera lors de l’utilisation.
• Débranchez la batterie après utilisation , si applicable.
Précautions de sécurité générales du produit
• Gardez toutes les batteries, produits chimiques,
petites pièces et système électriques hors de portée
des enfants.
• Ne pas mettre en contact avec l’eau. Gardez toutes
les pièces sèches.
• Gardez les pièces mobiles propres.
14 ans et plus. Ceci n’est pas un jouet.
Spécifications
Longueur
83mm
Diamètre du rotor principal
65mm
Hauteur
28mm
Poids de vol
16 g
Pour recevoir les mises à jour produit, les offres spéciales et plus encore, enregistrez votre produit
sur www.bladehelis.com
Installez les piles AA en respectant les polarités.
Remplacez les piles quand la DEL de l’émetteur
clignote et que le bip retentit.
Nous vous recommandons d’utiliser uniquement des
piles alcalines AA, cependant il est possible d’utiliser
des accus NiMH rechargeables.
ATTENTION: Ne rechargez que des
batteries rechargeables. Si vous tentez
de charger des piles non rechargeables, il y a un
risque d’incendie entraînant des blessures et des
dégâts matériels.
Charge de la batterie
Installation des piles de l’émetteur (RTF)
REMARQUE: Chargez uniquement des batteries froides au toucher et non endommagées. Contrôlez
l’état de la batterie pour être sûrt qu’elle n’est pas endommagée, gonfl ée, pliée ou percée.
Insérez le chargeur dans un port USB.
Connectez la batterie au chargeur.
CHARGE (Rouge fi xe)
CHARGE MAX (OFF )
Toujours déconnecter la batterie du chargeur immédiatement après la fi n de charge.
ATTENTION: Utilisez uniquement des chargeurs spécifi quement conçus pour charger la
batterie Li-Po incluse. Le fait de charger la batterie avec un chargeur non-compatible peut
être à l’origine d’un incendie provoquant des blessures corporelles ou des dégâts matériels.
ATTENTION: Ne jamais dépasser l’intensité de charge recommandée.
ATTENTION: Débranchez immédiatement la batterie une fois que la charge est terminée. Ne
jamais laisser une batterie connectée au chargeur.
USB Li-Po
Charger
EFLC1008
SOLID RED LED
–Charging
DC Input:5.0V 350mA
DC Output:4.2V 300mA
LED OFF
–Charge
Complete
Installation de la batterie
ATTENTION: Toujours débrancher la batterie du modèle quand
vous ne l’utilisez pas, afi n d’éviter une décharge trop impor-
tante. Des batteries déchargées à un voltage inférieur à celui
recommandé, seront endommagées, elles perdront en performance et
pourront entraîner un risque d’incendie durant la charge.
1 Gaz en bas 2 Mise sous tension
3
4
A ectation de l’émetteur et du récepteur
Procedure d’a ection de l’émetteur MLP4DSM
1. Débranchez la batterie du quadcoptère.
2. Mettez tous les trims au neutre.
3. Mettez l'émetteur hors tension et placez le manche des gaz en position basse.
4. Connectez la batterie au quadcoptère. La DEL du module 4 en 1 clignote en rouge durant l'initialisation,
puis clignote en bleu quand il est prêt pour l'affectation.
5. Lorsque la lumière bleue clignote, appuyez sur la manche gauche et maintenez-le appuyé lors de la mise
en marche de l’émetteur (vous entendrez un “click” et une longue tonalité).
6. Relâchez le manche de gauche. L’émetteur va se mettre à biper et la DEL d’alimentation à clignoter. Le
quadcoptère est affecté quand la DEL bleue devient fi xe.
7. Débranchez la batterie et mettez l’émetteur hors tension.
L'émetteur de la version RTF est livré déjà affecté au modèle. Si vous devez refaire l'affectation,
suivez les instructions ci-dessous.
Si vous utilisez ce produit en Amérique du Nord, vous devez détenir la licence de radio
amateur (HAM). Veuillez consulter le site www.arrl.org pour plus d’informations.

4
Information IC
Le présent appareil est conforme aux CNR d’Industrie Canada applicables aux appareils radio
exempts de licence. L’exploitation est autorisée aux deux conditions suivantes : (1) l’appareil ne doit
pas produire de brouillage, et (2) l’utilisateur de l’appareil doit accepter tout brouillage radioélectrique
subi, même si le brouillage est susceptible d’en compromettre le fonctionnement.
Informations de conformité pour l’Union européenne
Elimination dans l’Union Européenne
Ce produit ne doit pas être éliminé avec les ordures ménagères. Il est de la res-
ponsabilité de l‘utilisateur de remettre le produit à un point de collecte offi ciel des
déchets d’équipements électriques. Cette procédure permet de garantir le respect de
l’environnement et une meilleure gestion des ressources naturelles. Elle protège de
plus le bien-être de la communauté humaine. Pour plus d’informations quant aux lieux
d’éliminations des déchets d‘équipements électriques, vous pouvez contacter votre
mairie ou le service local de traitement des ordures ménagères.
Déclaration de conformité de l’union européenne :
Horizon Hobby, LLC déclare par la présente que ce produit est en conformité avec les
exigences essentielles et les autres dispositions de la RTTE, RED, CEM et Directive DBT.
Une copie de la déclaration de conformité Européenne est disponible à:
http://www.horizonhobby.com/content/support-render-compliance.
Coupure par tension faible (LVC)
Le CEV (ESC) ne cessera de diminuer la puissance fournie au moteur jusqu’àla coupure complète
lorsque la batterie atteint une tension de 3Vsous charge. Ceci permet d’éviter que la batterie Li-Po
ne subisse une décharge trop «profonde». Posez-vous immédiatement lorsque le CEV active la
coupure par tension faible (LVC). Continuer àvoler après une coupure par tension faible (LVC = Low
Voltage Cutoff) peut endommager la batterie ou entraîner un écrasement au sol, voire les deux. Les
dommages suite àun écrasement au sol et des batteries endommagées suite àune décharge trop
profonde ne sont pas couvertes par la garantie.
Faire constamment voler l’hélicoptère jusqu’àce que la coupure par tension faible (LVC) s’active,
endommagera la batterie de l’hélicoptère.
Déconnectez et sortez la batterie Li-Po de l’avion après utilisation afi n d’éviter une décharge au
goutte àgoutte. Pendant le stockage, assurez-vous que la charge de la batterie ne tombe pas en-
deçà de 3Vpar cellule.
Les DELs sur l’Inductrix indique l’avant et l’arrière du quadcoptère. Les DELs blanches sont à l’avant. Les
DELs rouges sont à l’arrière.
Décollage
Mettez les gaz de façon à décoller à 60 cm au-dessus du sol et concentrez vous sur le manche des
gaz afi n de garder cette altitude pour effectuer un vol stationnaire. Dans certains cas, vous devrez
faire quelques “sauts” de quelques centimètres de hauteur pour vous familiariser avec la commande
de gaz pour maintenir une altitude constante.
Stationnaire
Le quadcoptère Glimpse ne nécessite que de corrections mineures aux gaz pour maintenir une altitude
constante en stationnaire. Ne donnez pas de corrections trop brutales ou importantes qui risqueraient
d’entraîner une perte de contrôle pouvant causer un crash.
Avant de tenter un stationnaire au ras du sol, vous devez vérifi er que le quadcoptère ne glisse pas, sinon
effectuer les corrections à l’aide des trims. Si vous trouvez que le modèle glisse trop sans agir sur le
manches, faites-le atterrir avant d’effectuer les corrections aux trims. Pour plus d’information concernant
le contrôle du modèle, référez-vous à la section “Apprentissage des commandes de base”.
• Si le nez du quadcoptère pivote vers la gauche ou la droite, ajuster le trim de dérive.
• Si le quadcoptère glisse vers l’avant ou l’arrière, ajustez le trim de profondeur.
• Si le quadcoptère glisse vers la gauche ou la droite, ajustez le trim d’ailerons.
Continuez d’effectuer de légères corrections aux trims en faisant un stationnaire à basse altitude. Si le
quadcoptère est votre premier quadricoptère, n’hésitez à demander l’aide d’un pilote expérimenté pour
effectuer ces réglages avant votre premier vol.
Avec votre quadcoptère correctement réglé et en stationnaire à basse altitude, entrainez-vous à uti-
liser les commandes de dérive, de profondeur et d’ailerons afi n de vous familiariser avec la réponse
du modèle. Toujours effectuer de petits mouvements avec les manches de commande.
L’autonomie de vol moyenne est d’environ 4 minutes.
REMARQUE: les dégâts causés par les crashs ne sont pas couverts par la garantie.
Pour éviter une usure excessive des moteurs, laissez toujours les moteurs refroidir entre les vols.
Vol du quadcoptère
Ailerons
Gouverne de profondeur
Gouverne de direction
Compréhension des commandes de vol de base
Si vous n’avez pas encore bien assimilé les commandes de votre quadcoptère Inductrix, prenez
quelques minutes pour vous familiariser avec elles avant de tenter votre premier vol.
Throttle (Gaz)
Aileron à gauche
Aileron à droite
Vue arrière
Vers l’avant Vers l’arrière
Vue latérale Vue latérale
Gouverne de
direction à gauche
Le nez tourne vers la droite
Le nez tourne vers la gauche
Augmenter
les gaz
Vue latérale Vue latérale
Descendre
Monter
Vue arrière
Réduire
les gaz
Gouverne de
direction à droite
Gouverne de
profondeur baissée
Gouverne de
profondeur levée
Sélection du débattements (RTF)
Le quadcoptère Inductrix RTF est livré avec l’émetteur Blade
MLP4DSM.
• Quand l’émetteur est mis sous tension, il est
automatiquement placé en grands débattements.
• Changez de débattements en pressant puis relâchant le
manche de droite.
• En mode petits débattements, le quadcoptère a un
angle limité et s’auto-stabilisera lorsque vous relâchez
les manches. Ce mode est préférable pour les pilotes
qui veulent un contrôle plus doux lors de la première
utilisation.
• En mode grands débattements, le quadcoptère a un angle plus grand et s’auto-stabilisera lorsque
vous relâchez les manches.
Sélection des
débattements
Si vous rencontrez des diffi cultés, référez-vous au guide de dépannage. Si nécessaire, contactez votre
revendeur ou le service technique Horizon Hobby. Pour consulter la liste des émetteurs compatibles,
veuillez visiter www.bindnfl y.com.
Contrôle de l’émetteur (RTF)
D
E
F
C
B
A
Sélection des
débattements
Sélection des
débattements
Affectation/
Sélection du
mode de vol
Procédure d’a ectation
1. Débranchez la batterie du le quadcoptère.
2. Sélectionnez dans votre émetteur "Acro" ou "Avion" comme type de modèle.
3. Mettez tous les trims de votre émetteur au neutre.
4. Mettez l'émetteur hors tension et placez le manche des gaz en position basse.
5. Connectez la batterie au quadcoptère. La DEL du module 4 en 1 clignote en rouge durant l'initialisation,
puis clignote en bleu quand il est prêt pour l'affectation.
6. Mettez votre émetteur en mode affectation (Bind).
7. Relâchez le bouton/interrupteur Bind après 2 ou 3 secondes. Le quadcoptère est affecté quand la DEL est fi xe.
8. Débranchez la batterie et mettez l’émetteur hors tension.
Guide de résolution des problèmes
Problème Cause possible Solution
Aucune réponse aux gaz
Le manche des gaz et/ou le trim
est également trop haut
Baissez le manche des gaz et placez le
trim à la valeur la plus basse
Ne fonctionne pas et dégage
une odeur de brûlé après
avoir branché la batterie
La polarité de la batterie n’a pas
été respectée
Remplacez le module 3 en 1. Branchez
la batterie en respectant la polarité
La DEL du récepteur clignote
rapidement et l’appareil ne
répond pas aux commandes
(durant l’affectation)
L’émetteur est trop près de
l’appareil durant l’affectation
Mettez l’émetteur hors tension.
Eloignez-le de l’appareil. Débranchez
puis rebranchez la batterie. Suivez les
instructions d’affectation
Le bouton ou l'interrupteur
d'affectation n'a pas été maintenu
durant la mise sous tension de
l'émetteur
Mettez l'émetteur hors tension et répé-
tez le processus d'affectation
L'appareil ou l'émetteur se trouve
trop proche d'un grand objet
métallique, d'un réseau sans fi l ou
d'un autre émetteur
Placez l'avion et l'émetteur à un autre
emplacement et retentez l'affectation
La DEL du récepteur clignote
rapidement et l’appareil ne
répond pas aux commandes
(après l’affectation)
Moins de 5 secondes se sont
écoulées entre l’allumage de
l’émetteur et la connexion de la
batterie de vol sur le quadcoptère
Laissez l’émetteur sous tension.
Débranchez puis rebranchez la batterie
du le quadcoptère
Le quadcoptère est affecté à une
mémoire de modèle différente
(radios ModelMatch uniquement)
Sélectionnez la mémoire de modèle
correcte sur l’emetteur. Débranchez puis
rebranchez la batterie du le quadcoptère
Charge des batteries de l’émetteur
trop faible
Remplacez ou chargez les batteries
de l’emetteur
L'appareil ou l'émetteur se trouve
trop proche d'un grand objet
métallique, d'un réseau sans fi l ou
d'un autre émetteur
Placez l'avion et l'émetteur à un autre
emplacement et retentez la connexion
Chute immédiatement après
le décollage ou ne décolle
pas du tout
Les hélice ne sont pas correcte-
ment placées ou vous n’avez pas
sélectionné la bonne configuration
Effectuez les modifications nécessaires
Lorsqu’ils sont enfoncés, les boutons de trim font un bruit qui augmente ou diminue en intensité
àchaque pression. La position intermédiaire ou neutre du trim utilise une tonalité de milieu de
gamme. Une série de bips sonores indique la fi n de la plage de contrôle.
H A B C D E F
Mode
1
Ailerons (Gauche/Droit)
Gaz (Haut/Bas)
Trim des
gaz
Trim
d’ailerons
Trim de
dérive
Trim de
profondeur
Dérive (Gauche/Droit)
Profondeur (Haut/Bas)
Mode
2
Ailerons (Gauche/Droit)
Profondeur (Haut/Bas)
Trim de
profondeur
Trim
d’ailerons
Trim de
dérive
Trim des gaz
Dérive (Gauche/Droit)
Gaz (Haut/Bas)
DEL d’alimentation
Commutateur ON/OFF
Droite
Gauche
Émetteur BNF
Si vous utilisez un émetteur programmable, dans le menu entrée de voie, réglez la voie 6 (Aux 1) sur un
bouton poussoir comme le bouton affectation (I). Réglez le type de modèle sur mode “Avion”. Affectez le
quadcoptère à votre émetteur en suivant les instructions suivantes.
Sélection du mode de vol
Changez de mode de vol en appuyant et relâchant le manche gauche de la MLP4DSM ou en en appuyant
et relâchant le bouton poussoir de votre émetteur programmable comme programmé dans la section
affectation ci-dessus.
• Mode Stabilité (DEL bleue): les angles d’inclinaison sont limités. Le quadcoptère s’auto-stabilise
lorsque vous relâchez les manches.
• Mode Agilité (DEL rouge): il n’y a aucune limite d’angles d’inclinaison et le quadcoptère ne s’auto-
stabilise pas lorsque vous relâchez les manches. Utilisez les débattements et expo pour régler les
performances du modèle selon votre style de pilotage.
REMARQUE: N’essayez pas de changer de mode de vol en cours de vol avec l’émetteur
MLP4DSM. Tenter de le faire entraînera le mauvais enregistrement du neutre. Faites toujours
atterrir votre quadcoptère et lâchez les manches avant de changer de mode de vol.
3. Fixez le support moniteur FPV sur l’émetteur MLP4DSM.
a. Glissez le support sur l’antenne.
b. Serrez la vis de blocage, mais pas de manière
excessive.
c. Écartez les mâchoires de serrage et placez-y le
moniteur. L’angle du moniteur peut être réglé en
desserrant la vis de réglage d’angle d’inclinaison,
en pivotant la pince vers le haut ou le bas et en
resserrant la vis de réglage.
REMARQUE: Consultez les lois et réglementations en vigueur avant d’utiliser un équipement FPV.
Dans certains lieux, le vol FPV peut être interdit ou limité. Il est de votre responsabilité d’utiliser de
manière responsable ce produit tout en respectant les lois.
Moniteur vidéo (RTF)
Caméra et émetteur vidéo FPV
1. Avant d’utiliser le moniteur vidéo 4,3’ Spektrum, assurez-vous qu’il est complètement chargé.
Connectez la prise micro USB à une source alimentation USB 5V. L’indicateur DEL de charge
sera rouge lors de la charge et vert lorsque la charge est terminée.
2. Connectez l’antenne incluse à la prise antenne située sur la partie
supérieure du moniteur.
ATTENTION: Ne mettez pas le moniteur sous tension sans
avoir connecté l’antenne. Vous risqueriez d’endommager les
amplifi cateurs de l’émetteur vidéo et du récepteur. Les dommages sur
les amplifi cateurs ne sont pas couverts par la garantie.
Prise antenne 5,8GHz
Bouton Menu:
Utilisez les boutons + et - pour modifi er:
Bouton de sélection de fréquence
Une simple pression pour
changer de fréquence
Bouton de sélection
de bande de fréquence
Une simple pression pour changer de
bande de fréquence
75%
Entrée AV
Luminosité
Contraste
Couleur
Mode (16:9, 4:3)
Langues
Réinitialisation
1. Mettez votre émetteur radio sous tension puis votre modèle.
2. Mettez le récepteur vidéo sous tension pour vous assurez que la
fréquence est libre.
3. Sélectionnez la fréquence émetteur vidéo désirée en appuyant
sur le bouton du quadcoptère comme sur l’illustration pour faire
défi ler les bandes de fréquence libres (Fat Shark/IRC ou Race) et
les fréquences (1-8). La fréquence 1 Fat Shark est indiquée par
une DEL rouge interne dans le quadcoptère. Continuez à appuyer et
relâcher le bouton pour faire défi ler les autres fréquences.
4. Effectuez un test de portée avant de voler.
S’il y a des interférences sur le retour vidéo, sélectionnez une autre fréquence.
REMARQUE: La portée de votre micro caméra 25mW de votre drone est inférieure à celle de votre
émetteur. Assurez-vous d’avoir la portée appropriée pour fi lmer.
Conseil: Si vous volez avec des lunettes FPV et que vous êtes sujet au mal des transports, asseyez-
vous sur une chaise. Si vous commencez à vous sentir mal au cours du vol, baissez votre menton
vers votre poitrine.
Volez dans une zone dégagée à l’écart des personnes, arbres, voitures ou bâtiments. La portée de
votre système peut changer si un obstacle bloque le signal. Il est normal de remarquer des coupures
vidéo lorsque vous passez derrière des arbres ou autres obstacles.
Interrupteur ON/Off
DEL de statut de charge
Rouge = En charge
Vert = Chargé
Port de charge micro USB 5V
a
b
c
4. Mettez le moniteur sous tension et cherchez une fréquence libre. Une fréquence libre aura une
image statique constante. Les fréquences avec interférence affi cheront des lignes statiques
horizontales. Sélectionnez l’une des fréquences libres. L’émetteur vidéo inclus avec le quadcop-
tère Inductrix FPV émet uniquement sur les bandes de fréquence Fat Shark/IRC et RaceBand,
fréquence 1-8.
5. Une fois que vous avez sélectionné une fréquence libre sur votre moniteur, sélectionnez la même
fréquence sur l’émetteur vidéo.
BAND CH 1 CH 2 CH 3 CH 4 CH 5 CH 6 CH 7 CH 8
Fat Shark/IRC 5740 5760 5780 5800 5820 5840 5860 5880
RaceBand 5658 5695 5732 5769 5806 5843 5880 5917
Band E 5705 5685 5665 5645 5885 5905 5925 5945
Band A 5865 5845 5825 5805 5785 5765 5745 5725
Liste des pièces détachées
Vue éclatée
Pièces optionnelles
Réf. pièce
Description
BLH8500 Platine principale
BLH8580 Moteur rotation horaire
1
BLH8501 Moteur rotation anti-horaire
2
BLH8502 Fuselage
3
BLH8503 Caméra FPV 25mW avec Raceband
4
BLH8504 Set d’hélices, jaunes (4)
5
BLH8505 Châssis
6
BLH8506
Support de Smartphone pour
émetteur mLP
7
BLH8706 Chargeur USB Li-Po 1S 300mA
Réf. pièce
Description
8
BLH2208 Batterie Li-Po 1S 200mA
EFLC1008 Moniteur vidéo 4,3’
EFLB2001S45
1S, 200mAh LiPo
SPMVM430 4.3 inch video monitor
Réf. pièce Description
EFLB1501S45
Batterie Li-Po 1S 150mA
SPMVM430HA
Kit conversion lunettes
4
6
8
5
1
7
2
3

5
AVVISO
Tutte le istruzioni, le garanzie e gli altri documenti pertinenti sono soggetti a cambiamenti a totale
discrezione di Horizon Hobby, LLC. Per una documentazione aggiornata sul prodotto, visitare il sito
horizonhobby.com e fare clic sulla sezione Support del prodotto.
SIGNIFICATO DELLE AVVERTENZE DI SICUREZZA
Nella documentazione relativa al prodotto vengono utilizzati i seguenti termini per indicare i vari livelli di
pericolo potenziale durante l’uso del prodotto:
AVVISO: Istruzioni che, se non seguite, possono determinare la possibilità di danni alle cose E di lesioni
lievi alle persone.
ATTENZIONE: Istruzioni che, se non seguite, possono determinare la probabilità di danni alle cose E la
possibilità di lesioni alle persone.
ATTENZIONE: leggere e seguire tutte le istruzioni e avvertenze riportate nel manuale prima
dell’impostazione o dell’uso. Un uso improprio del prodotto può causare danni al prodotto
stesso, alle cose e/o lesioni alle persone.
Questo è un prodotto sofi sticato per appassionati. Deve essere azionato in maniera attenta e responsabile
e richiede alcune conoscenze basilari di meccanica. Non usare componenti non compatibili o alterare il
prodotto in nessuna maniera al di fuori delle istruzioni fornite da Horizon Hobby LLC.
Avvertenze e istruzioni per le batterie
AVVERTENZA: Non seguendo le
seguenti avvertenze potrebbero verifi carsi
malfunzionamenti del prodotto, problemi elettrici,
un eccessivo sviluppo di calore, INCENDI e in
defi nitiva lesioni e danni materiali.
• NON LASCIARE MAI L’ALIMENTATORE, IL
CARICABATTERIE E LA BATTERIA INCUSTODITI
DURANTE L’USO.
• NON CARICARE MAI LE BATTERIE DURANTE LA
NOTTE SENZA SUPERVISIONE.
• Non caricare mai le batterie danneggiate. Se durante
la carica o durante l’uso si forma un rigonfi amento
della batteria, interrompere direttamente l’uso/la
carica.
• Usare sempre la batteria e il caricabatteria inclusi nella
confezione. Sconnettere la batteria dopo la carica.
• Caricare sempre le batterie lontano da materiali
infi ammabili in un luogo ben ventilato.
• Non caricare, trasportare o conservare mai le batterie
in ambienti estremamente caldi, freddi o esposti al
sole (la temperatura consigliata è compresa tra 5 e
49 °C).
Precauzioni per la sicurezza durante l’uso
• Come utenti di questo prodotto, siete responsabili
per un utilizzo sicuro del prodotto, non mettendo
in pericolo voi stessi o altri o non danneggiando il
prodotto o le cose di altri.
• Utilizzare il prodotto in spazi aperti, lontano da persone
e cose.
• Non usare mai il prodotto con delle componenti
elettriche danneggiate.
• Lasciare la trasmittente accesa quando il modello è
acceso.
• Lasciare raffreddare le componenti dopo l’uso prima
di toccarle, i motori si scalderanno durante l’uso.
• Rimuovere le batterie dopo l’uso, se possibile.
Precauzioni di sicurezza del prodotto generali
• Tenere tutte le batterie, le sostanze chimiche, le parti
piccole e tutte le componenti elettriche fuori dalla
portata dei bambini.
• Evitare il contatto con l’acqua di questo prodotto.
Mantenere asciutte le componenti.
• Mantenere pulite le parti mobili.
Specifiche
Lunghezza
83mm
Diametro elica
65mm
Altezza
28mm
Peso in volo
16 g
Per ricevere gli aggiornamenti del prodotto, le offerte speciali e altro, bisogna registrarlo su www.bladehelis.com
Inserire le pile AA nel trasmettitore facendo attenzi-
one alla polarità. Bisogna sostituirle quando il LED
lampeggia e si attiva un allarme sonoro (beep).
Noi raccomandiamo di usare solo pile alcaline AA
nel trasmettitore, comunque è possibile usare anche
batterie ricaricabili NiMH.
ATTENZIONE: se si usano batterie
ricaricabili, si raccomanda di ricaricare
solo queste. Se si tenta di ricaricare pile non
ricaricabili, si potrebbe provocarne lo scoppio con
conseguenti ferite alle persone e danni alle cose.
Carica della batteria di volo
Installazione batterie nella trasmittente (RTF)
AVVISO: caricare solo batterie che siano fredde al tatto e che non siano danneggiate. Controllare la
batteria per verifi care che non sia gonfi a, piegata, rotta o bucata.
Inserire il caricatore in una porta USB.
Connettere la batteria al caricabatteria.
Carica in corso (acceso rosso)
Carica massima (spento)
Scollegare sempre la batteria dal caricatore immediatamente dopo il termine della carica.
ATTENZIONE: usare solo caricatori progettati specifi camente per queste batterie LiPo. In caso
contrario si potrebbero incendiare procurando danni.
ATTENZIONE: non superare le correnti di carica raccomandate.
ATTENZIONE: quando la carica è terminata, scollegare subito la batteria dal caricatore.
Taglio di bassa tensione (LVC)
Il controllo elettronico di velocità continuerà ad abbassare la corrente erogata al motore fi no allo spe-
gnimento completo quando la batteria raggiunge i3Vsotto carico. Questo fa si che si possa evitare
una scarica eccessiva della batteria Li-Po. Effettuare immediatamente l’atterraggio quando il regolato-
re di velocità attiva il taglio di bassa tensione (LVC). Continuare afar volare il modello dopo che ha
raggiunto il taglio di bassa tensione (LVC) può danneggiare la batteria, causare lo schianto del velivolo
oentrambe le cose. Idanni della batteria oquelli dovuti allo schianto in seguito auno scaricamento
eccessivo non sono coperti dalla garanzia.
Far volare l’elicottero fi no all’attivazione del taglio di bassa tensione (LVC) danneggia la batteria
dell’elicottero.
Dopo l’uso scollegare erimuovere dal velivolo la batteria Li-Po per evitare lo scaricamento passivo.
Durante la conservazione, assicurarsi che la carica della batteria non scenda sotto i3 Vper cella.
I LED dell’Inductrix indicando la parte anteriore e posteriore del quadricoptero. I LED bianchi indicano la
parte anteriore e i LED rossi indicano la parte posteriore.
Decollo
Agire sull’acceleratore fi nché il modello si alza di circa 60 cm da terra e concentrarsi sul comando
motore per fare in modo che il quadricoptero mantenga costante questa quota in volo stazionario.
Inizialmente ci sarà qualche piccolo salto di quota, fi nché non si familiarizza sui comandi necessari
per mantenere il modello in volo stazionario ad una quota costante.
Hovering
Lo Glimpse richiede degli aggiustamenti minimi sul comando motore per mantenere la quota. Bisogna
tenere ben presente che questi aggiustamenti devono essere il più possibile ridotti, perché i comandi
troppo ampi portano a perdere il controllo e, di conseguenza, a causare una caduta.
Mentre si tenta di stabilizzare il volo stazionario a bassa quota, conviene controllare se sono neces-
sarie delle regolazioni sui trim per evitare una deriva costante in varie direzioni. Se si notano queste
derive senza aver dato alcun comando direzionale, conviene far atterrare il modello prima di fare qual-
siasi regolazione con i trim. Altre informazioni sulla posizione e il funzionamento dei trim, si trovano
nella sezione “Capire i controlli primari di volo” su questo manuale.
• Se il naso dello nano QX ruota verso destra o sinistra, regolare il trim del timone.
• Se lo nano QX si sposta continuamente in avanti o indietro, allora bisogna intervenire sul trim
dell’elevatore.
• Se lo nano QX si sposta continuamente a destra o a sinistra, allora bisogna intervenire sul trim
dell’alettone.
Si continui a fare piccole regolazioni sui trim fi nché il modello resta in volo stazionario con una deriva
minima e controlli ridotti. Se questo è il vostro primo modello di quadricoptero, vi conviene chiedere
l’aiuto di un modellista esperto in questo campo, specialmente per il primo volo.
Quando il quadricoptero è trimmato correttamente e si trova in volo stazionario a bassa altezza,
provare ad usare i controlli di direzionale, elevatore e alettone per familiarizzare con le risposte del
quadricoptero ai vostri comandi. Ricordarsi di usare una quantità di comandi limitata.
Il tempo medio di volo è di circa 4 minuti.
AVVISO: I danni da incidente non sono coperti dalla garanzia.
Per prevenire un’usura eccessiva dei motori, lasciarli raffreddare sempre tra un volo e l’altro.
Volo del Quadricoptero
Alettone
Elevatore
Timone
Informazioni sui comandi di volo principali
Se non avete ancora familiarità con i comandi del vostro quadricoptero Glimpse è necessario dedicare
alcuni minuti per familiarizzarsi con essi prima di tentare il primo volo.
Throttle
Alettone a
sinistra
Sinistra
Destra
Vista posteriore
Avanti Indietro
Vista laterale Vista laterale
Timone
a sinistra
La fusoliera vira a destra
La fusoliera vira a sinistra
Throttle alzato
Vista laterale Vista laterale
Discesa
Salita
Vista posteriore
Throttle abbassato
Timone
a destra
Elevatore
abbassato
Elevatore
alzato
Alettone a
destra
Scelta della corsa (RTF)
Il quadricoptero Inductrix nella versione RTF arriva con una
trasmittente Blade MLP4DSM.
• Quando si accende, il trasmettitore si trova in corse massime.
• Per cambiare di corsa premere e rilasciare lo stick di destra.
• Nella modalità low rate, l’angolo di virata del quadricoptero
è limitato e rilasciando entrambi gli stick, il quadricoptero si
auto-livella. Questa modalità tipicamente viene scelta da piloti
che preferiscono un controllo più semplice e docile durante
i primi voli.
• Nella modalità high rate, l’angolo di virata del quadricoptero è
più ampio e rilasciando entrambi gli stick, il quadricoptero si auto-livella.
Selezione dual rate
A B C D E F
Modalità
1
Alettone
(Sinistra/Destra)
Throttle
(Su/Giù)
Trim
del throttle
Trim
dell’alettone
Trim del
timone
Trim
dell’elevatore
Timone
(Sinistra/Destra)
Elevatore
(Su/Giù)
Modalità
2
Alettone
(Sinistra/Destra)
Elevatore
(Su/Giù)
Trim
dell’elevatore
Trim
dell’alettone
Trim del
timone
Trim
del throttle
Timone
(Sinistra/Destra)
Throttle
(Su/Giù)
Installazione della batteria di volo
ATTENZIONE: scollegare sempre la batteria LiPo dall’aereo
quando non si deve volare, per evitare di sovrascaricarla. Le batterie
scaricate al di sotto della soglia minima approvata, si potrebbero danneggia-
re perdendo capacità o anche incendiarsi quando si tenta di ricaricarle.
1 Stick motore
in basso
2 Posizione ON
3
4
Connessione (binding) fra trasmettitore e ricevitore
Se si incontrassero problemi, osservare le istruzioni per il “binding” e far riferimento alla guida per la soluzione
dei problemi per ulteriori istruzioni. Se necessario contattare il servizio assistenza Horizon. Per un elenco
completo dei trasmettitori DSM compatibili visitare il sito www.bindnfl y.com.
Controllo trasmettitore (RTF)
Scelta della
riduzione di
corsa
Connessione
(bind)/
Scelta della
modalità di volo
Procedura generale per la connessione (binding)
1. Scollegare la batteria dal quadricoptero.
2. Selezionare "Acro" come tipo di modello nelle impostazioni della trasmittente.
3. Centrare tutti i trim sulla trasmittente.
4. Spegnere la trasmittente e portare lo stick motore completamente in basso.
5. Collegare la batteria di bordo al quadricottero. Il LED dell’unità di controllo 4 in 1 lampeggia in rosso
durante l’inizializzazione, poi lampeggia in blu quando è pronto per la connessione (bind).
6. Mettere il trasmettitore nel modo “bind” e accenderlo.
7. Rilasciare il pulsante/interruttore di “bind” dopo 2-3 secondi. Il quadricoptero è connesso quando il LED
blu sull’unità di controllo resta acceso con luce fi ssa.
8. Scollegare la batteria dal modello e spegnere il trasmettitore.
Procedura di “binding” con trasmettitore MLP4DSM
1. Scollegare la batteria dal quadricoptero.
2. Centrare tutti i trim sul trasmettitore.
3. Spegnere la trasmittente e portare lo stick del motore completamente in basso.
4. Collegare la batteria di bordo al quadricottero. Il LED dell'unità di controllo 4 in 1 lampeggia in rosso
durante l'inizializzazione, poi lampeggia in blu quando è pronto per la connessione (bind).
5. Quando il LED blu lampeggia, mantenere premuto lo stick sinistro mentre si accende la trasmittente
(si deve sentire un clic e un beep lungo).
6. Rilasciare lo stick di sinistra. Il trasmettitore emette un beep e il suo LED lampeggia. Il quadricoptero è
connesso quando il LED blu sull’unità di controllo resta acceso con luce fi ssa.
7. Scollegare la batteria dal modello e spegnere il trasmettitore.
USB Li-Po
Charger
EFLC1008
SOLID RED LED
–Charging
DC Input:5.0V 350mA
DC Output:4.2V 300mA
LED OFF
–Charge
Complete
Il trasmettitore RTF viene fornito già connesso al modello. Se serve rifare la connessione, si prega di
osservare le seguenti indicazioni.
D
E
F
C
B
A
Connessione
(bind)/
Scelta della
modalità di volo
Scelta della
riduzione di
corsa
Se premuti, i pulsanti dei trim emettono un suono che aumenta o diminuisce di intensità a ogni
pressione. La posizione del trim intermedia o neutra è associata a un tono medio nell’intervallo di
passo dei suoni. La fi ne del campo di controllo è segnalata da una serie di beep.
Interruttore ON/OFF
LED di alimentazione
Almeno 14 anni. Non è un giocattolo.
IT
Trasmittente BNF
Se si sta usando una trasmittente computerizzata, nel menu di input dei canali, attribuire il canale 6 (Aux1)
ad un interruttore momentaneo come il tasto Bind (I). Impostare il tipo di modello su “Acro” o “Aereo”.
Connettere il quadricottero alla propria trasmittente osservando le indicazioni che seguono:
Scelta della modalità di volo
Far scorrere le varie modalità di volo premendo e rilasciando lo stick sinistro del MLP4DSM, oppure pre-
mendo e rilasciando l’interruttore momentaneo sulla propria trasmittente computerizzata, come program-
mato nella sezione precedente, riguardante la connessione.
• Modalità Stability (LED blu): l’angolo di rollio è limitato. Quando si rilasciano gli stick, il quadri-
cottero ritorna in volo livellato.
• Modalità Agility (LED rosso): il quadricottero non ha limiti sull’angolo di rollio e non ritorna
in volo livellato quando si rilasciano gli stick. Regolare le corse e gli esponenziali per avere le
prestazioni adatte al proprio stile di pilotaggio.
AVVISO: Non tentare di cambiare modalità di volo mentre si vola con la trasmittente MLP4DSM,
altrimenti la trasmittente registrerà una posizione di centro errata. Far atterrare sempre il quadri-
cottero e rilasciare gli stick prima di cambiare la modalità di volo.
Videocamera FPV e trasmettitore video
AVVISO: Prima di operare in FPV consultare le leggi e le ordinanze locali. In alcune aree
le operazioni in FPV potrebbero essere limitate o proibite. L’utilizzatore risponde direttamente
dell’utilizzo in maniera legale e responsabile.
1. Accendere prima la trasmittente e poi il velivolo.
2. Accendere il ricevitore video per controllare che il canale sia
libero.
3. Selezionare il canale del trasmettitore video premendo il tasto
sul quadricottero (come illustrato) per far scorrere le bande
(Fat Shark/IRC o Race) e i canali (1-8) disponibili. Il canale 1
Fatshark viene indicato da un LED rosso interno sul quadricottero.
Continuare a premere e rilasciare il tasto per far scorrere i canali
rimanenti.
4. Prima di andare in volo eseguire una prova della portata.
Se si vedono dei disturbi sullo schermo video, selezionare un canale diverso.
AVVISO: la portata della micro videocamera 25 mW sul quadricottero è inferiore a quella del radio-
comando. Bisogna accertarsi di avere una portata adeguata alle riprese che si vogliono fare.
Consiglio: se state usando gli occhiali FPV e soffrite di chinetosi è consigliabile sedersi su di una sedia.
Se si inizia ad avere il disturbo durante il volo, bisogna abbassare il mento contro il petto.
Si raccomanda di volare in aree aperte, lontano da persone, alberi, auto, edifi ci. La portata del sistema
viene limitata da qualsiasi ostacolo che possa bloccare il segnale. È normale vedere interruzioni del video
quando si passa dietro ad alberi o ad altri ostacoli.
3. Fissare il supporto per il monitor FPV alla trasmittente
MLP4DSM.
a. Inserire il supporto sull’antenna
b. Stringere la vite di fi ssaggio senza esagerare.
c. Aprire le ganasce e sistemare il monitor al loro
interno. Si può regolare l’angolazione del monitor
allentando la manopola di regolazione. Dopo averlo
posizionato, stringere di nuovo la manopola.
Monitor video (RTF)
1. Prima di usare il monitor video Spektrum®, accertarsi che sia completamente carico. Collegare
il connettore Micro USB ad un caricatore 5V USB. Il LED indicatore di carica si accenderà in
rosso durante la carica e in verde quando la carica è terminata.
2. Fissare l’antenna fornita al suo connettore posizionato sulla parte
superiore del monitor.
ATTENZIONE: Non alimentare il monitor senza aver collegato
l’antenna. Altrimenti si danneggiano gli amplifi catori del
trasmettitore e del ricevitore video. I danni all’amplifi catore non sono
coperti da garanzia.
Connettore antenna 5,8GHz
Tasti menu
Usare i tasti + e - per modifi care:
Tasto selezione canali
Premere una volta per cambiare canale
Tasto per la banda di frequenza
Premere una volta per cambiare banda
75%
Ingresso AV
Luminosità
Contrasto
Colore
Modalità (16:9, 4:3)
Lingua
Ripristino
Interruttore ON/OFF
LED stato di carica
Rosso = in carica
Verde = carica terminata
Presa di carica 5V Micro USB
a
b
c

6
4. Accendere il monitor e cercare un canale libero. Nei canali liberi si vedranno molte scariche,
mentre in quelli occupati si vedranno delle interferenze sotto forma di linee orizzontali. Selezion-
are uno dei canali liberi. Il trasmettitore video fornito con il quadricottero Inductrix FPV, trasmette
solo sulle bande Fat Shark/IRC e Raceband, canali 1-8.
5. Una volta scelto il canale libero sul monitor, selezionare lo stesso canale sul trasmettitore video.
BAND CH 1 CH 2 CH 3 CH 4 CH 5 CH 6 CH 7 CH 8
Fat Shark/IRC 5740 5760 5780 5800 5820 5840 5860 5880
RaceBand 5658 5695 5732 5769 5806 5843 5880 5917
Band E 5705 5685 5665 5645 5885 5905 5925 5945
Band A 5865 5845 5825 5805 5785 5765 5745 5725
Istruzioni del RAEE per lo smaltimento da parte di utenti dell’Unione Europea
Questo prodotto non deve essere smaltito assieme ai rifiuti domestici. Al contrario,
l’utente è responsabile dello smaltimento di tali rifiuti che devono essere portati in
un centro di raccolta designato per il riciclaggio di rifiuti elettrici e apparecchiatu-
re elettroniche. La raccolta differenziata e il riciclaggio di tali rifiuti provenienti da
apparecchiature nel momento dello smaltimento aiuteranno a preservare le risorse
naturali e garantiranno un riciclaggio adatto a proteggere il benessere dell’uomo e
dell’ambiente. Per maggiori informazioni sui centri di raccolta, contattare il proprio
ufficio locale, il servizio di smaltimento rifiuti o il negozio presso il quale è stato acquistato il prodotto.
Informazioni sulla conformità per l’Unione Europea
Dichiarazione di Conformità EU:
Horizon Hobby, LLCcon la presente dichiara che il prodotto è conforme ai requisiti
essenziali e ad altre disposizioni rilevanti del R&TTE, RED, direttiva EMC, e LVD.
Una copia della dichiarazione di conformità per l’Unione Europea è disponibile a:
http://www.horizonhobby.com/content/support-render-compliance.
Guida alla soluzione dei problemi
Problema Possibile causa Soluzione
Il quadricoptero non
risponde al comando
del gas
Stick e/o trim del motore troppo
in alto
Resettare i controlli con stick e trim
completamente in basso
Il quadricoptero non
funziona ed emette odo-
re di bruciato dopo aver
connesso la batteria
Batteria di bordo collegata con
polarità invertita
Sostituire il circuito del 4-in-1. Collegare
la batteria di bordo facendo attenzione alla
polarità
ll LED sulla ricevente
lampeggia velocemente
e il qaudricoptero non
risponde alla trasmitten-
te (durante il “binding”)
Trasmettitore troppo vicino al
modello durante la procedura di
“binding”
Spegnere il trasmettitore. Allontanare il tra-
smettitore all’aereo. Scollegare e ricollegare
la batteria di bordo. Ripetere la procedura di
“binding” seguendo le istruzioni
Il comando per il "bind" non è
stato premuto all'accensione del
trasmettitore
Spegnere il trasmettitore e ripetere la
procedura
Il modello o il trasmettitore sono
troppo vicini a grossi oggetti me-
tallici, sorgenti WiFi o ad un altro
trasmettitore
Spostare il modello e il trasmettitore in un
altro posto prima di ripetere la procedura
Il LED della ricevente
lampeggia rapidamente
ed il quadricoptero non
risponde alla trasmitten-
te (dopo aver effettuato
il “binding)
Non sono passati 5 secondi
dall’accensione del trasmettitore
al collegamento della batteria di
bordo
Lasciare acceso il trasmettitore. Scollegare e
ricollegare la batteria allo quadricottero
Lo quadricottero è connesso ad
una memoria diversa (solo tra-
smettitori con ModelMatch)
Scegliere la memoria giusta sul trasmetti-
tore. Scollegare e ricollegare la batteria allo
quadricottero
Batteria di bordo o del trasmettito-
re quasi scariche
Sostituire o ricaricare le batterie
Il modello o il trasmettitore sono
troppo vicini a grossi oggetti me-
tallici, sorgenti WiFi o ad un altro
trasmettitore
Spostare il modello e il trasmettitore in un
altro posto prima di ripetere la procedura
Cade direttamente dopo
il decollo o non decolla
Eliche nella posizione sbagliata o
modalità di volo scelta non corretta
Effettuare le regolazioni necessarie
Elenco delle parti
Vista esplosa
Componenti opzionali
Codice Descrizione
BLH8500 Inductrix FPV RTF
BLH8580 Inductrix FPV BNF
1
BLH8501 Scheda di controllo principale
2
BLH8502 Motore in senso orario speed
3
BLH8503 Motore in senso antiorario speed
4
BLH8504 Capottina
5
BLH8505 Camera FPV 25mW con Raceband
6
BLH8506 Set eliche (4), gialle
7
BLH8706 Telaio principale
Codice Descrizione
8
BLH2208 Supporto per telefono mLP TX
EFLC1008 Caricatore LiPo USB 1S 300 mA
EFLB2001S45 Batteria LiPo 1S, 200mAh
SPMVM430 Monitor video da 4,3 pollici
Codice Descrizione
EFLB1501S45
Batteria LiPo 1S, 150mAh
SPMVM430HA
Conversione visore da testa
4
6
8
5
1
7
2
3
BLH8500, BLH8580
© 2016 Horizon Hobby, LLC. Blade, Inductrix, E-flite, Bind-N-Fly, BNF, the BNF logo, DSM and the
Horizon Hobby Logo are trademarks or registered trademarks of Horizon Hobby, LLC. The Spektrum
trademark is used with permission of Bachmann Industries, Inc. All other trademarks, service marks
and logos are property of their respective owners. US 8,672,726. Other patents pending.
Created 08/2016 53613
-
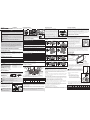 1
1
-
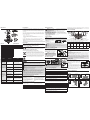 2
2
-
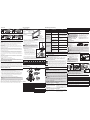 3
3
-
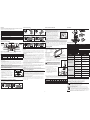 4
4
-
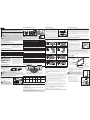 5
5
-
 6
6


Blade BLH8500 Manuale utente
- Categoria
- Giocattoli telecomandati
- Tipo
- Manuale utente
in altre lingue
- English: Blade BLH8500 User manual
- français: Blade BLH8500 Manuel utilisateur
- Deutsch: Blade BLH8500 Benutzerhandbuch
Documenti correlati
-
Blade BLH08700 Manuale utente
-
-
-
-
-
-
-
Blade SPMVM435C Manuale del proprietario
-
Blade Mach 25 Manuale utente
-
Altri documenti
-
Hobby Zone Faze RTF Manuale utente
-
Horizon Hobby InDUCTRiX RTF Ultra Micro Electric Quad-Copter Drone Manuale utente
-
Horizon Hobby BLH8570 Manuale utente
-
E-flite EFC-720 Manuale utente
-
Spektrum SPMVM430 Manuale utente
-
-
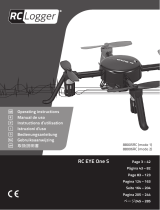 RC Logger RC EYE One S Manuale utente
-
HobbyZone SPMRMLP6 Manuale del proprietario
-
-
