La pagina si sta caricando...

H180
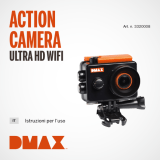
FULL HD
Wide angle
lens
Cycle
recording
220°
Waterproof
up to 30m
Virtual reality
ready
MANUALE D’USO
USER MANUAL
BEDIENUNGSANLEITUNG

2
Il manuale multilingua e disponibile sul sito
www.midlandeurope.com
The multi-language user manual is available on our website
www.midlandeurope.com
Die mehrsprachige Anleitung finden Sie auf unserer Webseite
www.midlandeurope.com
El manual multilingue esta disponible en
www.midlandeurope.com
Le manuel multi langue est disponible sur notre site internet
www.midlandeurope.com
Το πολύγλωσσο εγχειρίδιο χρήσης είναι διαθέσιμο στην ιστοσελίδα μας
www.midlandeurope.com
Instrukcja w wielu językach dostępna na stronie
www.midlandeurope.com

3
ENGLISH
Cautions
• Do not drop your camera.
• Do not place heavy objects on the camera.
• Keep the camera away from water and liquids (unless used in the
wa terproof case). This may cause the camera to malfunction.
• Recharge the battery via the USB ca ble.
• The camera should not be in heat over 65ºC.
• When the camera cannot work well, please don’t disassemble it
by your self, if your behavior cause damage, the original factory
will not under take responsibility.
The package contains:
• H180 camera
• Wireless remote control
• Li-ion battery pack 1000mAh
• Waterproof case up to 30m depth
• Frame for Go-Pro mount
• Adhesive mount
• USB cable
• 90 ° mount
• Suction cup mount

4
Starting steps
Before using your H180:
• Make sure that the battery is full
• Format the Micro SD memory card.
Now you can proceed and set H180 upon your needs.
Description of appearance and keys
1. LCD display screen
2. Start/Stop REC/Shutter button
3. Power/Mode button
4. Wifi/Menu button
5. Power/rec LED (red)
6. Charging LED (blue
7. WIFI led (red)
8. Camera lens
9. Mount screw
10. Connectors lid (USB, HDMI, microSD)
11. Speaker
12. Microphone

5
05:12:39
1080P
2015/01/01 01: 01
★★★★★★★★
★★★★★★★★
05:12:39
1080P
2015/01/01 01: 01
★★★★★★★★
★★★★★★★★
05:12:39
1080P
2015/01/01 01: 01
★★★★★★★★
★★★★★★★★
15298
2015/01/01 01: 01
P
5
m
1
2 5
11
10
9
12
4
7
6
3
8
05:12:39
1080P
2015/01/01 01: 01
★★★★★★★★
★★★★★★★★
05:12:39
1080P
2015/01/01 01: 01
★★★★★★★★
★★★★★★★★
15298
2015/01/01 01: 01
P
5
m
12
HDMI

6
How to use your Wifi camera?
1. Insert a micro SD or micro SDHC card.
SDHC Class 10 is recommended for use.
Please turn o the camera when plug-in or pull-out the memory
card.
2. Turn-on & Turn-o.
• Turn-on: Press and hold the button for about 2 seconds.
With a sound of “Beep” from the buzzer, LCD display screen
will be on (default mode: video recording).
• Power saving mode: When the camera is not under operation
for the selected time (system default 1 minute), it will turn o
automatically.
• Turn-o: Press and hold the button for about 3 seconds.
“GOODBYE” will be displayed while it is turning o.
3. Charging the camera
The camera has an external rechargeable lithium battery.
Installation:
• Open the cover of the battery (slide in arrow direction)
• Insert the battery observing positive and negative poles
• Close the cover of the battery
The battery can be charged by the micro USB cable. The charg-
ing led will be blue while it is charging. The recharge shall take 4
hours. The blue light will be o when charging is completed.
05:12:39
1080P
2015/01/01 01: 01
★★★★★★★★
★★★★★★★★
05:12:39
1080P
2015/01/01 01: 01
★★★★★★★★
★★★★★★★★
05:12:39
1080P
2015/01/01 01: 01
★★★★★★★★
★★★★★★★★
15298
2015/01/01 01: 01
P
5
m
1
2 5
11
10
9
12
4
7
6
3
8
05:12:39
1080P
2015/01/01 01: 01
★★★★★★★★
★★★★★★★★
05:12:39
1080P
2015/01/01 01: 01
★★★★★★★★
★★★★★★★★
15298
2015/01/01 01: 01
P
5
m
12
HDMI
05:12:39
1080P
2015/01/01 01: 01
★★★★★★★★
★★★★★★★★
05:12:39
1080P
2015/01/01 01: 01
★★★★★★★★
★★★★★★★★
05:12:39
1080P
2015/01/01 01: 01
★★★★★★★★
★★★★★★★★
15298
2015/01/01 01: 01
P
5
m
1
2 5
11
10
9
12
4
7
6
3
8
05:12:39
1080P
2015/01/01 01: 01
★★★★★★★★
★★★★★★★★
05:12:39
1080P
2015/01/01 01: 01
★★★★★★★★
★★★★★★★★
15298
2015/01/01 01: 01
P
5
m
12
HDMI

7
4. Working mode selection
The camera has three modes: video recording, driving mode and
photograph shooting. They can be switched by pressing the
button or through the APP (driving mode is not selectable by the
APP).
• Video recording (see the following picture): the LCD displays
the available REC time (as in below example image). Press the
start/stop REC button to start recording. The REC led (red)
will be twinkling during the video recording process. LCD
timer starts timing. Press the start/stop REC button again to
stop video recording.
• Driving mode (see the following pictures): in driving mode,
the camera will record splitting the video in 3 minutes file.
When the card is full, the file recorded earliest will be delet-
ed automatically so that video recording can continue. Press
REC button to start video recording. The REC led (red) will
be twinkling during the video recording process. LCD timer
starts timing. Press the REC button again to stop video re-
cording.
In this mode when the unit is power supplied it automatical-
ly turns ON and starts recording; when the power supply is
switched o the unit turns OFF.
05:12:39
1080P
2015/01/01 01: 01
★★★★★★★★
★★★★★★★★
05:12:39
1080P
2015/01/01 01: 01
★★★★★★★★
★★★★★★★★
05:12:39
1080P
2015/01/01 01: 01
★★★★★★★★
★★★★★★★★
15298
2015/01/01 01: 01
P
5
m
1
2 5
11
10
9
12
4
7
6
3
8
05:12:39
1080P
2015/01/01 01: 01
★★★★★★★★
★★★★★★★★
05:12:39
1080P
2015/01/01 01: 01
★★★★★★★★
★★★★★★★★
15298
2015/01/01 01: 01
P
5
m
12
HDMI
05:12:39
1080P
2015/01/01 01: 01
★★★★★★★★
★★★★★★★★
05:12:39
1080P
2015/01/01 01: 01
★★★★★★★★
★★★★★★★★
05:12:39
1080P
2015/01/01 01: 01
★★★★★★★★
★★★★★★★★
15298
2015/01/01 01: 01
P
5
m
1
2 5
11
10
9
12
4
7
6
3
8
05:12:39
1080P
2015/01/01 01: 01
★★★★★★★★
★★★★★★★★
05:12:39
1080P
2015/01/01 01: 01
★★★★★★★★
★★★★★★★★
15298
2015/01/01 01: 01
P
5
m
12
HDMI

8
• Photo shooting: The LCD displays the available number of pho-
tos (as in below example image). Short press the Shutter button
to shoot photographs after it is switched to the photo-shooting
mode. The buzzer will send out a “beep” sound. The counter will
countdown the remaining photos.
• Slow Motion: this function is selectable in Option Mmenu
while in video mode (read paragraph 5 to access the option
menu). When Slow Motion is active you see the icon on the
LCD display (see image below).
With this function the unit records a video @30 FPS then
creates the final video @10 FPS. So your video will last three
more times, therefore it will be slowed to 1/3 (for example, if
you record for 1 minute, the unit will create a 3 minutes file,
so playing it you will see 1/3 slower video).
• Time Lapse: this function is selectable in Option menu. When
Time Lapse is active you see the icon on the LCD display.
• In Video Mode - With this function the unit records 1
frame each “x” seconds (“x” is selectable in Option menu)
then creates a @30 FPS video, so you will see a faster vid-
eo (for example if you set Time Lapse to 3 seconds you will
05:12:39
1080P
2015/01/01 01: 01
★★★★★★★★
★★★★★★★★
05:12:39
1080P
2015/01/01 01: 01
★★★★★★★★
★★★★★★★★
05:12:39
1080P
2015/01/01 01: 01
★★★★★★★★
★★★★★★★★
15298
2015/01/01 01: 01
P
5
m
1
2 5
11
10
9
12
4
7
6
3
8
05:12:39
1080P
2015/01/01 01: 01
★★★★★★★★
★★★★★★★★
05:12:39
1080P
2015/01/01 01: 01
★★★★★★★★
★★★★★★★★
15298
2015/01/01 01: 01
P
5
m
12
HDMI
05:12:39
1080P
2015/01/01 01: 01
★★★★★★★★
★★★★★★★★
05:12:39
1080P
2015/01/01 01: 01
★★★★★★★★
★★★★★★★★
05:12:39
1080P
2015/01/01 01: 01
★★★★★★★★
★★★★★★★★
15298
2015/01/01 01: 01
P
5
m
1
2 5
11
10
9
12
4
7
6
3
8
05:12:39
1080P
2015/01/01 01: 01
★★★★★★★★
★★★★★★★★
05:12:39
1080P
2015/01/01 01: 01
★★★★★★★★
★★★★★★★★
15298
2015/01/01 01: 01
P
5
m
12
HDMI

9
have 1 frame each 3 seconds that multiplied for 30 FPS it
means that you will have 3x30=90 seconds compressed in
1 second video)
In Photo shooting - With this function the unit takes 1
photo each “x” seconds (“x” is selectable in Option menu)
Time lapse in Video Mode Time lapse in Photo mode
5. Menu operation:
A. Option Menu - Press the WIFI button for 2 seconds to enter
the menu.
Short press the WIFI button to move the cursor for selec-
tion; press the shutter button for confirmation; long press the
WIFI button to cancel the setting or exit.
While in Video recording the option menu has these items:
Movie Size. 1440p@30 / 1080p@30 - Select the video res-
olution
Slow Motion. On / O - Activate slow motion function
White Balance. Auto / Daylight / Cloudy / Fluor H / Tungsten
- Adjust the brightness of the video.
While in Photo Shooting the option menu has these items:
Resolution. 3264x2448 / 2592x1944 / 2304x1728 - Select
the photo resolution
Timer. O / 2s / 10s / Double – Select the timer before taking
a photo. “Double” will take 2 photos: the first after 10 seconds
and the other after 2 seconds.
Photo Burst. O / 3 photos / 5 photos / 10 photos / continue
burst – Select the number of consecutive shots
B. Settings Menu - While in option menu, press the button to
enter the settings menu.
05:12:39
1080P
2015/01/01 01: 01
★★★★★★★★
★★★★★★★★
05:12:39
1080P
2015/01/01 01: 01
★★★★★★★★
★★★★★★★★
05:12:39
1080P
2015/01/01 01: 01
★★★★★★★★
★★★★★★★★
15298
2015/01/01 01: 01
P
5
m
1
2 5
11
10
9
12
4
7
6
3
8
05:12:39
1080P
2015/01/01 01: 01
★★★★★★★★
★★★★★★★★
05:12:39
1080P
2015/01/01 01: 01
★★★★★★★★
★★★★★★★★
15298
2015/01/01 01: 01
P
5
m
12
HDMI
05:12:39
1080P
2015/01/01 01: 01
★★★★★★★★
★★★★★★★★
05:12:39
1080P
2015/01/01 01: 01
★★★★★★★★
★★★★★★★★
05:12:39
1080P
2015/01/01 01: 01
★★★★★★★★
★★★★★★★★
15298
2015/01/01 01: 01
P
5
m
1
2 5
11
10
9
12
4
7
6
3
8
05:12:39
1080P
2015/01/01 01: 01
★★★★★★★★
★★★★★★★★
05:12:39
1080P
2015/01/01 01: 01
★★★★★★★★
★★★★★★★★
15298
2015/01/01 01: 01
P
5
m
12
HDMI

10
Short press the WIFI button to move the cursor for selec-
tion; press the shutter button for confirmation; long press the
WIFI button to cancel the setting or exit.
Power Save. OFF / 1min / 3min / 5min - If the camera is inac-
tive for the set time, the camera will enter power saving mode
and turns o.
Date & Time. System time setting
Time Lapse. OFF / 3 sec / 5 sec / 10 sec / 30 sec / 1 min
– Turn On/O the time lapse function and set the time be-
tween shots
Time Lapse Duration. Unlimited / 5 min / 10 min / 15 min / 20
min / 30 min / 60 min – Set a timer for time lapse function.
After the timer is finished the unit stops recording or taking
photos.
System. Factory reset / System Info / Card Info – “Factory
reset” reset the unit’s settings to factory default. “System
Info” will display the firmware version. “Card Info” will display
the memory card information (capacity and available space).
Wi-Fi Password. Set the Wi-Fi password (10 characters). De-
fault is “1234567890”
Format. Yes / No - Format the memory card

11
05:12:39
1080P
2015/01/01 01 : 01
★★★★★★★★
★★★★★★★★
05:12:39
1080P
2015/01/01 01 : 01
★★★★★★★★
★★★★★★★★
05:12:39
1080P
2015/01/01 01 : 01
★★★★★★★★
★★★★★★★★
15298
2015/01/01 01 : 01
P
5
m
1
2 5
11
10
9
12
4
7
6
3
8
05:12:39
1080P
2015/01/01 01 : 01
★★★★★★★★
★★★★★★★★
05:12:39
1080P
2015/01/01 01 : 01
★★★★★★★★
★★★★★★★★
15298
2015/01/01 01 : 01
P
5
m
12
HDMI
2
1
5
3
4
6
4
6. Remote controller.
1. Power key
2. Video recording key
3. Photo shooting key
4. Key LEDs (red)
5. Watch band
6. Watch buckle
A. Use of watch-type remote controller:
With remote controller you can Power On/O the unit, Re-
cord Video and Take Photo within a range of 30m.
When any key is pressed, the two LEDs will turn on in red.
B. Turn On or O the camera with remote controller:
• Power on: hold key till LEDs are o then release, the
camera will be turned On and the buzzer will sound.
• Power o: Press and release it, the camera will be
turned O and the buzzer will sound.
C. Remote controller battery replacement
When remote controller’s battery is low the battery needs to
be replaced. Open the battery door with a coin carefully, and
avoid to damage it.

12
7. Connecting the device to an HDTV
Connect the video camera to a HDTV with a HDMI cable. After
power is on, display signals in the video camera will be output
to the HDTV automatically, and HD videos and photos can be
browsed in the HD TV.
Note: Stop video recording or playing before connecting or pulling
o the HDMI cable.
APP (for Android and iOS)
To view your videos you can download the APP “SYMAX360”
available on Play Store (for Android users) or Apple Store (for iOS
users).
1. After installing SYMAX360 APP, the icon will be shown on
the screen
2. Insert a card and turn the camera on, press the Wi-Fi button to
turn on Wi-Fi. On the LCD it will be displayed the SSID name
(P1800_xxxxxx) and the password (1234567890) to connect to
the Wi-Fi.
3. Turn on Wi-Fi on the mobile phone or tablet PC, search for APP
with the signal name P1800_xxxxxx (the SSID you read on the
LCD), then connect it till the connection is successful. When
your device will be connected you will see the Wi-Fi icon on the
LCD display.
4. Launch the App. From App you will be able to:
• see the real time preview
• start and stop Recording
• take photos
• change settings (change resolutions, AWB and Wi-Fi pass-
word)
• download videos from camera memory to your device
• play the video stored in camera memory or downloaded in
your device.

13
When connected to the PC:
The video camera has the plug and play function. When connected
to a PC by the USB cable, it will automatically switch to the mobile
HDD mode. LCD will display “MSDC”.
The removable disc icon will appear on “My Computer”. Photos are
stored in the “\jpg” folder of the removable disc. Videos are stored in
the “\video” folder and video recorded in DVR are in “\CAR” folder
Notice: No need to install drivers to run its mobile HDD function if
your operating system is windows 2000 or above.
PC player (for Windows and MAC)
With this software you can play the downloaded video file. During
play it is possible to choose between dierent kind of view.
You can even edit the video file rotating, trimming and converting it.
PC converter (for Windows only)
With this software is possible to convert video files recorded with
your camera before uploading them on social media 360 channels
(as YouTube or other), so it can be recognized as 180° video.
Note: immediately after the upload your video will not be played as
180° video, but you have to wait until your social media’s server process
the video.

14
Technical parameters
Image sensor 8 million pixels (CMOS)
Functional mode Video recording and photographing
Lens F2.0 f=1.1mm
Video resolution 1920x1440p@30 / 1920x1080p@30
Photo resolution 3264x2448 / 2592x1944 / 2304x1728
File format Video
H.264(MOV)
Picture JPG
Storage medium TF card (max. 32GB supported)
USB interface High-speed USB 2.0 interface
Power source External lithium battery 1000mAh
WARNING: Direct plug-in ac/dc power supply must be used for discon-
necting the device from the mains; the deskotp charger must be posi-
tioned close to the unit and easily accessibly.
To download further updatings and for information about the warranty
please visit www.midlandeurope.com

15
ITALIANO
Precauzioni
• Non appoggiate oggetti pesanti sul la videocamera.
• Se non utilizzate la custodia water proof, non bagnate la video-
camera: potrebbe danneggiarsi irreparabil mente.
• Ricaricate la batteria tramite il cavo USB in dotazione.
• Non esponete la videocamera a tem perature oltre i 65°C.
• In caso di malfunzionamento, non a prite la videocamera nè
tentate di ri pararla per nessun motivo: questo farà decadere au-
tomaticamente la garanzia.
Contenuto della confezione:
• Videocamera H180
• Pacco batteria Li-Ion 1000mAh
• Custodia waterproof 30m
• Telecomando Wi-Fi
• Cornice per aggancio GO-PRO
• Attacco a ventosa
• Fissaggio adesivo
• Cavo USB
• Supporto 90°

16
Per iniziare
Prima di iniziare ad utilizzare H180:
• Assicuratevi che la batteria sia carica.
• Formattate la scheda di memoria microSD.
Ora potete iniziare ad impostare la videocamera.
Descrizione dei comandi
1. Display LCD
2. Tasto inizio/fine registrazione/Scatto foto
3. Tasto accensione/modalità
4. Tasto Wi-Fi/Menu
5. LED accensione/registrazione (rosso)
6. LED di ricarica (blu)
7. LED modalità WIFI (rosso)
8. Lente videocamera
9. Vite per aggancio supporto
10. Coperchietto prese USB, microSD
11. Altoparlante
12. Microfono

17
05:12:39
1080P
2015/01/01 01:01
★★★★★★★★
★★★★★★★★
05:12:39
1080P
2015/01/01 01:01
★★★★★★★★
★★★★★★★★
05:12:39
1080P
2015/01/01 01:01
★★★★★★★★
★★★★★★★★
15298
2015/01/01 01:01
P
5
m
1
2 5
11
10
9
12
4
7
6
3
8
05:12:39
1080P
2015/01/01 01:01
★★★★★★★★
★★★★★★★★
05:12:39
1080P
2015/01/01 01:01
★★★★★★★★
★★★★★★★★
15298
2015/01/01 01:01
P
5
m
12
HDMI

18
Come si usa la videocamera Wifi?
1. Inserire la micro SD card o la micro SDHC card.
E’ raccomandato l’uso di SD card classe 10.
Tenere spenta la videocamera durante l’inserimento/rimozione
della memory card.
2. Accensione/spegnimento.
• Accensione: tenere premuto il pulsante per circa 2 secondi.
Si sentirà un “Beep” e il display LCD si accenderà (modalità di
default: registrazione video).
• Modalità di risparmio energetico: quando la videocamera
è inutilizzata per un tempo predeterminato (di default 1
minuto), si spegnerà automaticamente.
• Spegnimento: tenere premuto il pulsante per circa 3
secondi. La scritta “GOODBYE” apparirà sul display mentre
la videocamera si spegne.
3. Caricare la videocamera
La videocamera è dotata di una batteria al litio esterna. La figura
sottostante mostra l’installazione:
• aprire il coperchio della batteria (far scorrere in direzione della
freccia)
05:12:39
1080P
2015/01/01 01: 01
★★★★★★★★
★★★★★★★★
05:12:39
1080P
2015/01/01 01: 01
★★★★★★★★
★★★★★★★★
05:12:39
1080P
2015/01/01 01: 01
★★★★★★★★
★★★★★★★★
15298
2015/01/01 01: 01
P
5
m
1
2 5
11
10
9
12
4
7
6
3
8
05:12:39
1080P
2015/01/01 01: 01
★★★★★★★★
★★★★★★★★
05:12:39
1080P
2015/01/01 01: 01
★★★★★★★★
★★★★★★★★
15298
2015/01/01 01: 01
P
5
m
12
HDMI
05:12:39
1080P
2015/01/01 01: 01
★★★★★★★★
★★★★★★★★
05:12:39
1080P
2015/01/01 01: 01
★★★★★★★★
★★★★★★★★
05:12:39
1080P
2015/01/01 01: 01
★★★★★★★★
★★★★★★★★
15298
2015/01/01 01: 01
P
5
m
1
2 5
11
10
9
12
4
7
6
3
8
05:12:39
1080P
2015/01/01 01: 01
★★★★★★★★
★★★★★★★★
05:12:39
1080P
2015/01/01 01: 01
★★★★★★★★
★★★★★★★★
15298
2015/01/01 01: 01
P
5
m
12
HDMI

19
• Inserire la batteria rispettando la polarità.
• Chiudere il coperchio della batteria
La batteria può essere caricata con il cavo USB. Il led durante la
ricarica si accenderà di blu. Per una ricarica completa occorreran-
no circa 4 ore. La luce blu si spegne quando la carica è completa.
4. Selezione modalità operative
H180 opera in 3 modalità diverse: registrazione video, DVR e
foto. Possono essere selezionate premendo il tasto o tramite la
APP (modalità DVR non può essere impostata tramite la APP).
• Registrazione video: il display indica il tempo di registrazi-
one rimanente (come indicato nell’immagine qui sotto).
Premete il tasto inizio/fine registrazione per iniziare le
vostre riprese. Il led si accende di rosso e lampeggia ve-
locemente durante tutta la registrazione. Il timer del
display indica la durata del video. Per terminare la reg-
istrazione premete di nuovo il tasto inizio/fine registra-
zione.
• Modalità DVR: H180 registra suddividendo i video in file
da 3 minuti. Quando la memoria è piena, i file meno recenti
verranno sovrascritti e in questo modo la videocamera può
continuare la registrazione. Premete il tasto REC per iniziare
la registrazione. Il led corrispondente lampeggerà veloce-
mente di rosso. Il timer sul display inizia il conteggio. Per in-
terrompere la registrazione premete di nuovo il tasto REC.
Quando la videocamera è alimentata, si accende automatica-
mente ed inizia a registrare. Quando viene scollegata dall’ali-
mentazione si spegne.
05:12:39
1080P
2015/01/01 01: 01
★★★★★★★★
★★★★★★★★
05:12:39
1080P
2015/01/01 01: 01
★★★★★★★★
★★★★★★★★
05:12:39
1080P
2015/01/01 01: 01
★★★★★★★★
★★★★★★★★
15298
2015/01/01 01: 01
P
5
m
1
2 5
11
10
9
12
4
7
6
3
8
05:12:39
1080P
2015/01/01 01: 01
★★★★★★★★
★★★★★★★★
05:12:39
1080P
2015/01/01 01: 01
★★★★★★★★
★★★★★★★★
15298
2015/01/01 01: 01
P
5
m
12
HDMI

20
• Modalità Foto: Il display mostra gli scatti fotografici disponi-
bili (vedi imagine). Per scattare foto premete brevemente il
tasto Scatto; sentirete un beep. Sul display vedrete il numero
di foto rimanenti.
• Slow Motion: questa funzione è selezionabile dal menù opzioni
durante la modalità registrazione video vedi paragrafo 5 per
accedere al menù opzioni). Quando la modalità slow motion è
attiva appare l’icona sul display LCD (vedere la figura sotto-
stante). Con questa funzione la videocamera registra a @ 30
FPS poi si crea un video finale @10 FPS. Quindi si realizza un
video della tripla durata ossia un video rallentato di 1/3 (per
esempio se si registra per 1 minuto la videocamera crea un file
di 3 minuti e riproducendolo si vedrà un video rallentato 1/3).
• Time Lapse: questa funzione è selezionabile dal menù opzioni
(vedi paragrafo 5 per accedere al menù opzioni). Quando
Time Lapse è attiva si vedrà l’icona sul display LCD.
05:12:39
1080P
2015/01/01 01: 01
★★★★★★★★
★★★★★★★★
05:12:39
1080P
2015/01/01 01: 01
★★★★★★★★
★★★★★★★★
05:12:39
1080P
2015/01/01 01: 01
★★★★★★★★
★★★★★★★★
15298
2015/01/01 01: 01
P
5
m
1
2 5
11
10
9
12
4
7
6
3
8
05:12:39
1080P
2015/01/01 01: 01
★★★★★★★★
★★★★★★★★
05:12:39
1080P
2015/01/01 01: 01
★★★★★★★★
★★★★★★★★
15298
2015/01/01 01: 01
P
5
m
12
HDMI
05:12:39
1080P
2015/01/01 01: 01
★★★★★★★★
★★★★★★★★
05:12:39
1080P
2015/01/01 01: 01
★★★★★★★★
★★★★★★★★
05:12:39
1080P
2015/01/01 01: 01
★★★★★★★★
★★★★★★★★
15298
2015/01/01 01: 01
P
5
m
1
2 5
11
10
9
12
4
7
6
3
8
05:12:39
1080P
2015/01/01 01: 01
★★★★★★★★
★★★★★★★★
05:12:39
1080P
2015/01/01 01: 01
★★★★★★★★
★★★★★★★★
15298
2015/01/01 01: 01
P
5
m
12
HDMI
1/46